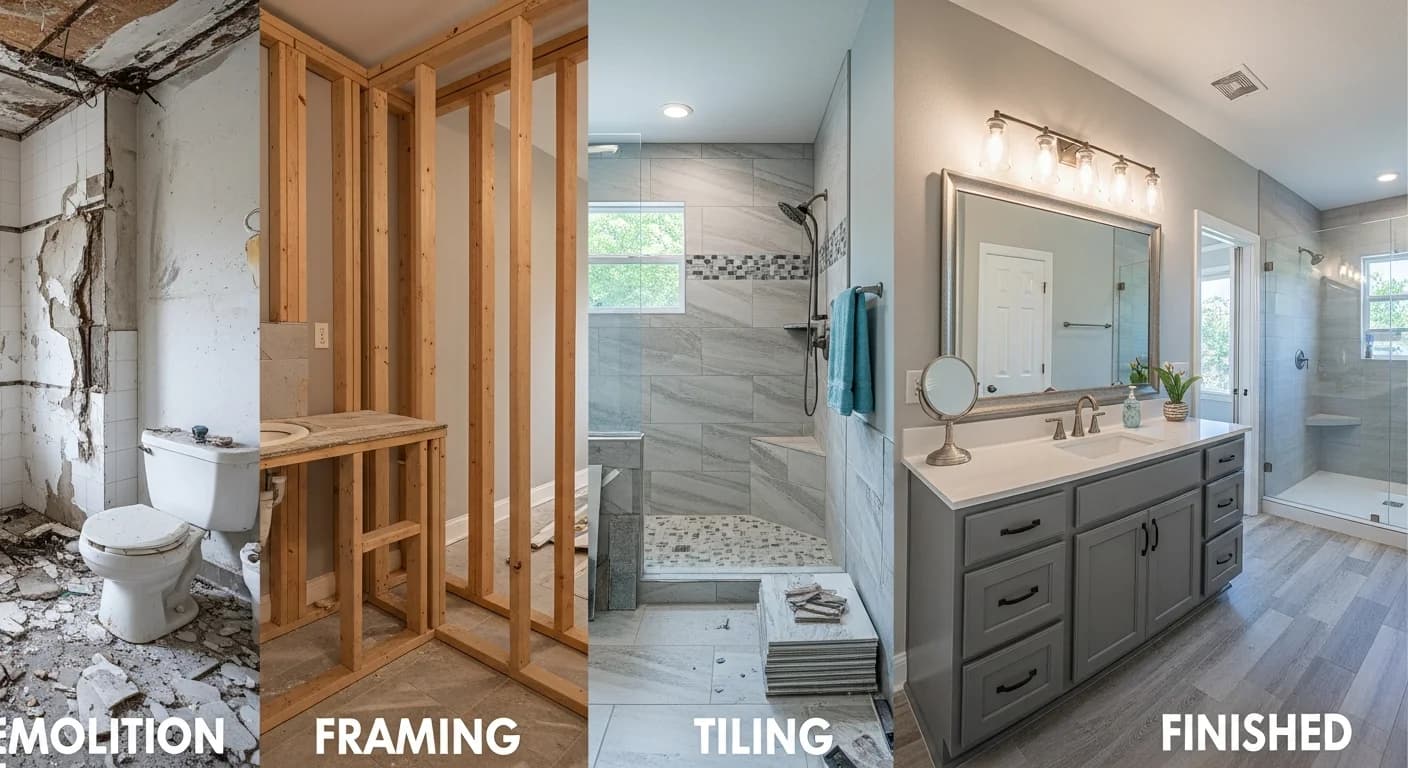
Handicap Bathroom Remodel: ADA-Accessible Design That's Beautiful
Quick Summary
Comprehensive guide to handicap bathroom remodeling with ADA-accessible design that is beautiful. Covers curbless showers, grab bar placement, roll-under vanities, accessible layouts, and funding resources.

Introduction: Why Accessible Bathroom Design Matters for Everyone
When most people hear "handicap bathroom remodel," they picture sterile, institutional spaces with cold metal grab bars and clinical white tile. That outdated image couldn't be further from today's reality. Modern ADA-accessible bathrooms combine universal design principles with stunning aesthetics, creating spaces that are not only functional for people with disabilities but genuinely beautiful for everyone who uses them.
The truth is, accessible design benefits far more people than you might think. According to the CDC, one in four American adults lives with some form of disability, and that number grows significantly as we age. Beyond permanent disabilities, consider temporary injuries, pregnancy, small children, and the natural aging process. A thoughtfully designed accessible bathroom serves every member of your household across every stage of life.
Universal design — the philosophy of creating spaces usable by all people regardless of age, ability, or circumstance — has transformed how architects and designers approach residential bathrooms. Rather than treating accessibility as an afterthought or compromise, today's best designers integrate accessible features seamlessly into luxurious, magazine-worthy spaces. Curbless showers become spa-like retreats, decorative grab bars double as towel holders, and roll-under vanities showcase beautiful vessel sinks.
Whether you're renovating for a family member with mobility challenges, planning ahead for aging in place, or simply wanting a bathroom that works better for everyone, this comprehensive guide covers everything you need to know. We'll walk through ADA requirements, design solutions for every fixture, beautiful layout options, and realistic cost expectations — along with funding resources that can make your dream accessible bathroom more affordable than you might expect. For broader remodeling inspiration, check out our complete bathroom remodel ideas guide.
Understanding ADA Requirements for Residential Bathrooms
Before diving into design specifics, it's important to understand the Americans with Disabilities Act (ADA) guidelines that govern accessible bathroom design. While ADA requirements technically apply to commercial and public spaces, they provide the gold standard for residential accessibility and are required for any project receiving federal funding or certain grants.
Key ADA Measurements and Clearances
The foundation of an accessible bathroom starts with adequate space and proper clearances. Here are the critical measurements every homeowner should know:
Door Width: A minimum clear opening of 36 inches is required for wheelchair access. Standard residential doors are typically 30-32 inches, so most accessible remodels require widening at least the bathroom doorway. Consider pocket doors or barn-style sliding doors to eliminate the swing clearance issue entirely.
Turning Radius: A 60-inch turning radius (measured as a circle) is needed for a full wheelchair turn. This is the single biggest space requirement and often the driving factor in bathroom layout decisions. For tighter spaces, a T-shaped turning space can work, requiring a 60-inch by 36-inch minimum area with extensions.
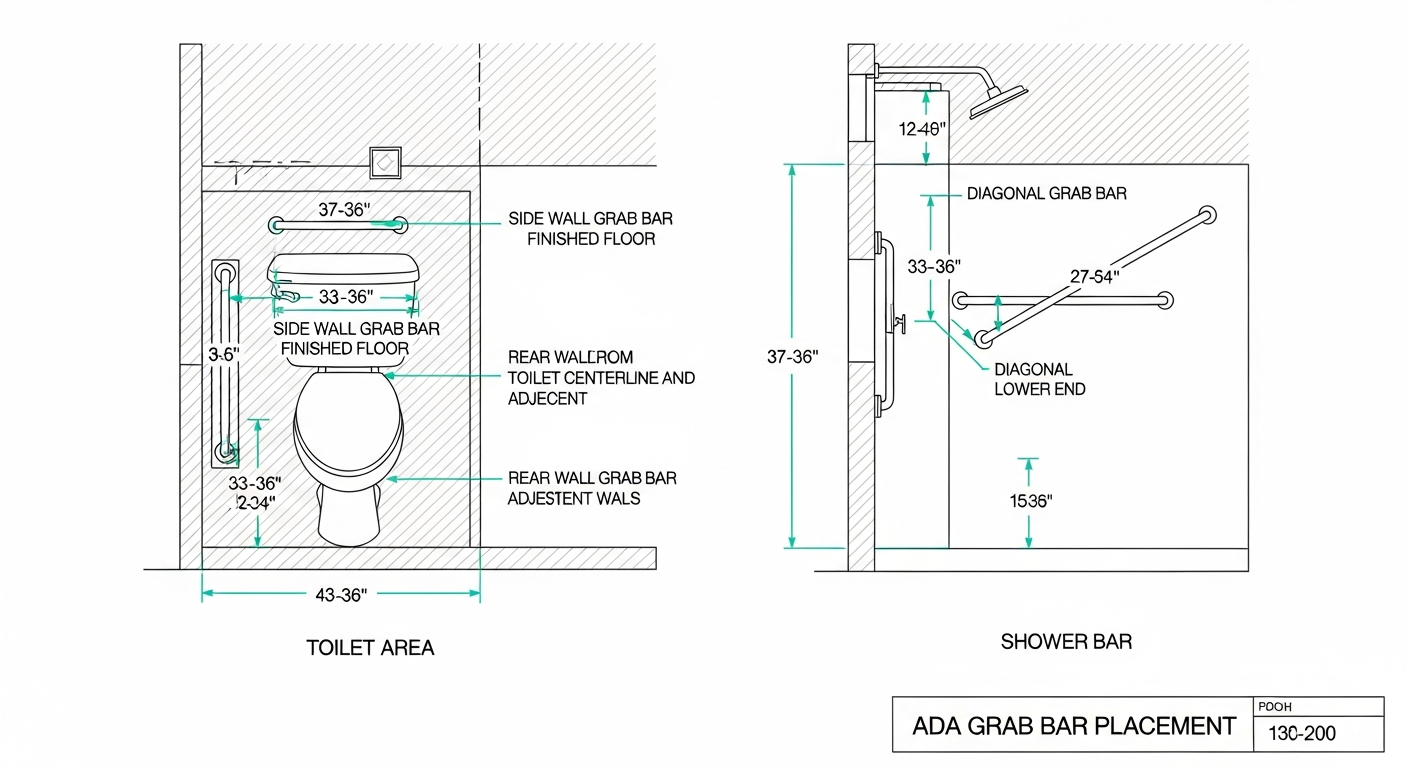
Grab Bar Heights: Grab bars should be mounted between 33 and 36 inches above the finished floor. They must support a minimum of 250 pounds of force and be installed into structural blocking behind the wall — never into drywall alone.
Toilet Height: ADA-compliant toilets measure 17 to 19 inches from the floor to the top of the seat, compared to standard toilets at 14-15 inches. This "comfort height" makes sitting and standing significantly easier for people with mobility limitations.
Floor Clearance: Maintain at least 30 by 48 inches of clear floor space at each fixture (toilet, sink, tub/shower) for wheelchair approach. These clearance areas can overlap with each other and with the turning radius.
Building Codes vs. ADA vs. Universal Design
It's important to distinguish between these three frameworks. Local building codes set minimum safety requirements. ADA guidelines establish accessibility standards primarily for public spaces. Universal design goes beyond both, creating spaces that are intuitive and comfortable for the widest range of users. For residential projects, we recommend using ADA guidelines as your baseline while incorporating universal design principles for the best long-term results.
Curbless Roll-In Showers: The Centerpiece of Accessible Bathing
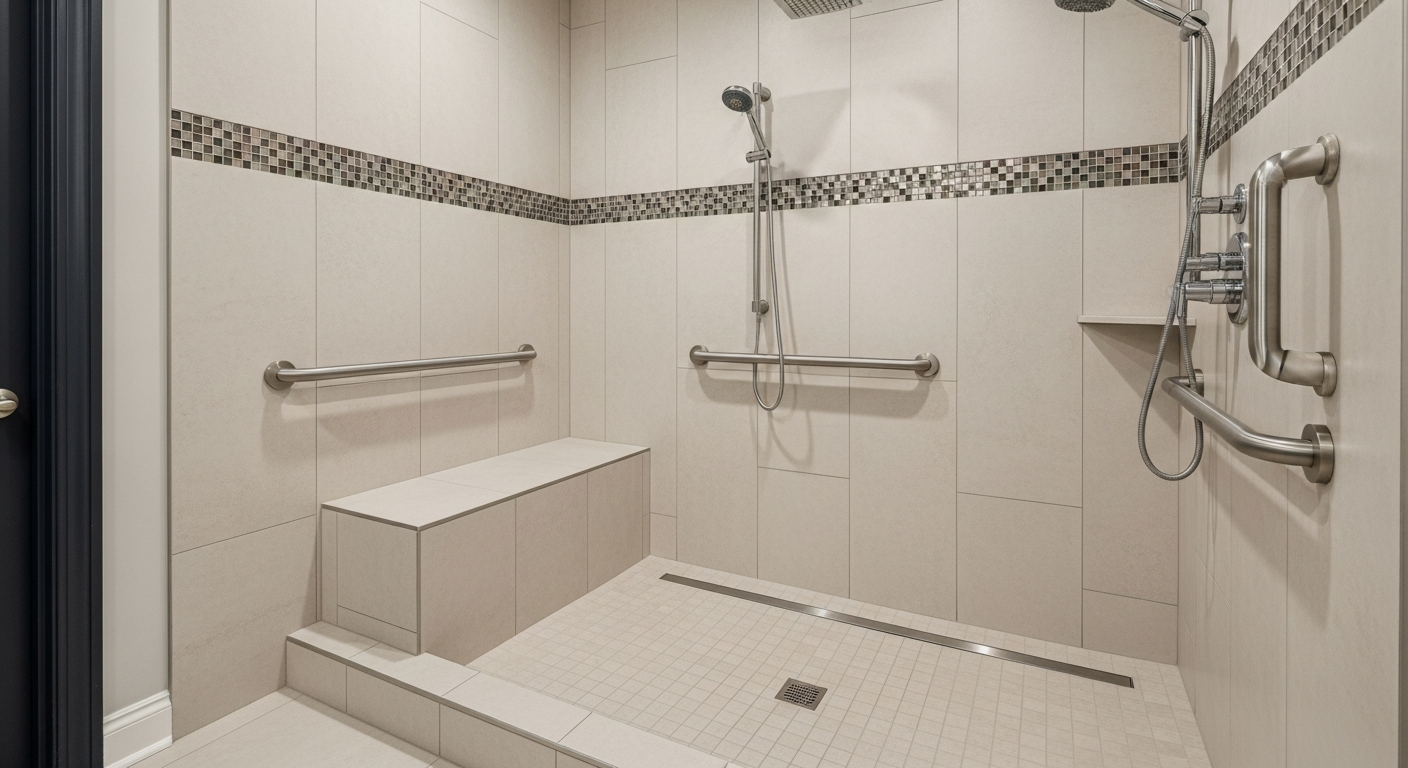
The curbless roll-in shower is perhaps the most impactful single feature in an accessible bathroom. By eliminating the threshold barrier entirely, these showers provide safe, easy access for wheelchair users, people with walkers, those with balance issues, and anyone who simply appreciates a sleek, modern shower design.
Zero-Threshold Entry Design
Creating a truly curbless shower requires careful planning during the framing and rough-in stages. The shower floor must be recessed into the subfloor, typically dropping 1 to 1.5 inches below the surrounding bathroom floor. This allows for proper drainage slope without creating a lip at the shower entry.
The standard slope for a curbless shower floor is 1/4 inch per foot toward the drain, meeting both accessibility requirements and plumbing codes. Too much slope creates a ramp feeling that can be uncomfortable, while too little slope causes water pooling and potential leaks.
Linear Drain Systems
Linear drains have revolutionized curbless shower design. Unlike center-point drains that require a four-way slope (creating an uneven surface), linear drains allow the entire shower floor to slope in one direction — typically toward the back wall. This creates a flatter, more stable surface for standing, walking, or rolling a wheelchair.
Position the linear drain along the back wall or side wall of the shower, never at the entry point. Modern linear drain covers come in brushed nickel, matte black, bronze, and custom tile-insert designs that virtually disappear into the floor.
Bench Seats and Support Features
Every accessible shower should include seating. Options range from built-in tile benches (18 inches deep, 17-19 inches high) to fold-down seats that save space when not in use. For wheelchair users who transfer to a shower seat, the seat should be mounted at the same height as their wheelchair seat — typically 17 to 19 inches.
Install a handheld showerhead on a vertical slide bar (mounted 48-60 inches high) alongside a fixed rain showerhead. This dual-head setup accommodates seated and standing users equally well. Non-slip flooring is essential — look for tiles with a coefficient of friction (COF) rating of 0.60 or higher.
Accessible Grab Bar Placement: Safety Meets Style
Grab bars are the most important safety feature in any accessible bathroom, yet they're also the feature homeowners most resist. The good news? Today's grab bars are available in stunning designs that complement any bathroom aesthetic — from sleek contemporary bars to ornate traditional styles that look like luxury towel bars.
Toilet Area Grab Bars
Install grab bars on both sides of the toilet for maximum support. The side wall bar should be 42 inches long, mounted horizontally at 33-36 inches above the floor, positioned so it extends 12 inches in front of and 24 inches behind the toilet. If there's no side wall, use a floor-mounted grab bar or a fold-down bar attached to the wall behind the toilet.
Behind the toilet, install a 36-inch horizontal bar at the same height. Some homeowners prefer a single continuous L-shaped grab bar that wraps from the side wall to the back wall, providing uninterrupted support during transfers.
Shower and Tub Grab Bars
For showers, install three grab bars: one vertical bar at the entry (18 inches long, starting at 33 inches high), one horizontal bar along the control wall (extends the full width of the shower at 33-36 inches), and one horizontal bar on the back wall at the same height. In bathtub surrounds, add grab bars along the long wall at two heights — 33-36 inches for standing support and 8-10 inches above the tub rim for getting in and out.
Decorative Options That Blend with Design
The market for stylish grab bars has exploded. Leading manufacturers like Moen, Delta, and Kohler offer grab bars in every popular finish — polished chrome, brushed nickel, matte black, champagne bronze, and oil-rubbed bronze. Many feature designs that match their faucet and showerhead collections, creating a cohesive designer look.
Combination grab bars serve dual purposes: grab bar/towel bars, grab bar/toilet paper holders, and grab bar/corner shelves. These integrated designs make accessibility features virtually invisible while adding functional storage. The key specification to verify is weight rating — all grab bars should support a minimum of 250 pounds, with 500-pound ratings preferred for heavier individuals.
Roll-Under Vanities and Accessible Sinks
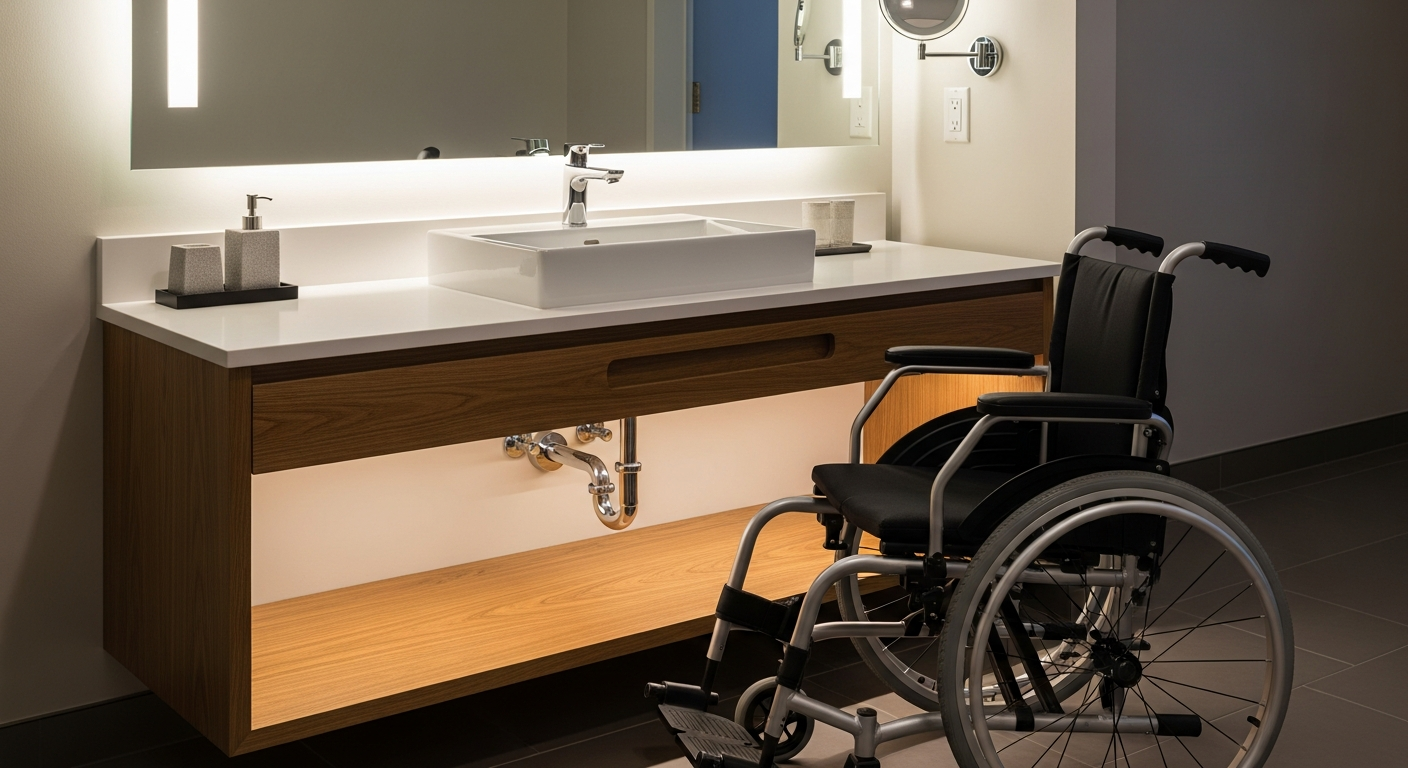
A properly designed accessible vanity allows a wheelchair user to roll underneath comfortably while reaching the faucet, soap, and mirror. This is one area where accessible design has genuinely advanced the aesthetics of bathroom design, as the open, floating vanity style has become a major trend in luxury bathrooms of all types.
Knee Clearance Requirements
ADA guidelines require a minimum knee clearance of 27 inches high, 30 inches wide, and 19 inches deep beneath the sink. The sink rim or counter should be no higher than 34 inches above the floor. These dimensions ensure comfortable access for most wheelchair users while still being ergonomic for standing users.
Wall-mounted (floating) vanities are the most popular solution, as they allow fully customizable height positioning. Console-style vanities with open legs also work beautifully and are available in numerous design styles from farmhouse to contemporary.
Pipe Protection and Insulation
Exposed drain pipes and hot water supply lines under an open vanity present a burn and injury risk for wheelchair users whose legs are positioned beneath the sink. All pipes must be insulated with foam covers or routed through the wall to eliminate contact. Offset drain kits push the P-trap closer to the wall, maximizing knee space.
Lever Handles and Touchless Faucets
Replace traditional knob-style faucet handles with lever handles or single-lever designs that can be operated with one hand and minimal grip strength. Touchless motion-sensor faucets are an excellent accessible option, eliminating the need to grasp anything at all. Look for models with adjustable temperature limiters to prevent scalding — a critical safety feature for users with reduced sensation.
Tilted Mirrors and Open Shelving
Standard mirrors mounted above a vanity are often too high for seated users. Install a tilted mirror that angles slightly downward, or use a full-length mirror that extends from the vanity top down to 40 inches above the floor. Lighted mirrors with built-in LED panels provide excellent visibility without requiring separate overhead lighting.
Replace closed upper cabinets with open shelving mounted at 40-48 inches — accessible from both seated and standing positions. Pull-down shelf systems and lazy Susan-style organizers inside lower cabinets keep essentials within reach without requiring bending or stretching.
Toilet Accessibility: Comfort Height and Beyond
The toilet area requires careful attention to both the fixture itself and the surrounding clearances. Getting this right dramatically impacts daily independence for people with mobility challenges.
Comfort Height Toilets (17-19 Inches)
Standard toilets sit 14-15 inches high, requiring deep knee bending that many people with mobility issues find difficult or impossible. Comfort height (also called "right height" or "chair height") toilets sit 17-19 inches high, aligning more closely with standard wheelchair seat height and making transfers much easier.
Wall-mounted toilets offer the most flexibility, as they can be set at any height during installation. They also simplify floor cleaning — a significant benefit for wheelchair users and caregivers. Expect to pay $400-$1,200 for the toilet plus $300-$600 for the in-wall carrier system required for wall-mounted installation.
Bidet Seats and Hygiene Features
Electric bidet seats have become increasingly popular in accessible bathrooms, and for good reason. They reduce or eliminate the need for manual wiping — a task that requires significant range of motion and dexterity. Features like heated seats, warm water wash, adjustable pressure, oscillating spray, and warm air drying provide comfort and independence. Quality bidet seats range from $250 to $800 and install on existing toilets in minutes.
Adequate Clearances
Maintain at least 18 inches of clear space from the center of the toilet to any side wall or obstruction. The preferred dimension is 18 inches to one side and 42-48 inches on the transfer side (the side a wheelchair user approaches from). Provide 48 inches of clear space in front of the toilet for wheelchair positioning.
Flooring and Safety: The Foundation of Accessible Design
Bathroom flooring in an accessible space must balance three priorities: slip resistance, wheelchair compatibility, and aesthetic appeal. Getting this balance right prevents falls — the leading cause of bathroom injuries — while ensuring smooth wheelchair navigation.
Non-Slip Ratings and What They Mean
The coefficient of friction (COF) measures how slip-resistant a floor surface is. For accessible bathrooms, look for flooring with a wet COF of 0.60 or higher — this is the threshold recommended by the ADA for accessible routes. Many manufacturers now list COF ratings on product specifications, making comparison shopping straightforward.
Best Flooring Materials for Accessible Bathrooms
Large-Format Porcelain Tile: Tiles 12x24 inches or larger minimize grout lines (which can catch wheelchair wheels) while providing excellent durability. Choose textured or matte finishes over polished surfaces. Large format porcelain typically costs $4-$12 per square foot installed.
Luxury Vinyl Plank/Tile (LVP/LVT): Waterproof, comfortable underfoot, and naturally slip-resistant, luxury vinyl is increasingly popular for accessible bathrooms. Its slight cushioning reduces fatigue for standing users and provides a warmer surface than tile. Expect $3-$8 per square foot installed.
Radiant Heated Floors: Heated flooring isn't just a luxury — it's a safety feature. Warm floors dry faster, reducing slip risk. Electric radiant heating mats add $8-$15 per square foot and operate for pennies per day. They're particularly beneficial for users with circulation issues who are sensitive to cold floors.
Contrast Strips and Visual Cues
For users with low vision, visual contrast between different floor zones helps with spatial orientation. Use contrasting grout colors, transition strips at material changes, or subtle color shifts between the shower area and main floor. Avoid busy patterns that can create visual confusion or the appearance of uneven surfaces.
Accessible Bathroom Layouts: Making the Most of Your Space
Layout is arguably the most critical element of an accessible bathroom. Even the best fixtures and features won't work if the space doesn't allow for wheelchair maneuvering. Here are three common bathroom sizes with accessible layouts that maximize both function and beauty.

5x8 Bathroom (40 Square Feet)
This standard small bathroom presents the biggest accessibility challenge. A full 60-inch turning radius won't fit, so use a T-shaped turning space instead. Place the toilet on the short wall with grab bars, use a curbless shower with a fold-down bench along the long wall, and install a wall-mounted sink on the opposite short wall. Replace the swing door with a pocket door or outward-swinging door to reclaim floor space. While tight, this layout can meet basic accessibility needs. For more small bathroom strategies, see our bathroom remodel ideas collection.
7x9 Bathroom (63 Square Feet)
This mid-size bathroom allows a full 60-inch turning radius if the layout is carefully planned. Position the toilet on one short wall with the roll-in shower adjacent along the long wall. Place the roll-under vanity on the opposite long wall. The turning radius fits in the center of the room with clearance areas overlapping. This size accommodates a comfortable, fully accessible bathroom with room for a linen cabinet or shelving unit.
8x10 Bathroom (80 Square Feet)
This generous size allows a spacious accessible bathroom with premium features. Include a large roll-in shower (at least 36x60 inches, ideally 42x60), a comfort-height toilet with grab bars on both sides, a roll-under vanity with adjacent storage, and a full 60-inch turning radius in the center. There's even room for a freestanding soaking tub if desired — choose a walk-in tub model with a door for full accessibility.
Door Swing Considerations
Always swing bathroom doors outward or use pocket/sliding doors. An inward-swinging door can trap a person who has fallen, as their body may block the door from opening. Outward-swinging doors or pocket doors eliminate this safety hazard while also freeing up interior floor space for wheelchair maneuvering.
Stylish Accessible Design: Beauty Without Compromise
One of the most persistent myths about accessible bathrooms is that they must look institutional or medical. Nothing could be further from the truth. Today's best accessible bathrooms are among the most beautiful spaces in the home, proving that function and aesthetics aren't just compatible — they're synergistic.

Designer Grab Bars as Décor Elements
Companies like Ponte Giulio, Hewi, and Brey-Krause produce grab bars that are genuinely beautiful objects. Geometric shapes, organic curves, wood-and-metal combinations, and artisan finishes transform safety hardware into intentional design features. Matte black grab bars in a contemporary bathroom, oil-rubbed bronze in a traditional space, or brushed gold in a glamorous powder room — these fixtures enhance the design rather than detract from it.
Spa-Like Aesthetic Techniques
Create a spa atmosphere with these design strategies that work beautifully in accessible bathrooms:
Natural Materials: Use natural stone, wood-look porcelain tile, and organic textures to create warmth. Large-format stone-look tiles on the shower walls and floor create a seamless, luxurious look while meeting slip-resistance requirements.
Warm Lighting: Layer ambient, task, and accent lighting. Recessed ceiling lights on dimmers, LED mirror lights, and in-shower niche lighting create a spa ambiance. Motion-sensor night lights provide safe navigation without harsh overhead lighting.
Seamless Transitions: The curbless shower entry creates a visually seamless flow that actually looks more luxurious than a traditional shower with a curb. Carry the same tile from the bathroom floor into the shower for a continuous, expansive feel.
Integrated Storage: Recessed shower niches (at multiple heights for seated and standing access), floating shelves, and built-in medicine cabinets keep surfaces clutter-free while putting essentials within reach.
Cost Expectations and Funding Resources
An accessible bathroom remodel represents a significant investment, but numerous funding programs can substantially reduce out-of-pocket costs. Understanding both the typical expenses and available resources helps you plan a realistic budget. For detailed pricing information, consult our bathroom remodel cost guide.
Typical Cost Ranges
The cost of a handicap bathroom remodel varies based on the scope of work, existing conditions, and finish level:
Basic Accessibility Retrofit ($8,000-$15,000): Adding grab bars, replacing the toilet with comfort height, installing a handheld showerhead on a slide bar, adding non-slip flooring, and widening the doorway. This approach works when the existing layout and plumbing can remain mostly unchanged.
Mid-Range Accessible Remodel ($15,000-$28,000): Includes a curbless shower conversion, roll-under vanity, comfort-height toilet, proper grab bar installation with structural blocking, new flooring, improved lighting, and doorway modifications. This is the most common scope for a comprehensive accessible bathroom.
Premium Accessible Bathroom ($28,000-$40,000+): A full gut renovation creating a spacious, luxurious accessible bathroom with high-end finishes, custom tile work, designer fixtures, smart home features, radiant floor heating, and premium grab bar hardware. This level often involves expanding the bathroom footprint by borrowing space from adjacent rooms.
VA Grants for Veterans
Veterans with service-connected disabilities may qualify for the Specially Adapted Housing (SAH) grant (up to $109,986 in 2026) or the Special Housing Adaptation (SHA) grant (up to $44,299). The Home Improvements and Structural Alterations (HISA) grant provides up to $6,800 for service-connected disabilities or $2,000 for non-service-connected conditions. Contact your local VA office or visit va.gov to apply.
Medicaid Home and Community-Based Waivers
Most states offer Medicaid waiver programs that fund home modifications including bathroom accessibility improvements. Coverage varies by state, but many programs cover grab bars, roll-in showers, widened doorways, and other ADA modifications. Apply through your state Medicaid office or Area Agency on Aging.
Tax Deductions and Credits
Medical expense deductions under IRS guidelines may cover accessibility modifications prescribed by a physician. The cost of improvements that don't increase home value — such as grab bars, ramps, and doorway widening — may qualify as medical expenses deductible to the extent they exceed 7.5% of adjusted gross income. Consult a tax professional for specific guidance.
Nonprofit and Community Resources
Organizations like Rebuilding Together, Habitat for Humanity, and local independent living centers often provide free or reduced-cost home modifications for qualifying individuals. Many state vocational rehabilitation agencies fund workplace and home modifications for people with disabilities. The National Council on Independent Living (ncil.org) maintains a directory of local resources across the country.
Creating Your Perfect Accessible Bathroom
Designing an ADA-accessible bathroom that's both beautiful and functional is not only achievable — it's becoming the new standard in thoughtful home design. The principles of universal design aren't limitations; they're a framework for creating bathrooms that work better for everyone, regardless of age or ability.
Start by assessing your specific needs and the needs of everyone who will use the space. Consider not just current requirements but future needs as well. A bathroom designed with accessibility in mind today will serve your household for decades, potentially eliminating the need for future costly renovations as circumstances change.
Remember that the most successful accessible bathrooms start with careful planning. Measure your space, understand the clearance requirements, and choose materials and fixtures that deliver both beauty and function. Work with a contractor experienced in accessible design — they'll understand the structural requirements for grab bars, the waterproofing demands of curbless showers, and the plumbing modifications needed for proper drainage.
Ready to visualize your accessible bathroom design? Our Room Designer tool lets you experiment with layouts, materials, and color schemes to create a space that's perfectly tailored to your needs. Upload your bathroom dimensions and start exploring the possibilities today.
Handicap Bathroom Remodel FAQs
Written by
Michael Torres
Bathroom and Kitchen Design Specialist with 15 years of remodeling experience. NKBA-certified designer focused on functional layouts, fixture selection, and spa-inspired wellness spaces.