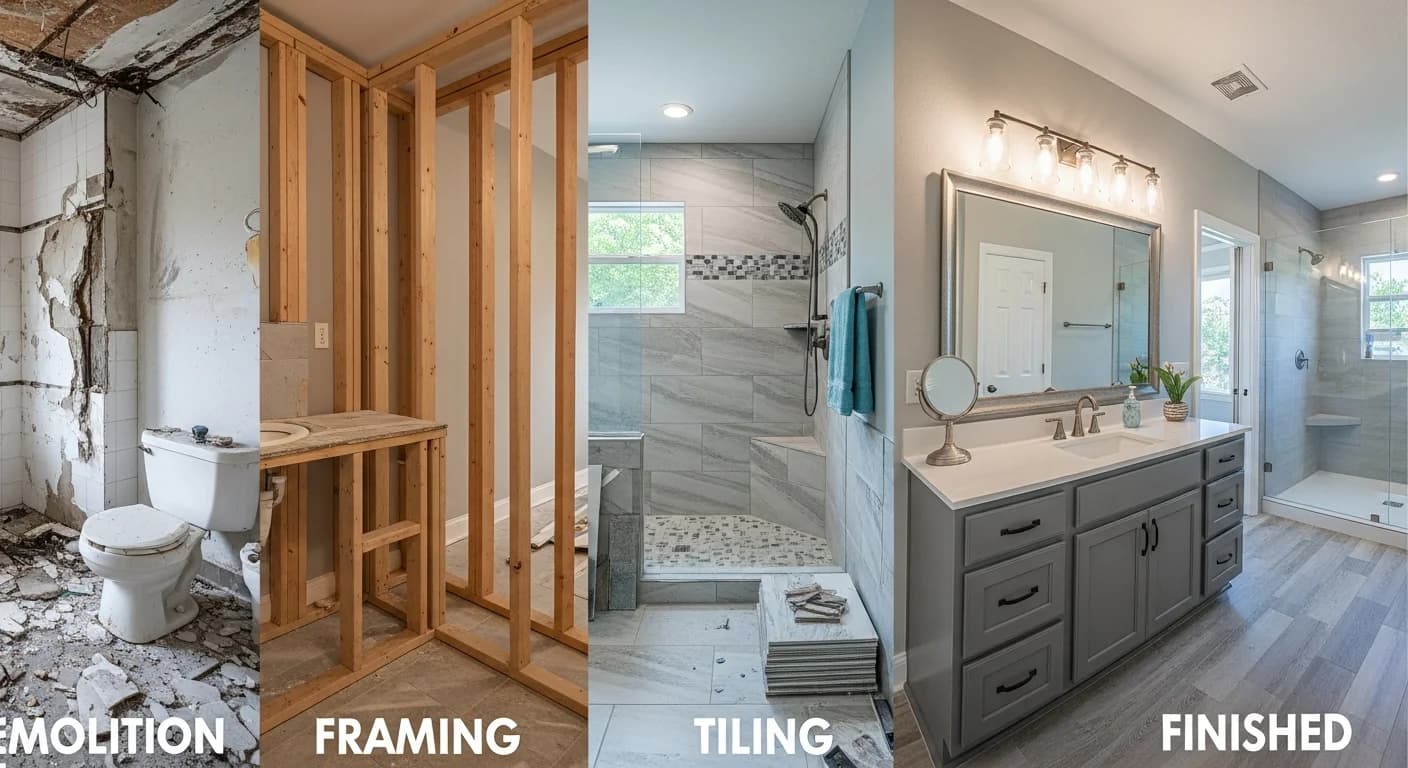
DIY Home Decor Ideas: 30+ Projects for Every Skill Level

The DIY home decor movement has grown from a niche hobby into a full-blown design revolution. With the average homeowner spending between $5,000 and $15,000 on professional interior decorating, it is no surprise that millions of people are picking up paintbrushes, power tools, and hot glue guns to create stunning DIY home decor that rivals store-bought pieces at a fraction of the cost. Whether you have never crafted anything beyond a school project or you are a seasoned maker with a workshop full of tools, this guide covers 30+ DIY decor projects organized by skill level so you can find exactly the right starting point.
From simple weekend crafts that require nothing more than paint and creativity to advanced woodworking projects that transform entire rooms, every project in this guide has been tested, refined, and photographed to give you the confidence to start making. For a broader look at decorating strategies beyond DIY, explore our complete home decor ideas guide for 2026.
Quick Overview: The DIY Decor Revolution
DIY decor is no longer about compromise. The materials, techniques, and tutorials available today allow home crafters to produce work that looks genuinely professional. The appeal goes beyond cost savings — making your own decor creates pieces with personal meaning, ensures your home looks unlike anyone else's, and provides a creative outlet that many people find deeply satisfying.
This guide is organized into three skill tiers:
- Beginner projects — No special tools required. Perfect for renters, first-time crafters, and anyone who wants quick wins in a single afternoon.
- Intermediate projects — Requires basic tools like a drill, saw, or sewing machine. Weekend projects that build confidence and produce statement pieces.
- Advanced projects — Involves power tools, precise measurements, and multi-day timelines. These are the projects that fundamentally transform a room.
Beyond skill-level projects, you will also find a complete section on upcycled and thrift flip decor, room-by-room project recommendations, a tools and materials guide, and a troubleshooting section covering the most common DIY mistakes.

Beginner DIY Projects: No Special Tools Needed
These projects are ideal for anyone just starting their DIY journey. Every item on this list can be completed in an afternoon with supplies found at any craft store or dollar store. No power tools, no sewing machines, no experience necessary.
Painted Terra Cotta Pots
Terra cotta pots are inexpensive, universally available, and provide a perfect canvas for creative expression. Use acrylic craft paint in coordinating colors, apply geometric patterns with painter's tape, or try an ombre effect by gradually blending two shades. Seal finished pots with a matte clear coat to protect your work from moisture and UV fading. A set of three to five pots in graduated sizes creates an instant vignette for a windowsill, shelf, or porch.
Decorative Tray Styling
Purchase an unfinished wooden tray from a craft store and transform it with paint, contact paper, or decoupage. Line the interior with patterned paper, add a coat of resin for a glossy finish, or simply paint it a bold color that contrasts with your coffee table. Once finished, style the tray with a candle, a small plant, and a stack of books for an instant focal point. This project works beautifully in budget-friendly decor schemes where every dollar needs to count.
Fabric-Wrapped Vases
Give plain glass vases a completely new look by wrapping them in fabric. Cut linen, burlap, or cotton fabric to size, apply it with spray adhesive or Mod Podge, and finish with a ribbon or twine tie. This technique transforms dollar-store vases into pieces that look like they came from a boutique. Mix fabrics across a set of vases for a collected, eclectic look.
Contact Paper Projects
Peel-and-stick contact paper is a renter-friendly miracle material. Use marble-print contact paper to resurface a laminate countertop, apply wood-grain contact paper to a plain bookshelf, or cover cabinet doors for an instant kitchen refresh. The key to professional-looking results is careful measurement, a squeegee to eliminate bubbles, and trimming edges with a sharp utility knife.
Book Page Art
Vintage book pages make stunning wall art when mounted on cardstock and framed. Print or trace botanical illustrations, silhouettes, or typography onto aged book pages for an instant vintage aesthetic. Group three to five framed pieces in a gallery arrangement for a wall decor display that costs almost nothing but looks curated and intentional.

Intermediate DIY Projects: Weekend Builds
Intermediate projects require a few basic tools — a drill, sandpaper, a level, and possibly a saw. These are weekend endeavors that produce pieces substantial enough to anchor a room's design.
Chalk Paint Furniture Makeover
Chalk paint has revolutionized furniture DIY because it adheres to almost any surface without sanding or priming. Pick up a solid wood piece from a thrift store — a dresser, side table, or bookcase — and transform it with two coats of chalk paint. Distress edges with medium-grit sandpaper for a farmhouse-inspired look, or leave it smooth for a modern finish. Seal with wax or a water-based polyurethane. Budget: $40 to $80 for paint and supplies; the thrift store piece is often under $30.
Macrame Wall Hanging
Macrame has experienced a massive revival, and for good reason — the technique produces textured, bohemian wall art using nothing but cotton cord and basic knots. Start with a simple pattern using square knots and spiral knots on a wooden dowel. A 24-inch wide wall hanging requires approximately 200 feet of 4mm cotton cord and takes four to six hours to complete. The finished piece adds instant texture and warmth to any blank wall.
Concrete Planters
Mixing concrete and pouring it into molds creates planters with a modern, industrial aesthetic. Use plastic containers, silicone molds, or even cardboard boxes as forms. Mix quick-setting concrete according to package directions, pour into your mold with a smaller container pressed into the center to create the hollow, and let cure for 24 to 48 hours. Sand rough edges and seal with a concrete sealer. These planters pair beautifully with modern and contemporary interiors.
Stencil Accent Wall
A stenciled accent wall delivers the visual impact of wallpaper at a fraction of the cost. Choose a large-scale geometric or botanical stencil pattern, tape it to the wall, and apply paint with a dense foam roller. Reposition the stencil and repeat until the entire wall is covered. The key to crisp lines is using very little paint on the roller — it is better to do two light passes than one heavy one. Total cost runs $30 to $60 for the stencil and a quart of accent paint.
Floating Shelves
Floating shelves are one of the most impactful DIY projects for the effort involved. Purchase pre-made floating shelf brackets from a hardware store, cut lumber to your desired length, and mount with a level and stud finder. Three shelves stacked vertically create a mini gallery wall; a single long shelf above a sofa provides the perfect ledge for art and photos. Stain or paint the wood to match your room's palette.

Advanced DIY Projects: Room Transformations
Advanced projects require power tools, careful planning, and often multiple days of work. The payoff is significant — these projects can add genuine value to your home while creating custom features that are impossible to buy off the shelf.
Board and Batten Accent Wall
Board and batten adds architectural interest and texture to any room. This project involves measuring and cutting MDF or pine boards into vertical strips, attaching them to the wall with construction adhesive and a nail gun, then caulking seams and painting everything a single color. A typical 12-foot wall takes a full weekend and costs $150 to $300 in materials. The result looks like a $2,000 professional installation. This technique works particularly well in rustic-style interiors and farmhouse-inspired spaces.
Upholstered Headboard
A custom upholstered headboard makes a bedroom feel instantly luxurious. Build a simple frame from plywood and 1x4 lumber, add a layer of 2-inch foam and batting, then wrap in your chosen fabric — linen for a relaxed look, velvet for drama, or performance fabric for durability. Staple the fabric to the back of the frame, mount with French cleats, and enjoy a headboard that fits your exact mattress size and style preference. Material cost: $100 to $200 depending on fabric choice.
Built-In Shelving
Built-in shelving transforms an empty wall into a functional design feature. Using pre-made bookcases as the foundation, add custom trim, crown molding, and a fresh coat of paint to create the illusion of expensive custom cabinetry. Frame the bookcases with 1x12 boards on the sides and top, add baseboard molding at the bottom, and paint everything the same color as the wall for a seamless built-in look. This project typically costs $300 to $600 versus $3,000 or more for true custom built-ins.
Tile Backsplash
Installing a tile backsplash is one of the most accessible advanced projects because the area involved is relatively small. Subway tile remains a classic choice, while peel-and-stick tile offers a less permanent option. For traditional tile installation, you will need thin-set mortar, a notched trowel, tile spacers, and grout. The learning curve is manageable, and the transformation is dramatic — a tiled backsplash instantly updates a kitchen or bathroom.
Custom Picture Frame Gallery Wall
Building custom frames from raw lumber gives a gallery wall a cohesive, designer look that mismatched store-bought frames cannot achieve. Cut 1x2 lumber with mitered corners using a miter saw, glue and pin-nail the joints, stain or paint all frames the same color, and mount prints or canvases. A gallery wall of eight to twelve custom frames creates a museum-quality display for under $100 in materials. For more gallery wall techniques, see our complete wall decor guide.

Upcycled and Thrift Flip Decor
Thrift stores, estate sales, and Facebook Marketplace are goldmines for DIY decor. The key is knowing what to look for and understanding which pieces have the best transformation potential.
What to Look For
- Solid wood furniture — Check for dovetail joints, solid wood construction, and sturdy frames. Veneer and particleboard pieces rarely refinish well.
- Brass and metal items — Lamps, candlesticks, trays, and picture frames in brass or copper can be polished, spray-painted, or left with their natural patina for a vintage aesthetic.
- Ceramic and glass — Vases, bowls, and decorative objects can be spray-painted in trending colors for an instant update.
- Frames and mirrors — Old frames with ornate detailing are perfect candidates for paint transformation.
Essential Thrift Flip Techniques
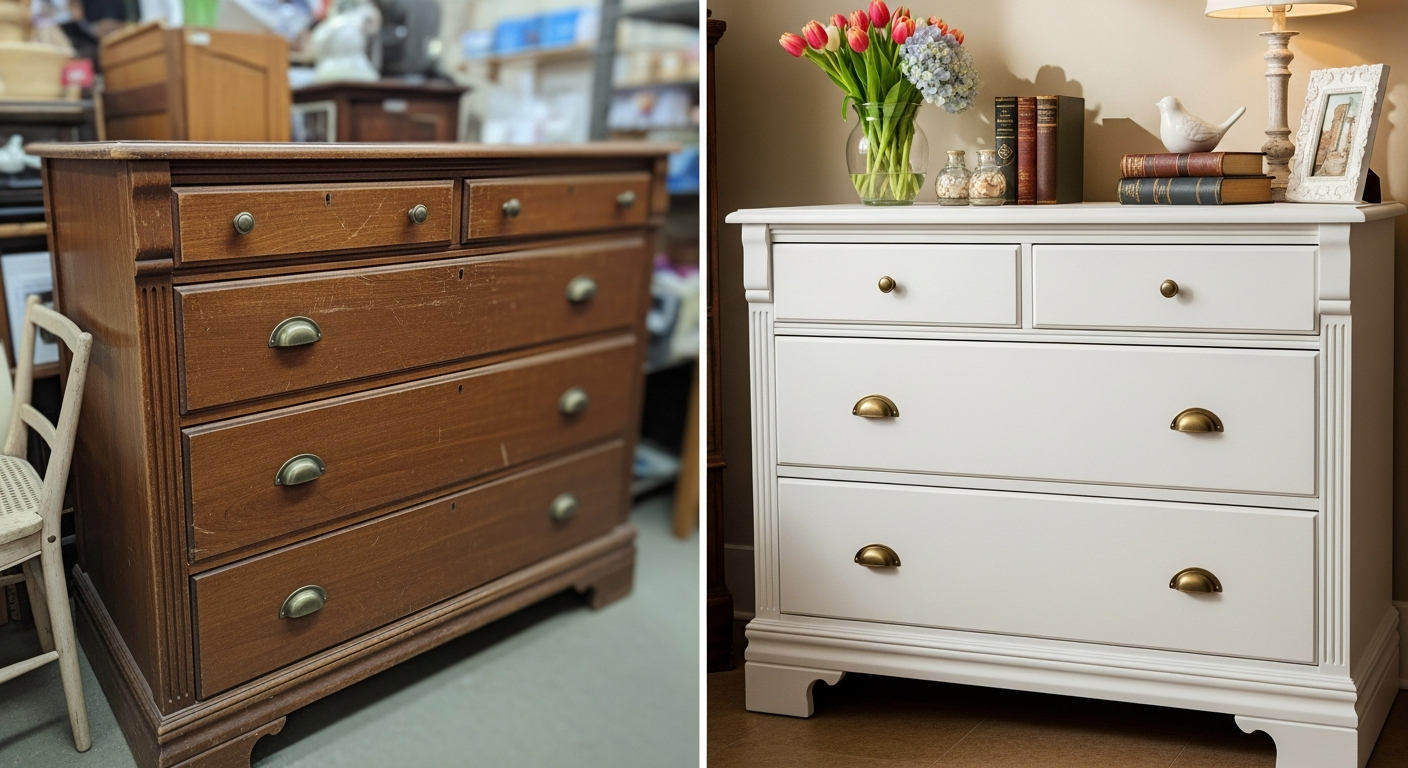
The most impactful thrift flip techniques include chalk painting over dark wood finishes, replacing dated hardware with modern pulls and knobs, removing unnecessary trim or embellishments for a cleaner look, and using contact paper or new fabric to update interiors of drawers and shelves. A $25 thrift store dresser with $40 in paint and new hardware becomes a $400-looking statement piece.
Before and After Transformations
Document your thrift flip projects with before and after photos. Consistent lighting and the same angle make the transformation more dramatic. The most successful thrift flips share three qualities: the original piece had good bones, the new finish is applied cleanly, and updated hardware ties the piece into a modern or intentional aesthetic. Thrift flipping is not just budget-friendly — it is also sustainable, keeping perfectly good furniture out of landfills.
DIY Decor by Room
Different rooms present different opportunities. Here are the highest-impact DIY projects organized by the spaces where they shine brightest.
Living Room Projects
- Custom throw pillow covers — Sew or no-sew envelope-style covers in seasonal fabrics
- Painted accent furniture — A bold side table or bookshelf in an unexpected color
- DIY art above the sofa — Large-scale abstract art on canvas using acrylic paint
- Styled floating shelves — Functional display combining books, plants, and objects
- Decorative tray vignettes — Coffee table and ottoman styling with curated objects
Bedroom Projects
- Upholstered headboard — Custom padded headboard in your fabric choice
- Macrame or woven wall hanging — Textured art above the bed or on a feature wall
- Painted nightstands — Coordinate mismatched thrift store finds with matching paint
- DIY curtain rods — Copper pipe or iron conduit rods with industrial brackets
- Gallery wall — Personal photos and prints in custom or coordinated frames
Kitchen Projects
- Open shelving — Replace upper cabinets with floating shelves for display storage
- Cabinet hardware update — Swap all pulls and knobs for a cohesive new look
- Painted cabinets — Full cabinet transformation with proper prep and paint
- Peel-and-stick backsplash — Renter-friendly tile alternative
- Custom pot rack — Wall-mounted or ceiling-hung rack from iron pipe fittings
Bathroom Projects
- Mirror frame — Frame a builder-grade mirror with molding for an instant upgrade
- Painted vanity — Transform a dated vanity with chalk paint and new hardware
- Floating shelves above toilet — Maximize vertical storage in small bathrooms
- Towel hooks and racks — DIY driftwood or industrial pipe towel storage
- Decorative baskets — Woven baskets for towel and toiletry storage
Tools and Materials Guide
Having the right tools makes every project easier and the results more professional. Here is what to invest in at each level.
Beginner Toolkit (Under $50)
- Painter's tape and drop cloths
- Foam brushes and small angled brush set
- Sandpaper variety pack (80, 120, 220 grit)
- Measuring tape and ruler
- Utility knife with extra blades
- Hot glue gun and glue sticks
- Mod Podge or craft adhesive
Intermediate Toolkit ($50 to $150)
- Cordless drill and driver with bit set
- Level (torpedo and 24-inch)
- Stud finder
- Palm sander or sanding block set
- Basic clamp set
- Staple gun with assorted staples
- Safety glasses and dust mask
Paint and Finish Primer
Choosing the right paint matters more than technique. For furniture, chalk paint or cabinet-grade paint provides the best adhesion and durability. For walls, use a quality interior latex paint in eggshell or satin finish. For exterior projects, opt for exterior-rated paint with UV protection. Always clean and lightly sand surfaces before painting — proper preparation accounts for 80 percent of a professional-looking finish.
Adhesives Guide
Different materials require different adhesives. Wood glue is strongest for wood-to-wood joints. Construction adhesive handles heavy items mounted to walls. E6000 bonds metal, glass, and ceramic. Hot glue is perfect for temporary holds, fabric, and lightweight embellishments. Spray adhesive works for paper and fabric flat applications. Using the wrong adhesive is one of the most common reasons DIY projects fail over time.
Common DIY Mistakes and How to Avoid Them
Even experienced crafters make mistakes. Learning to avoid these common pitfalls will save you time, money, and frustration.
- Skipping surface preparation — Sanding, cleaning, and priming are not optional steps. They are the foundation of every successful paint job. Skipping prep is the number one reason DIY paint projects chip, peel, or look uneven.
- Using the wrong paint or adhesive — Interior paint on an outdoor project, craft paint on furniture that gets daily use, or white glue on a heavy object. Match your materials to the project's demands.
- Not measuring twice — The old carpenter's rule exists for a reason. Measure twice, cut once. Check that your wall hanging is centered. Verify that your shelves are level. Small measurement errors compound into noticeable problems.
- Rushing dry times — Paint, glue, concrete, and stain all need proper curing time. Handling a project too soon causes smudges, fingerprints, weak bonds, and surface damage. Follow the manufacturer's recommended dry time — and then add a few extra hours for good measure.
- Overcomplicating the design — The most beautiful DIY projects are often the simplest. A single, well-executed paint color beats a complicated multi-color scheme that is difficult to execute cleanly. Start simple and add complexity as your skills grow.
- Ignoring scale and proportion — A tiny 8x10 print above a king-size bed looks lost. A massive macrame piece in a small powder room overwhelms the space. Consider the scale of your project relative to the wall, room, and furniture around it.
- Forgetting to seal finished work — Paint, stain, and decorative finishes need a protective topcoat. Polyurethane, wax, or clear sealer extends the life of your project from months to years. This step takes 20 minutes and makes all the difference.
Frequently Asked Questions
What is the easiest DIY home decor project for beginners?
Painted terra cotta pots and decorative tray makeovers are the easiest starting points. Both require only paint and basic supplies, can be completed in under two hours, and produce results that look genuinely polished. These projects build confidence before you tackle anything more complex.
How much money can I save with DIY home decor?
Most DIY decor projects cost 60 to 80 percent less than buying comparable items retail. A chalk-painted thrift store dresser runs $50 to $80 total versus $400 to $800 for a new painted dresser. A custom macrame wall hanging costs $15 to $30 in materials versus $80 to $200 for a handmade purchase. For more budget strategies, see our budget home decor ideas guide.
What DIY projects add the most value to a home?
Board and batten accent walls, built-in shelving, tile backsplashes, and painted cabinets consistently add more value than they cost. These projects create the perception of custom, high-end finishes that buyers are willing to pay a premium for. Cosmetic improvements like fresh paint and updated hardware offer the highest return on investment relative to cost.
Is chalk paint better than regular paint for furniture?
Chalk paint is better for beginners because it requires no sanding or priming and adheres to virtually any surface. Regular furniture paint — specifically cabinet-grade alkyd or acrylic-alkyd paint — produces a harder, more durable finish but requires more preparation. For high-traffic pieces like dining tables and dressers, cabinet paint with proper prep is the more durable choice long term.
How do I find good furniture to upcycle?
Check thrift stores like Goodwill and Habitat for Humanity ReStores, Facebook Marketplace, estate sales, and curbside finds. Look for solid wood construction, sturdy joints, and interesting shapes or details. Avoid pieces with water damage, structural cracks, or strong odors. The best upcycle candidates are pieces with good bones but outdated finishes — dark stained dressers, plain nightstands, and dated but solid bookshelves.
What are the best DIY projects for renters?
Renters should focus on removable or reversible projects: peel-and-stick wallpaper, contact paper surfaces, command-hook gallery walls, removable adhesive tile, and freestanding decorative objects like styled trays, painted pots, and fabric-wrapped vases. Avoid anything that requires holes in walls larger than small nail holes, permanent adhesive, or paint directly on surfaces.
How long does a typical DIY decor project take?
Beginner projects take one to three hours. Intermediate projects like furniture painting take a full day including dry time. Advanced projects like board and batten or built-in shelving take a full weekend or more. Factor in shopping for materials, preparation time, and drying or curing periods when planning your timeline.
Can I mix DIY pieces with store-bought decor?
Absolutely — in fact, mixing handmade and purchased pieces creates the most interesting, layered interiors. The key is maintaining a consistent color palette and style across both DIY and store-bought items. A handmade macrame wall hanging paired with a purchased mid-century console and DIY painted planters creates a cohesive, collected look that feels intentional rather than random.
Design Your DIY Projects with HanoDecor
Before you start any DIY project, visualize how it will look in your actual space. HanoDecor's Room Designer lets you experiment with colors, textures, and arrangements so you can see your ideas come to life before picking up a single tool. Upload a photo of your room, test different accent wall colors, preview furniture placement, and plan your DIY projects with confidence.
Whether you are painting your first terra cotta pot or building a full board and batten wall, having a clear vision of the finished result makes every project more successful. Try the Room Designer to plan your next DIY transformation, browse our project gallery for inspiration, or explore our design packages for professional guidance on your most ambitious projects.
DIY Home Decor Ideas FAQs
Written by
Emily Rodriguez
Interior Design Editor covering living spaces, styling trends, and room makeovers. Former Architectural Digest contributor with a focus on accessible, budget-conscious design.