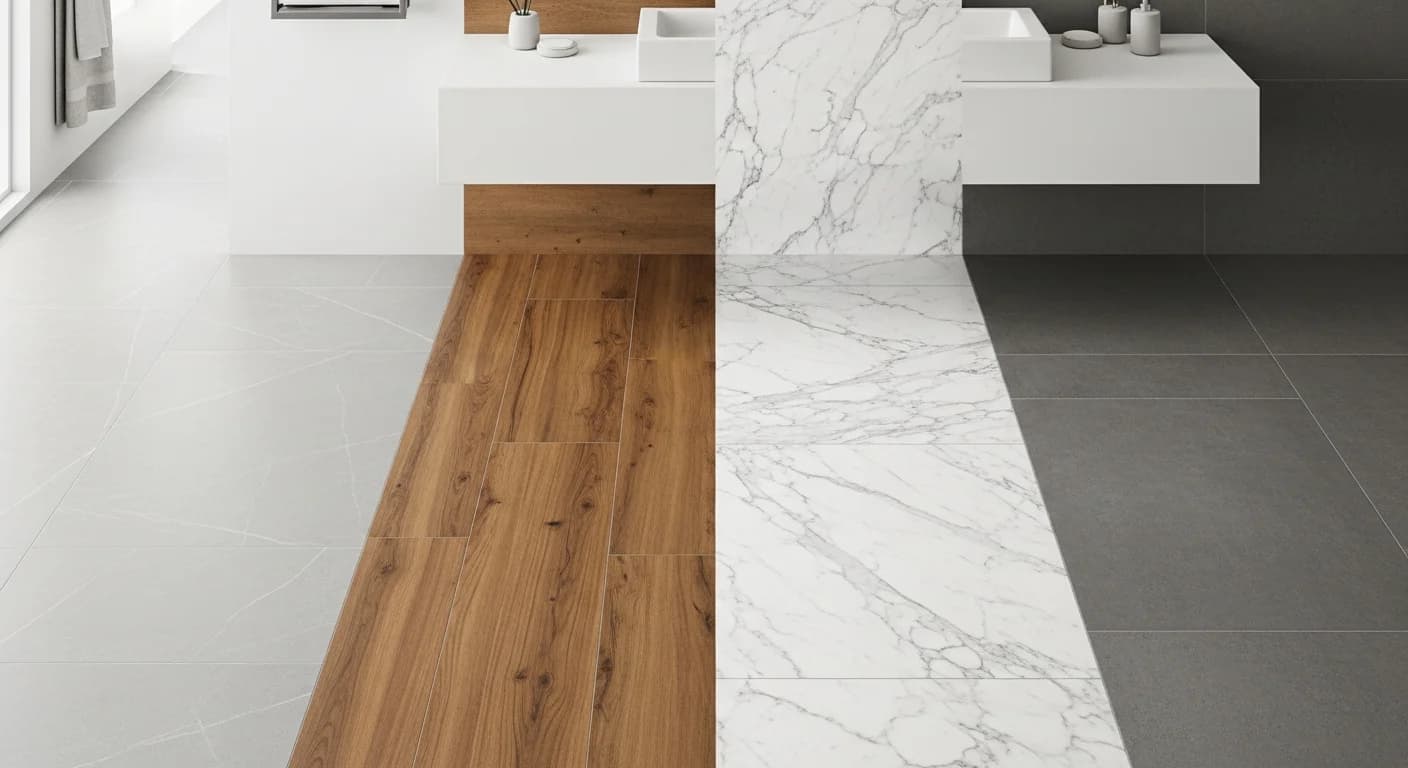
Bathroom Layout Ideas: Floor Plans for Every Size and Shape
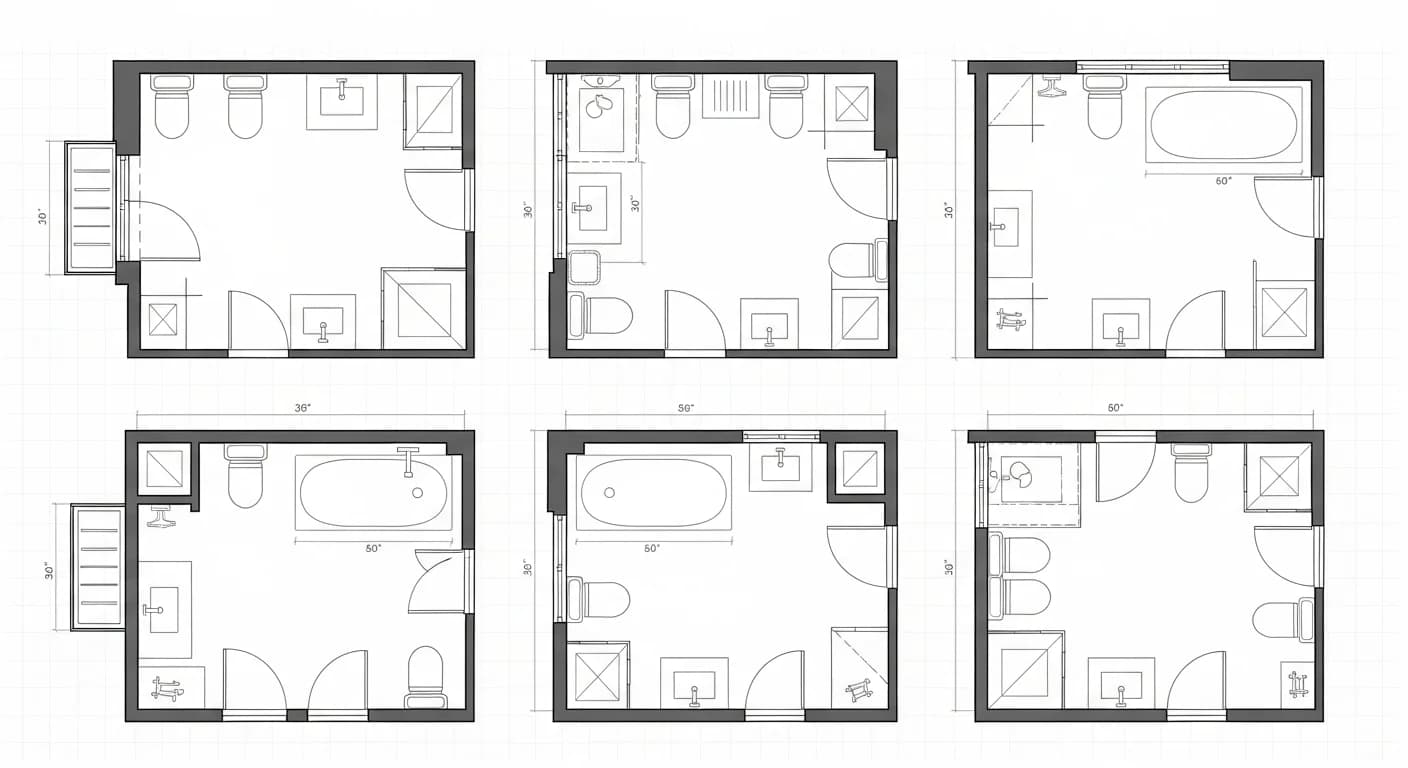
The layout of a bathroom determines everything that follows — from which fixtures fit comfortably to how the space feels during daily use. A well-planned bathroom layout maximizes every square foot, ensures adequate clearance between fixtures, and creates a traffic flow that feels intuitive rather than awkward. Poorly planned bathroom layout ideas, on the other hand, result in doors that bang into vanities, toilets visible from hallways, and shower enclosures that feel claustrophobic even in generously sized rooms.
Bathroom sizes in American homes range from compact 16-square-foot powder rooms to expansive 200-plus-square-foot primary suites, and each size category demands different layout strategies. A 5 x 8 foot bathroom — the most common full bathroom footprint in homes built between 1950 and 2000 — must accommodate a toilet, vanity, and tub or shower within 40 square feet while maintaining minimum clearance requirements mandated by building codes. A 12 x 15 foot primary suite bathroom has enough room for double vanities, a freestanding tub, a separate shower, and a private toilet compartment, but without thoughtful planning, that generous space can feel disjointed and inefficient.
This guide provides bathroom layout ideas for every common size and configuration, with specific dimensions, fixture placement recommendations, and clearance requirements based on current International Residential Code (IRC) standards. Whether you are squeezing a three-quarter bath into a 30-square-foot conversion or designing a spa-inspired primary suite, these floor plans provide a practical starting point for your bathroom remodel planning.
Quick Summary
- Small bathrooms (under 50 sq ft): Powder room, three-quarter bath, classic 5x8 layouts
- Medium bathrooms (50-80 sq ft): 7x10, 8x10, and L-shaped configurations
- Large bathrooms (80+ sq ft): Primary suite, spa layout, wet room options
- Minimum toilet clearance: 15 inches from center to side wall, 30 inches total width
- Minimum shower size: 30 x 30 inches (code), 36 x 36 inches (comfortable)
- Best for: Homeowners planning bathroom renovations, additions, or new construction who need bathroom layout ideas
- Reading time: 15 minutes
Layout Fundamentals
Before exploring specific floor plans, understanding the fundamental rules that govern bathroom layout design prevents costly mistakes during construction. These rules stem from building codes, plumbing constraints, and ergonomic best practices refined over decades of residential design.
Plumbing wall principle: Every bathroom fixture requires water supply and drain connections, and concentrating these connections on a single shared wall (the plumbing wall) significantly reduces installation costs. Moving a toilet drain even 3-4 feet from the existing plumbing stack can add $1,000-$3,000 in rough-in plumbing costs. The most cost-effective bathroom layout ideas keep the toilet, vanity, and shower/tub on the same wall or adjacent walls to share supply lines and drain connections.
Door swing clearance: A standard 30-inch bathroom door requires 30 inches of clear floor space in the direction of the swing. In tight layouts, a pocket door eliminates the swing radius entirely, reclaiming 6-8 square feet of usable floor space. Barn-style sliding doors offer a less expensive alternative at $200-$600 installed versus $400-$1,200 for pocket doors, though they do not provide the same sound isolation.
Minimum clearance requirements (IRC): 15 inches from the center of the toilet to any side wall or obstruction (21 inches recommended), 24 inches of clear space in front of the toilet (recommended 30 inches), 24 inches of clear space in front of the vanity, and a minimum shower interior dimension of 30 x 30 inches (36 x 36 inches recommended). These are code minimums — exceeding them improves comfort and accessibility significantly.
Small Bathroom Layouts Under 50 Square Feet
Powder Room (Half Bath): 16-25 Square Feet
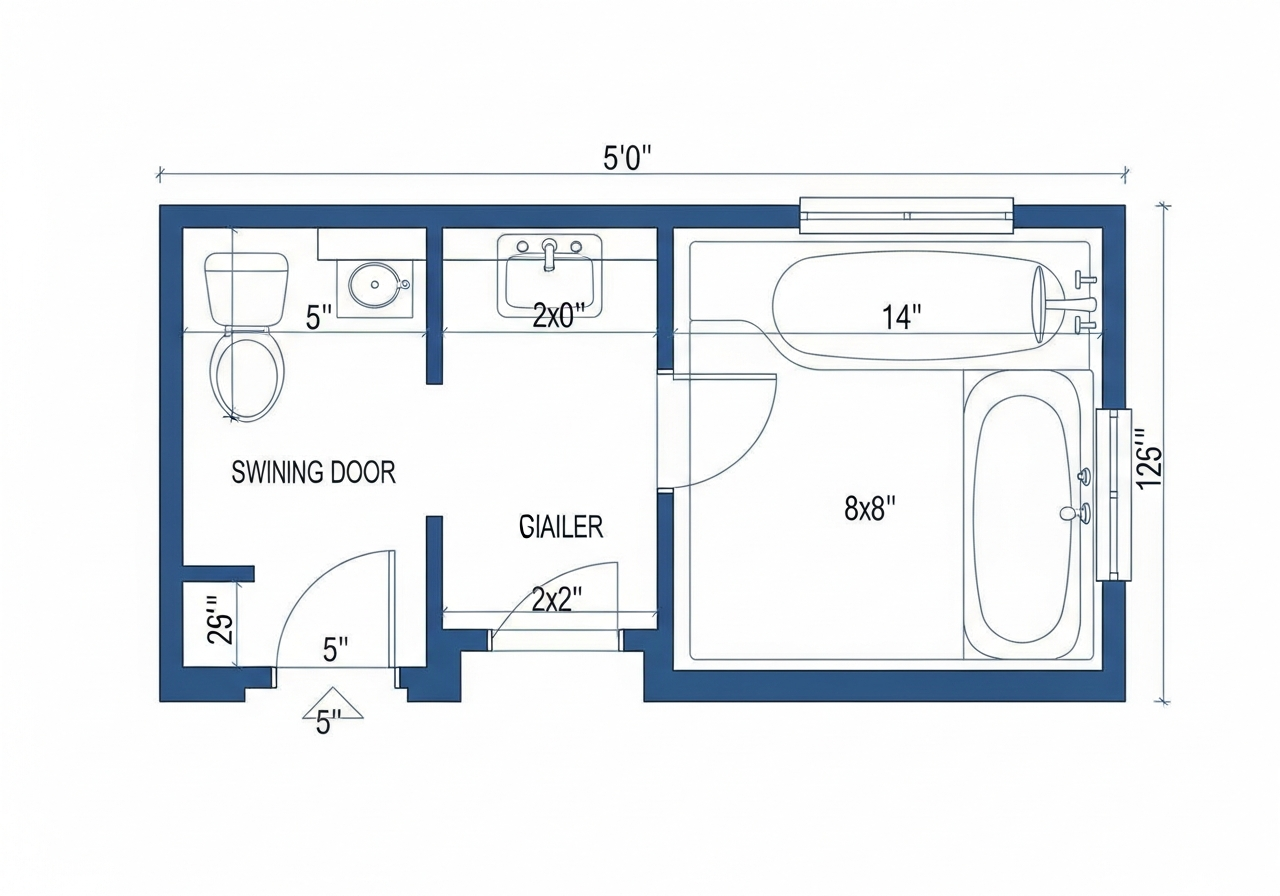
A powder room contains only a toilet and a sink — the minimum two-fixture bathroom that serves guests and common areas. The smallest functional powder room measures approximately 3 x 5.5 feet (16.5 square feet), placing the toilet at one end and a wall-mounted sink at the other. This ultra-compact arrangement works because powder rooms receive intermittent use and do not need to accommodate bathing fixtures.
Optimal powder room layouts place the toilet on the short wall opposite the door, with the vanity or pedestal sink on a side wall. This arrangement keeps the toilet out of direct sight lines from the hallway when the door is open — an often-overlooked detail that significantly improves the experience for guests. A pedestal sink or wall-mounted vanity (18-24 inches deep) preserves maximum floor space, while a small corner sink (15 x 15 inches) fits into the tightest configurations. For powder room design inspiration, explore guest bathroom ideas that maximize impact in minimal space.
Three-Quarter Bath: 30-40 Square Feet
A three-quarter bathroom includes a toilet, vanity, and shower (no bathtub). This efficient configuration fits comfortably in spaces as small as 5 x 6 feet (30 square feet) and serves as the workhorse bathroom in many homes — providing full bathing functionality without the footprint of a tub. The most common three-quarter bath layout places a 32 x 32 inch or 36 x 36 inch corner shower at one end, the toilet centered on a side wall, and a 24-30 inch vanity on the opposite wall.
Neo-angle shower enclosures (angled front with two straight walls) maximize corner space in three-quarter baths, offering a wider shower opening than square corner units without requiring more floor area. For maximum space efficiency, consider a sliding or bi-fold shower door rather than a hinged door that swings into the room. A 36-inch vanity with a single sink provides adequate counter and storage space for everyday essentials.
Classic 5x8 Full Bathroom: 40 Square Feet
The 5 x 8 foot bathroom is arguably the most important layout to master because it appears in millions of American homes and offers just enough space for a full bathroom with a tub. The standard 5x8 layout places a 60-inch alcove bathtub across the short (5-foot) wall, with the toilet and vanity arranged along one of the 8-foot side walls. This arrangement works because the 60-inch tub fits precisely within the 5-foot dimension, and the remaining 3 feet of depth provides adequate clearance for the toilet and vanity.
Variations on the classic 5x8 include swapping the tub for a 36 x 48 inch walk-in shower (gaining 12 inches of floor space in front of the shower), using a 30-inch vanity instead of 36 inches to increase passage width, or replacing the swing door with a pocket door to eliminate the door's intrusion into the limited floor area. Each of these modifications trades one comfort factor for another — small bathroom design is fundamentally an exercise in strategic compromise. For additional space-maximizing strategies, see the guide to small bathroom remodel ideas.
Medium Bathroom Layouts: 50-80 Square Feet
The 7x10 Layout: 70 Square Feet
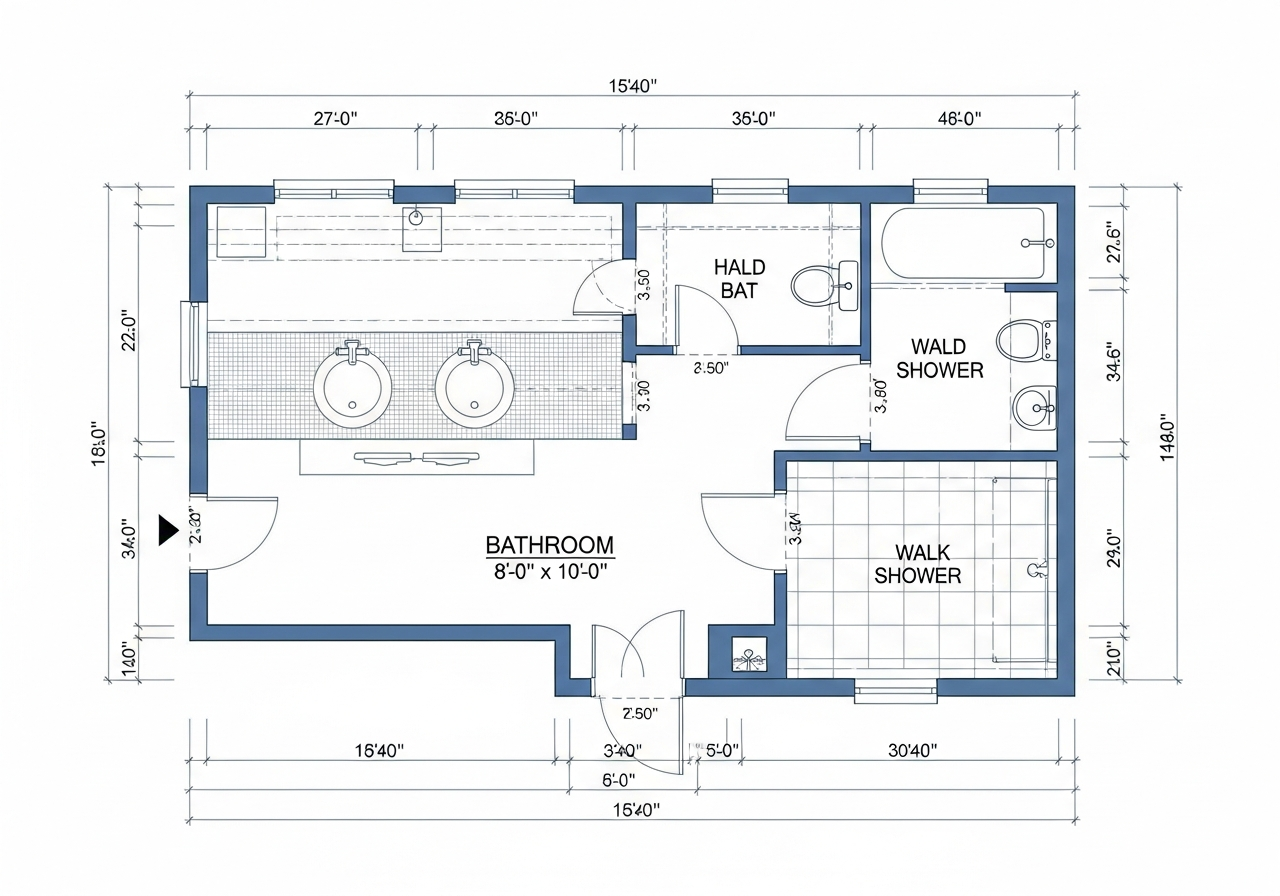
At 70 square feet, the 7 x 10 bathroom crosses the threshold from compromise to comfort. This size accommodates a 60-inch tub or a spacious 36 x 48 inch shower, a 48-inch vanity with ample counter space, and a toilet with generous clearance — all with enough remaining floor space for comfortable movement between fixtures. The typical 7x10 layout places the tub or shower across one short wall, the vanity on the opposite short wall, and the toilet centered on a long wall between them.
This layout also supports a double vanity configuration (48-60 inches wide) for shared bathrooms, though the counter space per person is modest at 24-30 inches each. A single 48-inch vanity with storage drawers is often more practical for a 70-square-foot bathroom than a tight double vanity that leaves insufficient counter space for either user.
The 8x10 Layout: 80 Square Feet
The 8 x 10 bathroom is the sweet spot for comfortable family bathrooms. This footprint accommodates a separate tub and shower — a feature highly desired by families with young children — along with a 60-inch double vanity and a toilet with generous clearance. The standard 8x10 layout positions a 60-inch tub along one 8-foot wall, a 36 x 36 or 36 x 48 inch shower at the end of the opposite 8-foot wall, the double vanity on the 10-foot wall facing the entry door, and the toilet between the tub and shower.
An alternative 8x10 configuration places both the tub and shower on the same wall, creating a dedicated wet zone that simplifies waterproofing and plumbing while opening the opposite wall for a longer vanity (up to 72 inches) and additional storage cabinetry. This layout works particularly well when the plumbing wall aligns with the wet zone, reducing rough-in costs.
L-Shaped Layouts
L-shaped bathrooms occur when architectural constraints — existing closets, hallways, or structural walls — create a floor plan that wraps around a corner. Rather than fighting the L shape, effective layouts embrace it by placing the shower or tub in the alcove created by the L and using the wider section for the vanity and toilet. This natural zoning separates the wet area from the dry area, improving both functionality and privacy.
The key to successful L-shaped bathroom layout ideas is ensuring that each section of the L meets minimum width requirements independently. A section narrower than 30 inches cannot accommodate any standard fixture, while sections between 30 and 42 inches can support a toilet or narrow vanity. The wider section should contain the primary vanity and ideally the toilet, while the narrower wing houses the shower or tub.
Large Bathroom Layouts: 80+ Square Feet
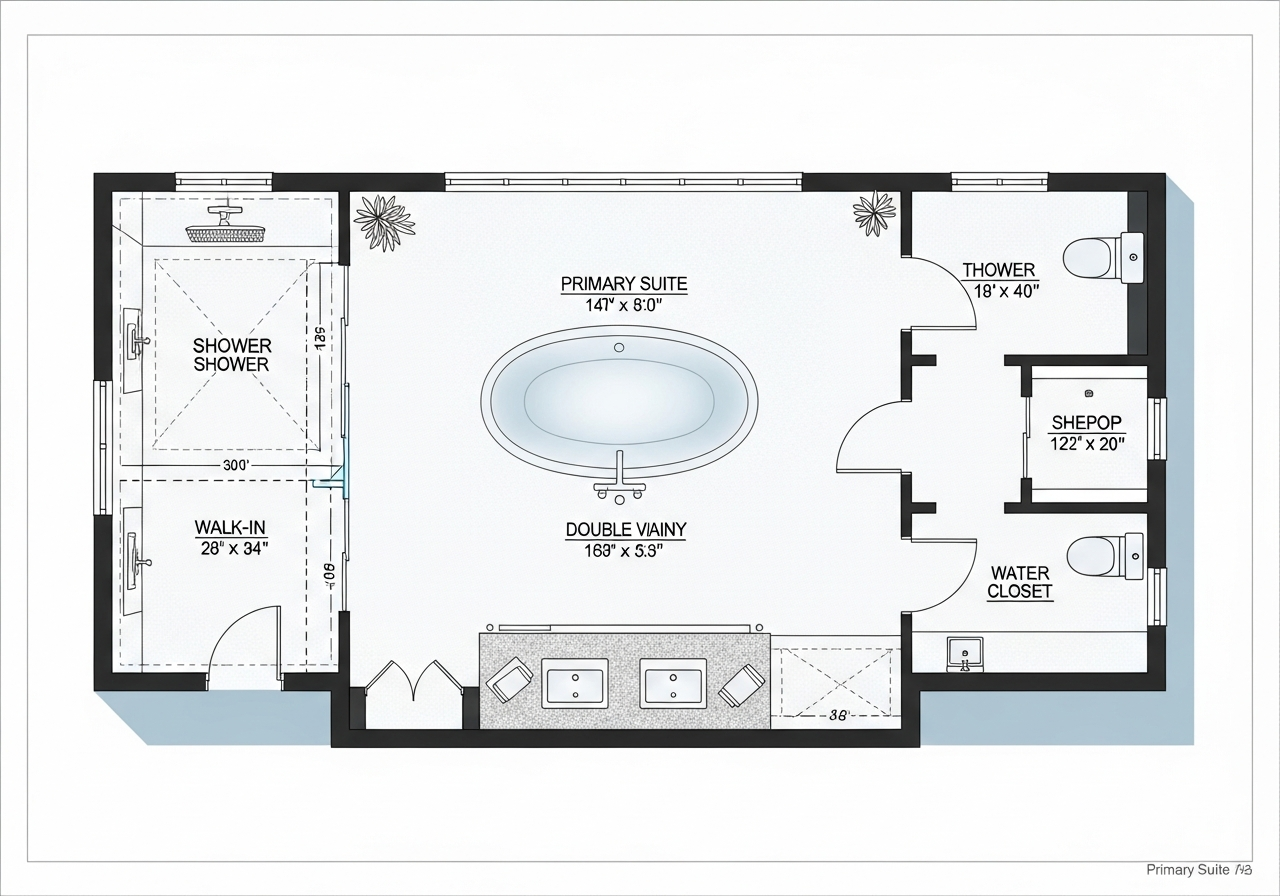
Primary Suite: 100-150 Square Feet
A primary suite bathroom between 100 and 150 square feet supports every fixture a homeowner might desire: double vanity (60-72 inches), freestanding soaking tub, spacious walk-in shower (48 x 60 inches or larger), private toilet compartment, and dedicated linen storage. The challenge in large bathroom layout ideas shifts from fitting fixtures to arranging them in a way that feels cohesive rather than scattered. Explore primary bathroom ideas for design inspiration at this scale.
The most effective large bathroom layouts create distinct zones: a wet zone (shower and tub, typically at the far end of the room from the entry), a grooming zone (vanity area with task lighting, near the entry for morning convenience), and a private zone (toilet compartment, ideally with its own door or half-wall separation). Traffic flow between these zones should follow the natural sequence of use: entry, toilet, vanity, then shower or tub.
Spa Layout: 150-200+ Square Feet
Spa-inspired bathroom layouts prioritize the bathing experience, placing a sculptural freestanding tub at the visual center of the room — often beneath a window or skylight — and surrounding it with open floor space that creates a sense of calm and luxury. Walk-in showers in spa layouts frequently measure 60 x 72 inches or larger, incorporating multiple showerheads, a built-in bench, and frameless glass enclosures or open curbless entries.
At this scale, symmetry becomes a powerful design tool. Placing identical vanities on opposite walls with the tub centered between them creates a hotel-suite aesthetic that feels both balanced and luxurious. A dedicated makeup vanity station (36-42 inches wide with a seated area) can be incorporated into one vanity wall without compromising the overall layout.
Wet Room Layout
A wet room eliminates the traditional shower enclosure entirely, waterproofing the entire bathroom floor and walls to create an open space where the shower area flows seamlessly into the rest of the room. This European-inspired approach works best in bathrooms of 60-100 square feet where the open design maximizes the perception of space. The entire floor slopes toward one or more linear drains, and a frameless glass panel (not a full enclosure) may be used to contain splash without creating visual barriers.
Wet room layouts require the entire floor and all walls to be fully waterproofed with a continuous membrane system — significantly more extensive waterproofing than a standard shower installation. The toilet and vanity must be positioned to avoid direct spray, and all electrical outlets and switches must use GFCI protection with appropriate IP (ingress protection) ratings for wet environments.
Jack-and-Jill Bathroom Layouts
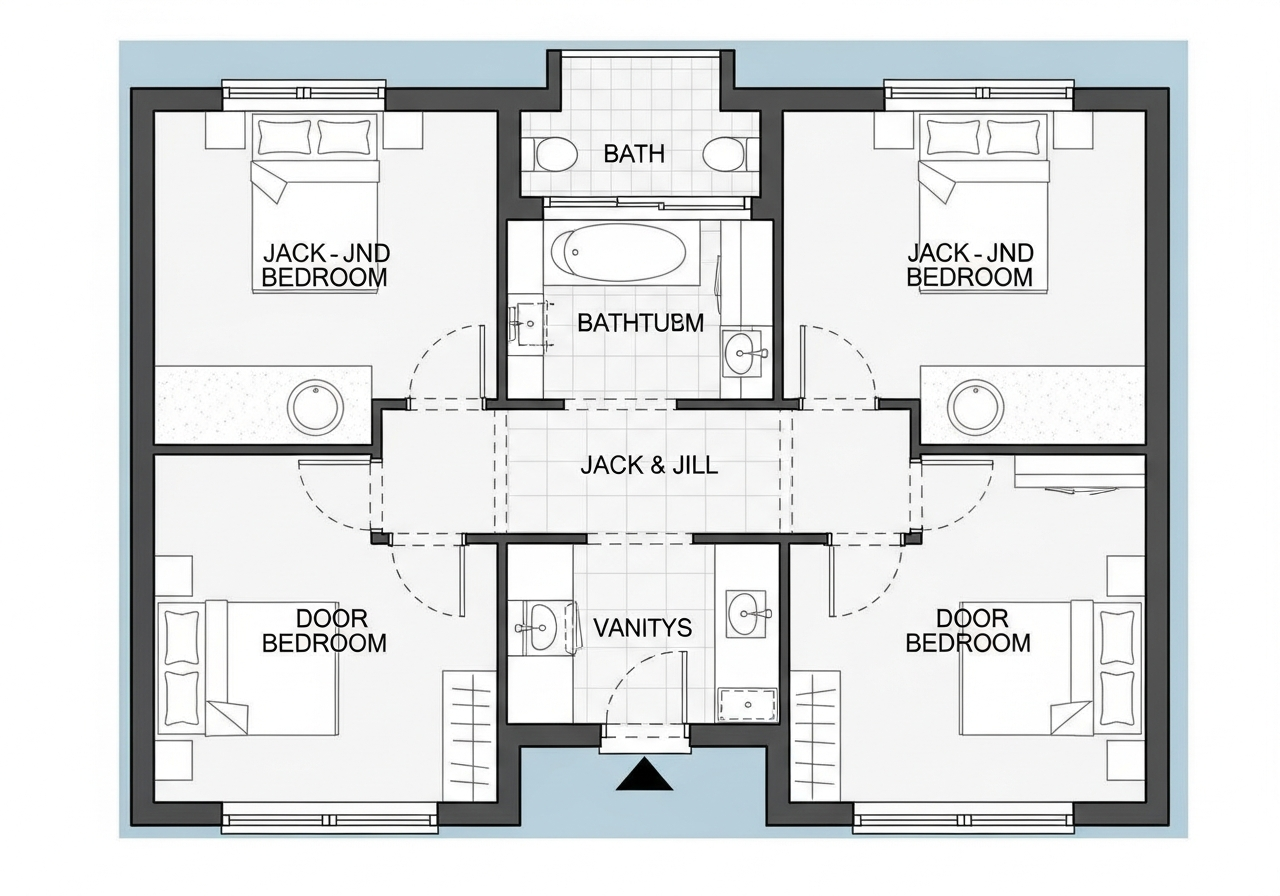
A Jack-and-Jill bathroom connects two bedrooms through a shared bathroom, typically serving children's or guest bedrooms. The defining feature is two entry doors — one from each bedroom — with a layout designed to allow some degree of simultaneous use. The most functional Jack-and-Jill layouts create a central wet zone (tub/shower and toilet behind a lockable door) flanked by two separate vanity areas that each bedroom can access independently.
Minimum dimensions for a functional Jack-and-Jill bathroom are approximately 8 x 10 feet (80 square feet), though 9 x 12 feet (108 square feet) provides significantly more comfortable shared use. The critical design detail is the locking mechanism: each entry door needs a privacy lock that prevents entry from the opposite bedroom, and the locks must be easily disengaged from outside in case of emergency (especially important when children use the bathroom).
A well-designed Jack-and-Jill layout gives each bedroom its own sink — either in separate alcoves within the bathroom or in a vanity vestibule between the bedroom and the shared wet area. This separation allows one child to brush teeth while the other uses the shower without scheduling conflicts, dramatically reducing morning-routine friction in busy households.
Accessible Bathroom Layouts
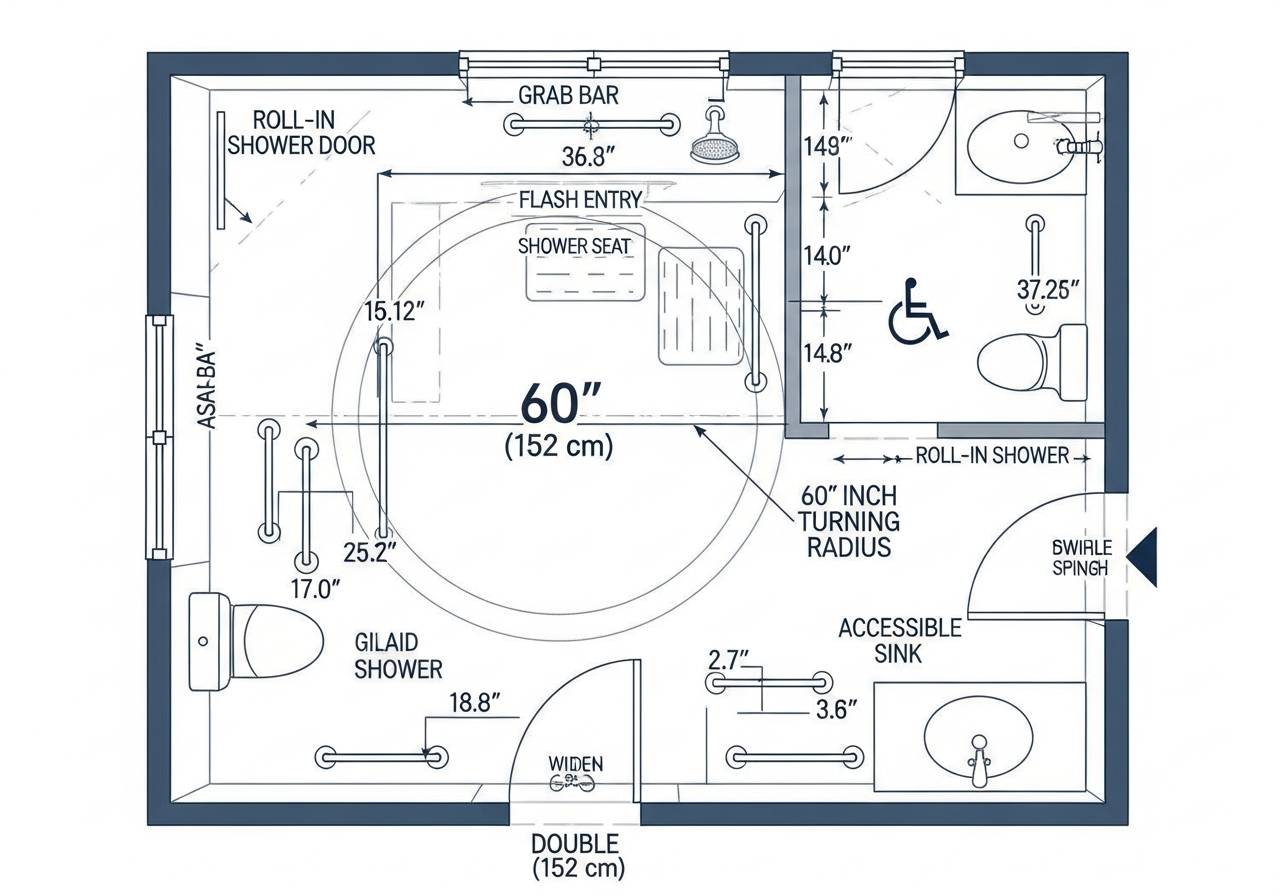
Accessible bathroom layouts accommodate wheelchair users, individuals with mobility limitations, and anyone planning for aging in place. The Americans with Disabilities Act (ADA) and the Fair Housing Act establish minimum requirements for accessible bathrooms in commercial and multi-family residential buildings, and these standards provide an excellent framework for private residential design as well.
The fundamental accessible layout requirement is a 60-inch turning radius — a clear circular floor area 60 inches in diameter that allows a wheelchair to make a complete 180-degree turn. This turning radius must be free of all obstructions including open cabinet doors, door swings, and fixture projections. In a private residence, the minimum accessible bathroom size to accommodate a turning radius, roll-in shower, accessible toilet, and roll-under vanity is approximately 8 x 8 feet (64 square feet).
Key accessible layout features include: a curbless (zero-threshold) roll-in shower measuring at least 36 x 60 inches with a fold-down bench, grab bars at the toilet (42-inch side bar, 36-inch rear bar at 33-36 inches above the floor), an ADA-height toilet (17-19 inches to the seat top versus the standard 15 inches), a roll-under vanity with knee clearance of at least 27 inches high by 30 inches wide by 19 inches deep, and lever-handle faucets and door hardware throughout. View floating vanity options that create the knee clearance required for wheelchair accessibility.
Where to Place the Toilet
Toilet placement is the most frequently debated element of bathroom layout ideas — and the most consequential when done wrong. The toilet should never be the first fixture visible when the bathroom door opens, yet it needs to be positioned with adequate clearance and plumbing access. The optimal toilet location satisfies three criteria: visual privacy (not visible from the hallway or bedroom), adequate clearance (15 inches minimum from center to any side obstruction, 24 inches minimum in front), and plumbing efficiency (close to the main drain stack to minimize rough-in costs).
In small bathrooms, the toilet typically occupies the wall adjacent to the door, positioned so the door conceals it when opened. In medium and large bathrooms, a toilet compartment — a small alcove or closet-like space measuring at least 30 x 60 inches — provides true privacy and keeps the toilet completely separate from the grooming and bathing zones. A toilet compartment adds $500-$1,500 to construction costs for the partition walls and additional door but significantly improves the experience in shared bathrooms.
Optimizing Natural Light
Natural light transforms a bathroom from a purely functional space into one that feels open, clean, and inviting. Window placement should be integrated into the layout from the earliest planning stage — not treated as an afterthought after fixtures are positioned. The most effective bathroom layout ideas position the vanity mirror wall on the wall opposite or adjacent to the primary window, allowing natural light to illuminate the face during grooming. A window directly behind the user creates backlighting that casts shadows on the face — the opposite of effective task lighting.
Skylights and sun tunnels provide natural light without sacrificing wall space for windows, making them particularly valuable in small or interior bathrooms without exterior walls. A 14 x 14 inch fixed skylight admits as much daylight as a 3 x 4 foot wall window, and modern skylight glazing options include frosted, rain-textured, and electrochromic (electronically tinted) glass that provides privacy without window treatments.
For bathrooms with limited natural light options, oversized mirrors (extending the full width of the vanity wall) effectively double the perceived light in the space by reflecting both natural and artificial light sources. Visit the bathroom ideas gallery for layouts that maximize natural light in various configurations, and explore the HanoDecor project gallery for real transformation examples.
Common Layout Mistakes
Certain bathroom layout mistakes appear so frequently in residential construction that they deserve specific attention. Avoiding these errors during the planning phase saves thousands of dollars in costly post-construction corrections.
Toilet facing the door: Placing the toilet directly opposite the entry door means anyone passing in the hallway has a clear view of the toilet — the least appealing fixture in the bathroom. Always position the toilet so the door or a half-wall screens it from the entry sight line.
Insufficient vanity clearance: A vanity installed too close to the toilet or tub creates a cramped, uncomfortable space. Maintain at least 4 inches (preferably 6-8 inches) between the edge of the vanity counter and the nearest fixture. In small bathrooms where this clearance is impossible with a standard vanity, use a narrower 18-inch-deep vanity or a pedestal sink.
Door conflicts: In tight layouts, a hinged door can collide with a vanity, toilet, or shower door when opened. Test every door swing on the floor plan before construction begins. Pocket doors, barn doors, and bifold doors resolve most door conflict issues in small bathrooms.
No storage plan: Failing to plan for storage during the layout phase results in toiletry clutter on every available surface. Allocate wall space for a medicine cabinet, recessed niches in the shower, and under-vanity storage as part of the layout — not as afterthoughts.
Ignoring the plumbing wall: Moving plumbing more than 3-4 feet from the existing drain stack adds $1,000-$5,000 or more to rough-in costs. The most cost-effective bathroom layout ideas work with the existing plumbing wall rather than against it.
Bathroom Layout Comparison Table
The following comparison helps match bathroom size to appropriate layout strategies and fixture options:
Powder Room (16-25 sq ft): Fixtures: toilet + sink. Best layout: Linear. Vanity size: 18-24 inches. Shower: None. Tub: None.
Three-Quarter (30-40 sq ft): Fixtures: toilet + sink + shower. Best layout: Corner shower. Vanity size: 24-30 inches. Shower: 32x32 to 36x36 inches. Tub: None.
Full 5x8 (40 sq ft): Fixtures: toilet + sink + tub/shower. Best layout: Tub on short wall. Vanity size: 30-36 inches. Shower: Tub-shower combo. Tub: 60-inch alcove.
Medium 7x10 (70 sq ft): Fixtures: all + possible double vanity. Best layout: Flexible. Vanity size: 48-60 inches. Shower: 36x48 inches. Tub: 60-inch or freestanding.
Large 8x10+ (80+ sq ft): Fixtures: all + separate tub and shower. Best layout: Zoned. Vanity size: 60-72 inches double. Shower: 48x60+ inches. Tub: Freestanding.
Primary Suite (100-200 sq ft): Fixtures: all + toilet compartment. Best layout: Wet/dry zones. Vanity size: 72+ inches. Shower: 60x72+ inches. Tub: Freestanding centerpiece.
Frequently Asked Questions
What is the minimum bathroom size for a full bath?
The minimum size for a functional full bathroom (toilet, sink, and tub or shower) is approximately 36 square feet — a 5 x 7.2 foot or 4.5 x 8 foot footprint. However, the standard minimum for a comfortable full bathroom is 40 square feet (5 x 8 feet). Building codes specify minimum fixture clearances rather than minimum room sizes, so technically a full bathroom can be built in smaller spaces if all clearance requirements are met. The 5 x 8 foot standard remains the practical minimum for three fixtures with code-compliant clearances and a usable shower or tub.
How much space do you need between a toilet and a vanity?
Building codes require a minimum of 15 inches from the center of the toilet to any side obstruction (including vanity edges), which translates to approximately 4 inches of clear space between the edge of a standard toilet and the vanity. For comfortable use, allow 6-8 inches of clear space. In very tight layouts, consider a wall-mounted toilet (which projects only 21-22 inches from the wall versus 27-29 inches for floor-mounted models) to gain additional clearance.
Should the toilet face the door or the side wall?
The toilet should face a side wall — never the entry door. A toilet facing the door is the first thing visible when the door opens, creating an unappealing sight line from the hallway or bedroom. Position the toilet so it is concealed by the door swing or a partition wall. In powder rooms where space is extremely limited, angling the toilet 45 degrees toward a corner can improve the entry sight line while maintaining code-compliant clearances.
What is the best layout for a Jack-and-Jill bathroom?
The best Jack-and-Jill layout separates the shared wet zone (tub/shower and toilet) behind a lockable partition while giving each bedroom its own vanity or sink area accessible without entering the shared zone. This allows two users to brush teeth simultaneously and limits scheduling conflicts to the shower and toilet. Minimum recommended size is 80-100 square feet to accommodate this configuration comfortably.
How do you make a small bathroom feel larger?
Five layout strategies make a small bathroom feel larger: use a pocket door or barn door to eliminate door swing intrusion, install a floating vanity that exposes floor space beneath, choose a clear glass shower enclosure instead of a curtain or frosted glass, extend floor tile into the shower without a threshold to create visual continuity, and mount a full-width mirror above the vanity to visually double the room depth. See pricing options for bathroom visualization tools that help test these strategies.
Plan Your Bathroom Layout with HanoDecor
Testing bathroom layout ideas in your actual space eliminates guesswork and prevents costly construction mistakes. Upload a photo of your current bathroom to our bathroom remodel visualizer and experiment with different configurations — move the vanity, swap the tub for a walk-in shower, test a floating vanity for more visual space, or explore how a double vanity changes the room's proportions. See every layout option rendered in your real bathroom with accurate dimensions and proportions before committing to a floor plan.
Bathroom Layout Ideas FAQs
Written by
Emily Rodriguez
Interior Design Editor covering living spaces, styling trends, and room makeovers. Former Architectural Digest contributor with a focus on accessible, budget-conscious design.