How to Redesign a Kitchen Island: 8 Smart Ideas for Function and Style
Quick Summary
Your kitchen island is the workhorse of your kitchen, serving as prep station, dining area, storage hub, and social center. This guide covers 8 smart ideas for redesigning your kitchen island for better function and updated style, from countertop upgrades to seating configurations and storage optimization.
How to Redesign a Kitchen Island for Function and Style
Learning how to redesign a kitchen island can transform the entire functionality and appearance of your kitchen without a full renovation. The kitchen island is the most used and most visible element in most kitchens, serving as the primary prep surface, casual dining area, storage hub, and social gathering point. When your island works well, the entire kitchen flows. When it does not, every cooking session feels like a struggle.
Whether your island is too small for your needs, lacks adequate storage, has outdated finishes, or simply does not match your current style, there are smart redesign strategies that range from quick cosmetic updates to more involved functional upgrades. These 8 ideas cover every budget level and skill requirement, from weekend DIY projects to professional installations.
Idea 1: Upgrade Your Countertop Material
The countertop is the most visible surface on your kitchen island, and upgrading it delivers immediate visual impact. If your island has laminate, tile, or dated granite, switching to a modern surface transforms the entire look of your kitchen. Quartz is the most popular island countertop material in 2026, offering consistent color and pattern, zero maintenance, and exceptional durability at $50-$100 per square foot installed.
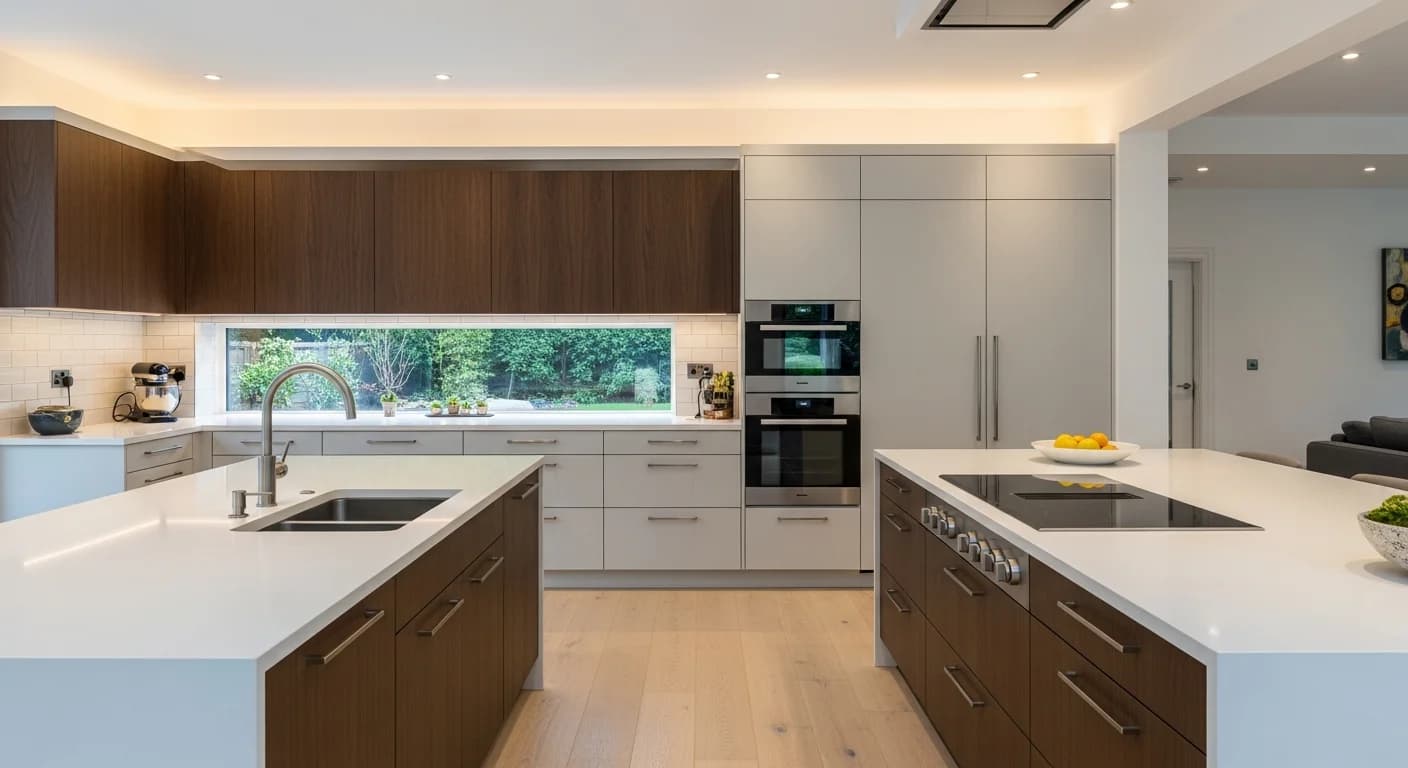
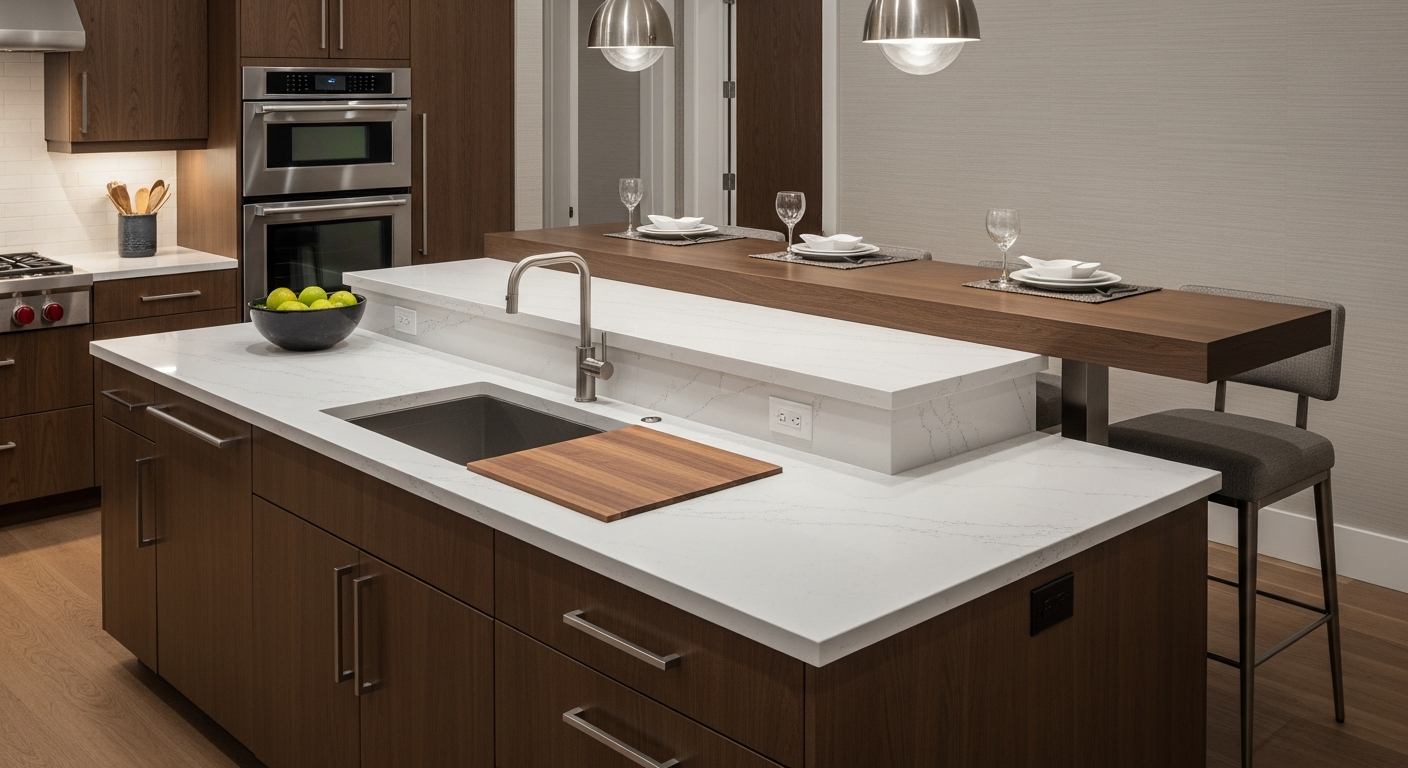
For a dramatic upgrade, consider a waterfall edge where the countertop material continues down one or both sides of the island to the floor. Waterfall edges create a sleek, modern look that hides the base cabinetry on the visible side. The additional material cost is typically $500-$1,500 depending on the countertop material, but the visual impact is significant.
Butcher block is another popular island countertop choice that adds warmth and natural character. It works especially well as a mixed-material approach: butcher block on the island for a warm contrast against quartz or granite on the perimeter countertops. Butcher block costs $30-$60 per square foot and can be installed as a DIY project for the confident homeowner. For a detailed comparison of countertop options, see our guide on how to redesign kitchen countertops.
Idea 2: Add or Reconfigure Seating
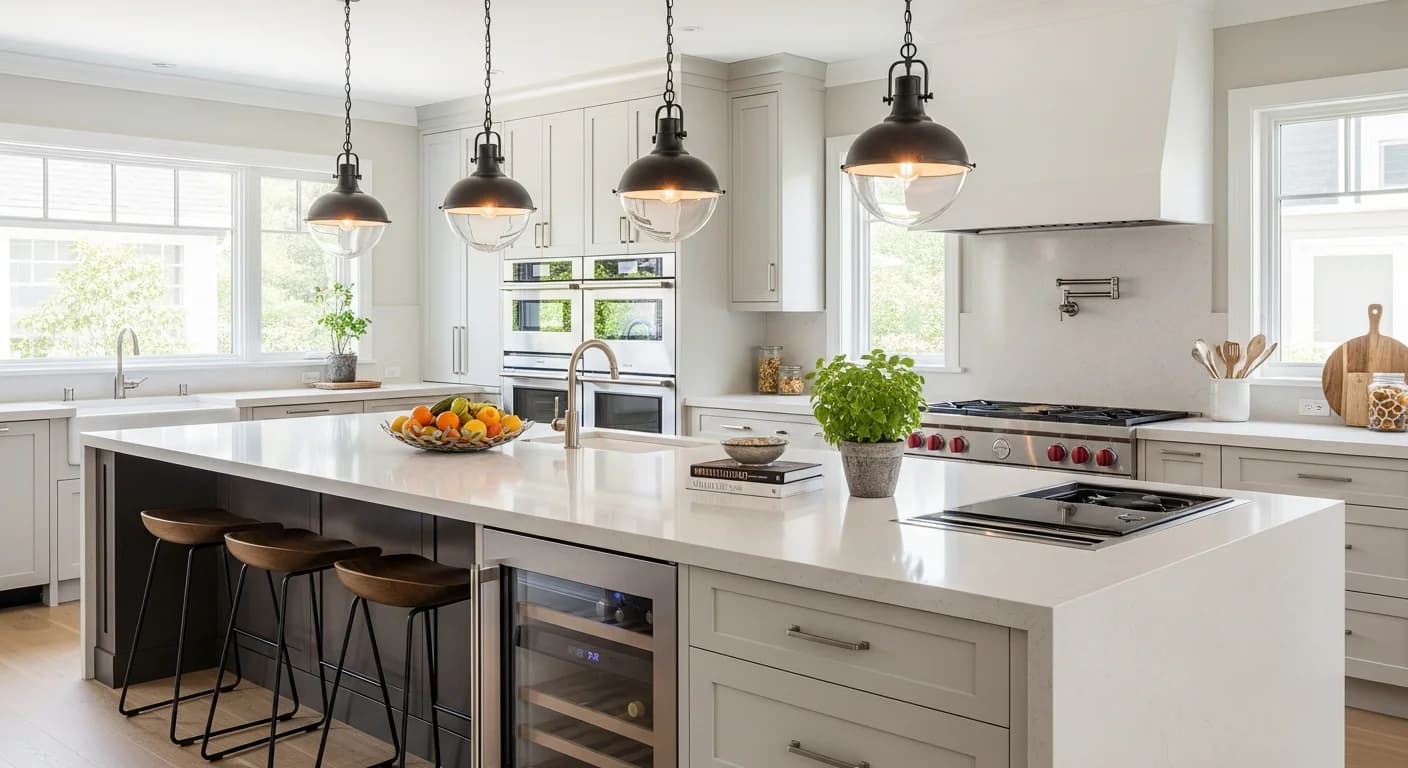
Seating at the kitchen island has evolved from an optional perk to an essential feature. If your island lacks seating, adding an overhang on one side creates a breakfast bar that accommodates 2-4 stools depending on island length. A standard eating overhang extends 12-15 inches beyond the base and requires support brackets or corbels for spans greater than 8 inches.
The ideal seat spacing is 24 inches center-to-center for standard stools and 30 inches for stools with arms. Counter-height islands (36 inches) use 24-26 inch stools, while bar-height islands (42 inches) require 28-30 inch stools. Getting these proportions right is critical for comfort. Stools that are too tall or too short make the island feel awkward and uncomfortable to use.
For a two-level island design, the lower level serves as the prep and cooking surface (at standard 36-inch counter height) while the raised level (42 inches) provides a dining bar that conceals the working mess from seated guests. This configuration works well for islands that face an open living or dining area where visibility of the prep zone would be undesirable.
Idea 3: Maximize Storage with Smart Organization
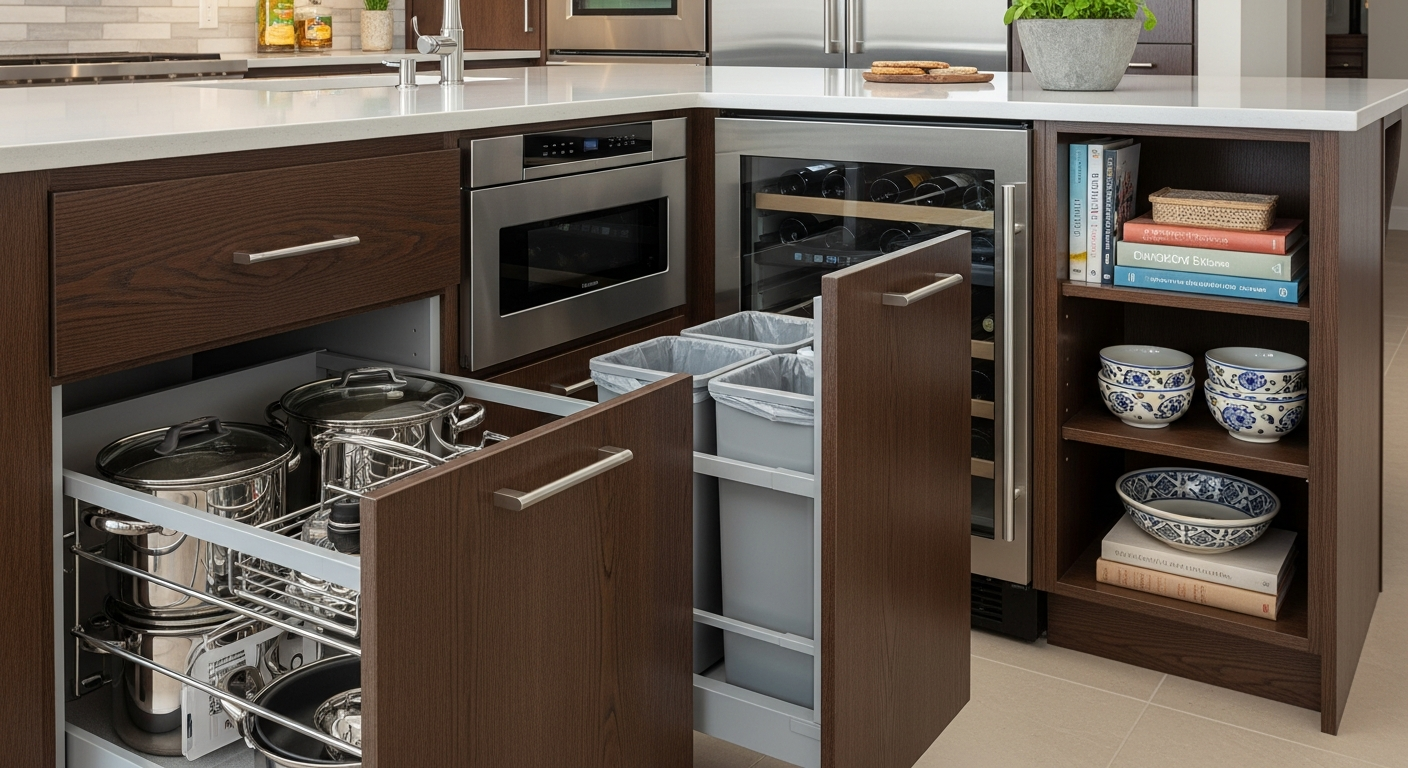
Most kitchen islands underutilize their storage potential. Standard base cabinets with fixed shelves waste vertical space and make items in the back difficult to access. Replacing fixed shelves with pull-out drawers dramatically improves accessibility and storage efficiency. Full-extension drawer slides allow you to see and reach every item without bending or reaching blindly.
Consider these high-impact storage upgrades for your island: deep drawers with peg systems for pot and pan organization, pull-out trash and recycling bins that are hidden behind a cabinet door, a built-in spice drawer with angled inserts near the cooktop, vertical dividers for baking sheets and cutting boards, and a dedicated appliance garage for stand mixers or food processors.
For islands with end panels, adding open shelving on one or both ends creates display space for cookbooks, decorative items, or frequently used serving pieces. Open shelving on an island end adds visual interest and breaks up the solid mass of cabinetry, making the island feel lighter and more furniture-like.
Idea 4: Update the Island Base and Finish
Painting or refinishing the island base is one of the most cost-effective kitchen redesign strategies. A contrasting island color creates a focal point and adds visual depth to the kitchen. While white or gray perimeter cabinets remain the most popular, islands in navy blue, forest green, black, or warm wood tones create a striking contrast that makes the kitchen feel custom-designed.
The painting process for an island base follows the same steps as full cabinet painting: remove all doors and hardware, clean thoroughly, sand lightly for adhesion, apply bonding primer, and finish with two coats of cabinet-grade paint. The island alone is a manageable weekend project compared to painting an entire kitchen's worth of cabinets.
For a furniture-like appearance, consider adding decorative elements to the island base. Turned legs at the corners, beadboard or shiplap panel inserts, or open shelving on one end can transform a basic builder-grade island into a custom piece. These additions typically cost $100-$300 in materials and can be completed as DIY projects with basic woodworking skills.
Idea 5: Integrate Electrical and Plumbing Features
Modern kitchen islands serve as charging stations, beverage centers, and even secondary wash stations. Adding electrical outlets to your island (including USB-C charging ports) makes it a true kitchen command center. Pop-up outlet strips that retract flush into the countertop surface maintain a clean look when not in use and provide power exactly where you need it for small appliances.
A prep sink in the island provides a dedicated station for washing produce, filling pots, and cleaning up during cooking without interfering with the main sink. Prep sinks are typically 12-18 inches wide with a single-handle faucet. Installation requires running a water supply and drain line to the island, which is a professional plumbing project but well worth the investment for serious home cooks.
Under-counter appliances like a beverage refrigerator, microwave drawer, or wine cooler can also be integrated into the island. These additions require electrical connections and, in some cases, plumbing. They increase the island's functionality dramatically and free up counter space on the perimeter cabinets. Plan these additions early in the redesign process, as they affect the island's dimensions and layout.
Idea 6: Optimize Island Size and Clearances
Many kitchen islands are either too large (blocking traffic flow) or too small (insufficient work surface). The ideal island provides at least 36 inches of clearance on all working sides and 42-48 inches on sides with seating or appliance access. Measure your kitchen carefully before making any size changes, as even 6 inches of adjustment can significantly improve traffic flow.
For kitchens under 200 square feet, consider a smaller mobile island or butcher block cart that can be repositioned as needed. These portable islands range from $200-$800 and provide additional prep surface without permanently reducing floor space. Some models include drop-leaf extensions that expand the work surface when needed and fold down when not in use.
For larger kitchens, extending the island length provides more seating capacity and prep surface. A standard island width is 24-36 inches; widths of 42-48 inches are needed if you want seating on one side plus a sink or cooktop. Consult our kitchen layout redesign guide for detailed clearance diagrams and layout optimization strategies.
Idea 7: Add Statement Lighting Above the Island
Pendant lights above the kitchen island are one of the most defining design elements in any kitchen. They provide essential task lighting for the prep surface while creating a visual anchor that draws the eye. The standard recommendation is 2-3 pendant lights for a typical 6-8 foot island, spaced 24-30 inches apart and hung 30-36 inches above the countertop surface.
When selecting pendants, consider scale, style, and light output. The pendant diameter should be proportional to the island: typically 10-14 inches for standard islands, or one large 20-30 inch pendant for a bold statement. Glass or open-cage pendants distribute light broadly for task work, while opaque shades direct light downward for a more dramatic, focused effect.
For a modern aesthetic, consider a linear chandelier or track lighting system instead of individual pendants. Linear fixtures work especially well over longer islands (8 feet or more) where multiple pendants might look cluttered. Integrated LED linear fixtures provide even, shadow-free illumination and clean lines that complement contemporary kitchen designs.
Idea 8: Create a Multi-Zone Island Design
The most functional kitchen islands divide their surface into distinct zones, each optimized for a specific task. A well-designed multi-zone island might include a prep zone with a cutting board insert and prep sink, a cooking zone near a cooktop or hot pad area, a serving zone with elevated seating for casual dining, and a storage zone with pull-out organizers below.
Zone separation can be achieved through countertop material changes (butcher block for the prep zone, quartz for the rest), height changes (a raised bar section for dining), or simply through organized placement of fixtures and storage. The goal is to make each zone feel intentional so that multiple people can use the island simultaneously without interfering with each other.
For families with children, consider a homework or craft zone at one end of the island with dedicated electrical outlets for laptops and charging. This allows parents to supervise homework while cooking dinner, making the island a true family hub. Built-in book storage or a shallow drawer for school supplies keeps the zone organized without cluttering the cooking areas.
Kitchen Island Redesign Cost Breakdown
| Project | DIY Cost | Professional Cost | Impact Level |
|---|---|---|---|
| Paint island base | $100-$200 | $300-$600 | High |
| Replace countertop (quartz) | N/A | $1,500-$4,000 | Very High |
| Add waterfall edge | N/A | $500-$1,500 | High |
| New pendant lights | $150-$600 | $300-$1,000 | High |
| Pull-out drawer inserts | $200-$500 | $400-$1,000 | Medium |
| Add seating overhang | $200-$500 | $500-$1,200 | High |
| Prep sink installation | N/A | $800-$2,000 | Medium |
| Electrical outlets | N/A | $200-$500 | Medium |
| Complete island overhaul | $500-$1,500 | $3,000-$10,000 | Very High |
Common Kitchen Island Redesign Mistakes
The most common mistake is making the island too large for the kitchen. An oversized island that leaves less than 36 inches of clearance on working sides creates bottlenecks and makes the kitchen feel cramped. Always verify clearances before extending an island, and remember that appliance doors (dishwasher, oven, refrigerator) need space to open fully without hitting the island.
Ignoring the work triangle is another frequent error. The kitchen work triangle connects the sink, stove, and refrigerator, and the island should enhance this triangle, not obstruct it. If people have to walk around the island to move between these three points, the island is poorly positioned. Consider reconfiguring the island orientation or adjusting its position to improve workflow.
Choosing form over function leads to regret. A stunning waterfall marble island looks beautiful but may not serve your needs if you lack sufficient storage, seating, or prep space. Start with a list of functional requirements (how many seats, how much storage, what appliances or features), then design the aesthetics around those needs.
Frequently Asked Questions
How much does it cost to redesign a kitchen island? Kitchen island redesign costs range from $200-$500 for cosmetic updates (painting and new hardware) to $3,000-$10,000 for a complete overhaul including new countertop, storage upgrades, electrical, and plumbing. The most popular mid-range option, a new quartz countertop with painted base and updated lighting, typically costs $2,500-$5,000.
Can I add a kitchen island to my existing kitchen? Yes, if your kitchen has sufficient floor space. A kitchen needs at least 10x10 feet of open floor area to accommodate a small island with proper clearances. For islands with seating, you need at least 12x12 feet. Freestanding and mobile islands are the easiest to add and require no installation. Built-in islands with plumbing or electrical need professional installation.
What is the best countertop material for a kitchen island? Quartz is the most popular choice in 2026 due to its durability, low maintenance, and consistent appearance. For a warmer look, butcher block adds natural character and is ideal for prep zones. Granite remains a classic option for those who prefer natural stone variation. Consider using mixed materials: a durable quartz main surface with a butcher block section for chopping.
How many stools should a kitchen island have? Allow 24 inches of counter width per standard stool or 30 inches for stools with arms. A 6-foot island comfortably seats 3 standard stools; an 8-foot island seats 4. Do not overcrowd seating, as cramped stools discourage use. It is better to have fewer stools with comfortable spacing than to maximize the count.
Should my kitchen island match my cabinets? A contrasting island color is one of the strongest kitchen design trends in 2026 and is recommended by most designers. A different color or finish on the island creates a focal point and adds depth to the kitchen. Popular combinations include white perimeter cabinets with a navy, black, or wood-tone island. However, matching is also a valid choice for a unified, seamless look.
Visualize Your Kitchen Island Redesign
See what your redesigned kitchen island could look like before making any changes. HanoDecor's kitchen remodel visualizer lets you upload a photo of your current kitchen and experiment with different island colors, countertop materials, and design styles. Generate multiple options, compare them side by side, and share your favorites with family or contractors for feedback.
Browse our kitchen design ideas gallery for more island inspiration, from minimalist modern to warm farmhouse and everything in between. Your dream kitchen island is closer than you think.
Related Articles
How to Redesign a Kitchen: 13 Essential Steps for a Beautiful Makeover — Complete step-by-step kitchen redesign guide from planning through completion.
How to Redesign Your Kitchen Layout: 7 Proven Flow Optimization Tips — Optimize your kitchen layout for better workflow and traffic flow.
How to Redesign Kitchen Countertops: 2026 Materials and Cost Comparison — Detailed material comparison and cost guide for countertop upgrades.
How to Redesign a Kitchen Island FAQs
Written by
Priya Sharma
Priya is an award-winning UX designer who previously led design teams at Airbnb and Pinterest. Her focus on user-centered design ensures that HanoDecor's tools are intuitive and accessible to everyone, regardless of their technical background.