How to Remodel a Closet: Custom Storage Without the Custom Price
Quick Summary
A step-by-step guide to remodeling closets of all sizes — from reach-in coat closets to walk-in primary suites. Covers measuring, planning storage zones, choosing between wire, melamine, and solid wood systems, DIY installation, lighting upgrades, accessories, and cost comparisons between DIY, semi-custom, and professional custom builds.
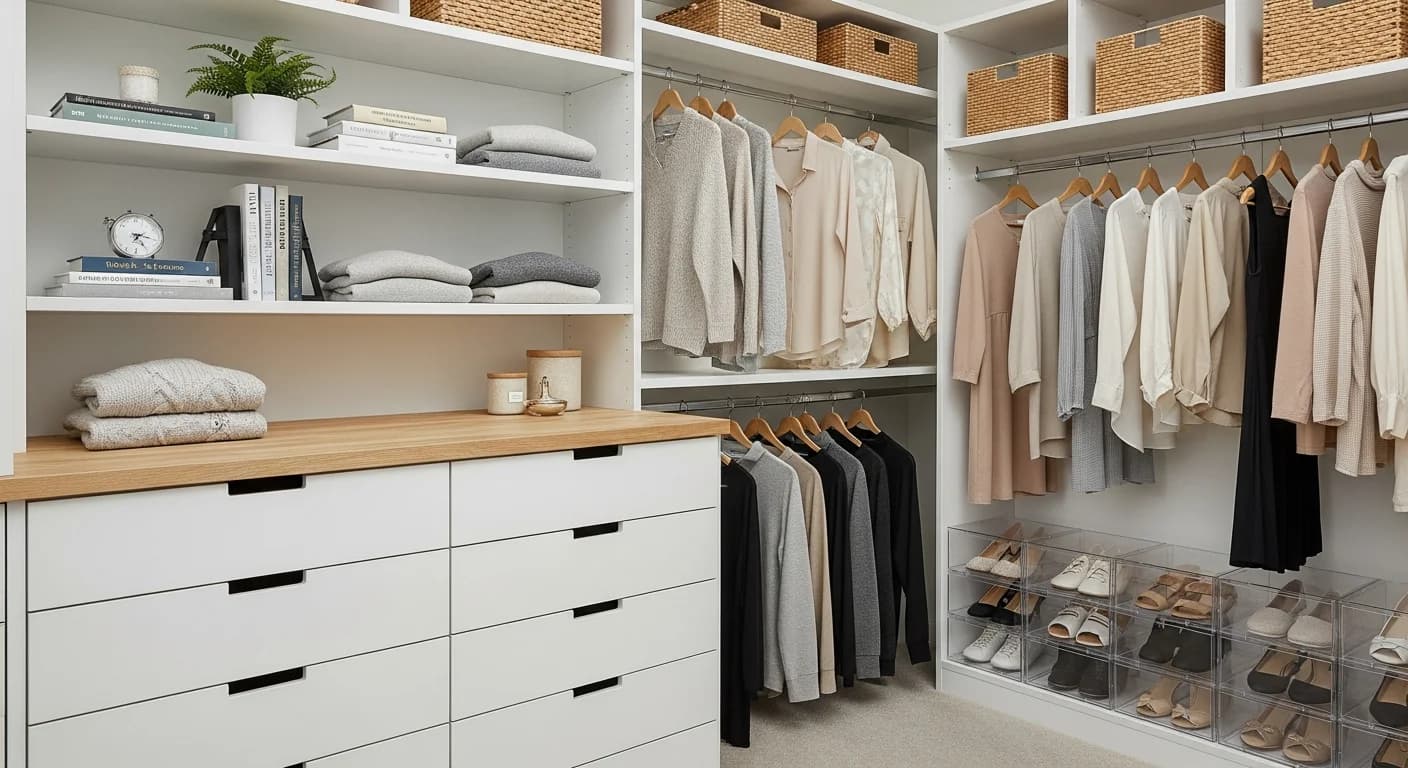
Knowing how to remodel a closet can transform one of the most underutilized spaces in your home into an organized, functional storage system that rivals custom built-ins at a fraction of the cost. The average American closet wastes 40 percent of its available space because builder-grade single-rod-and-shelf configurations do not account for the variety of items — shoes, folded clothes, hanging garments, accessories, and seasonal gear — that modern households need to store.
A well-planned closet remodel maximizes every vertical and horizontal inch through double-hung rods, adjustable shelving, drawer inserts, shoe racks, and specialized accessories. According to the National Association of Realtors, organized closet systems rank among the top 10 features buyers look for when house shopping, and a closet remodel recoups 50 to 80 percent of its cost at resale. Whether you have a 24-square-foot reach-in or a 100-square-foot walk-in, this guide covers everything from measurement and design to installation and styling.
Measuring and Planning Your Closet Layout
Accurate measurements are the foundation of a successful closet remodel. Measure the width, depth, and height of every wall inside the closet. Note the locations of outlets, light switches, door frames, and any HVAC vents that cannot be moved. Mark stud locations with a stud finder — shelving brackets and vertical panels must anchor into studs for structural support, especially when holding heavy items like shoe collections or stacked storage bins.
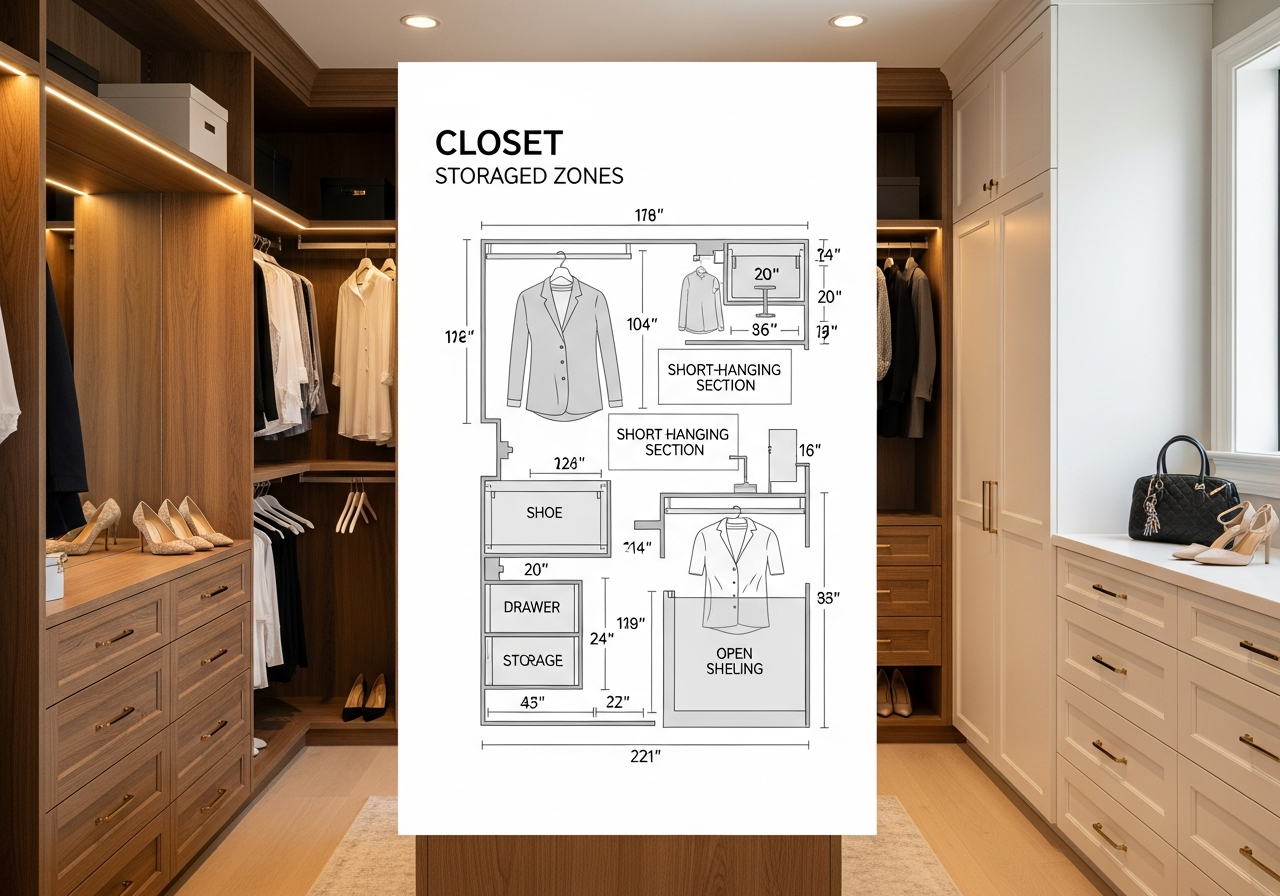
Standard closets have 96-inch ceilings, 24-inch depth for reach-ins, and 24-to-28-inch depth for walk-ins. Most builder-grade closets waste the top 24 to 30 inches of wall height with a single shelf set at 66 inches. By extending shelving to within 12 inches of the ceiling, you gain an entire additional shelf row for seasonal items, luggage, and infrequently used gear. Plan your layout around five storage zones: long hang, short hang (double rod), shelving, drawers, and shoe storage. For bedroom closet integration, see our bedroom remodel guide and closet redesign ideas.
Choosing a Closet System: Wire, Melamine, or Solid Wood
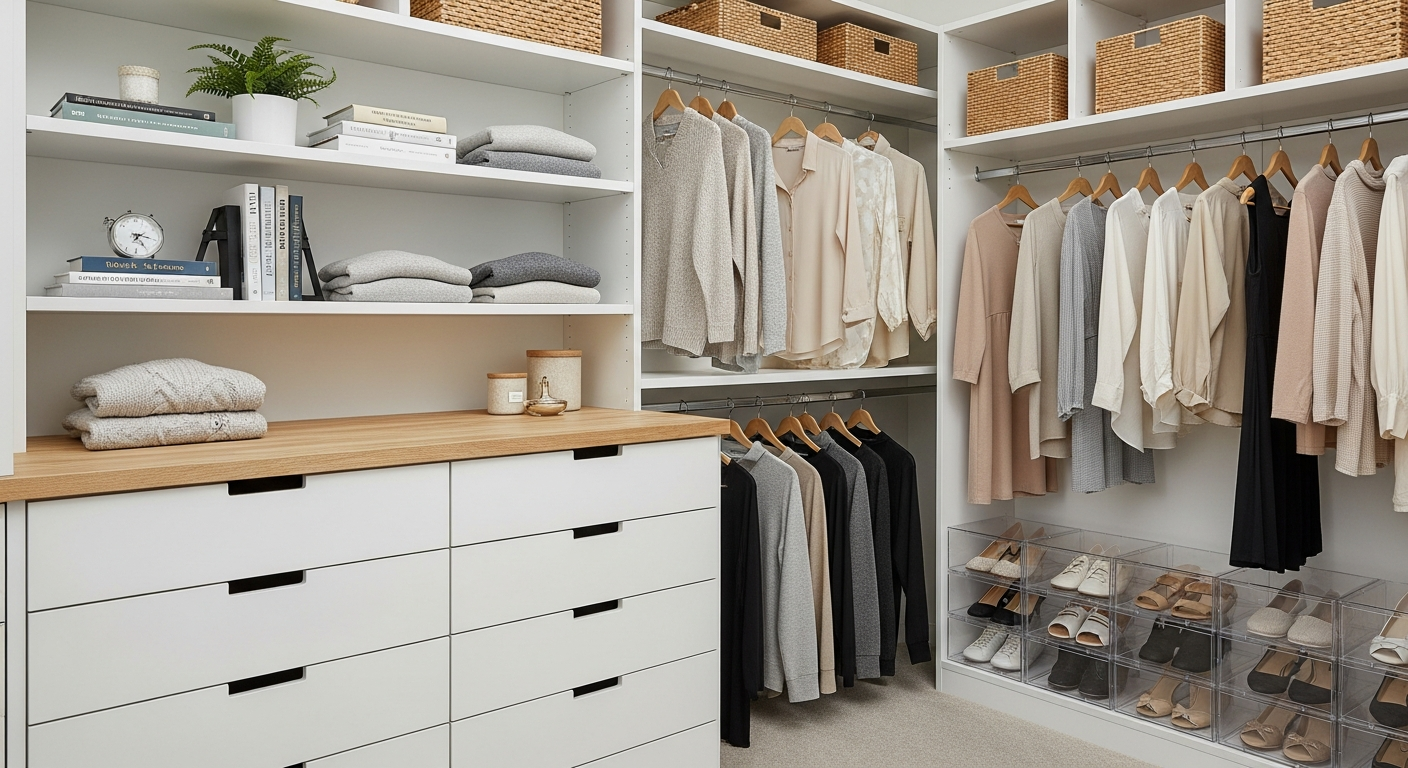
The three main closet system materials each offer different price points, aesthetics, and durability characteristics. Wire systems (like ClosetMaid or Rubbermaid) are the most affordable at $1 to $3 per linear foot, install quickly with basic tools, and allow air circulation that prevents musty odors. However, wire shelves create indentations on folded clothes and have a utilitarian look that does not suit primary bedroom closets.
| System Type | Cost per Linear Foot | DIY Difficulty | Appearance | Best For |
|---|---|---|---|---|
| Wire (ClosetMaid, Rubbermaid) | $1-$3 | Easy | Basic/Utilitarian | Utility closets, pantries, laundry |
| Melamine/Laminate (IKEA PAX, Modular) | $5-$15 | Moderate | Clean/Modern | Bedroom closets, reach-ins |
| Solid Wood/Plywood (Custom or DIY) | $15-$40 | Moderate-Hard | Premium/Custom | Walk-in primary suites |
| Professional Custom (California Closets) | $25-$75+ | N/A (installed) | Luxury/Custom | High-end walk-ins, showpiece closets |
Melamine and laminate systems from IKEA PAX, Elfa, and similar modular brands offer the best balance of appearance and affordability for most homeowners. These systems use pre-finished panels that look like real wood, accept standard hardware and accessories, and can be assembled with basic tools in a weekend. For a truly custom look on a moderate budget, building your own system from 3/4-inch plywood with edge banding and paint or stain gives you full control over dimensions and finishes. For closet design inspiration, browse our bedroom design ideas gallery.
Designing Storage Zones for Maximum Efficiency
The most organized closets divide space into purpose-specific zones. The long-hang zone accommodates dresses, coats, and robes that need 60 to 70 inches of vertical clearance below the rod. The double-hang zone stacks two rods — one at 40 inches and one at 80 inches — to double the hanging capacity for shirts, blouses, folded pants, and jackets that need only 34 to 38 inches of vertical space. Most wardrobes are 60 to 70 percent short-hang items, making double rods the single most effective space maximizer.
Shelving zones work best for folded sweaters, jeans, t-shirts, and storage bins. Space shelves 10 to 12 inches apart for folded clothing and 14 to 16 inches apart for shoe boxes and storage bins. Adjustable shelf pins allow you to reconfigure heights as your wardrobe changes. Drawer inserts — either built-in drawers or fabric drawer units that slide into shelf cubbies — contain small items like socks, underwear, belts, and jewelry that would create clutter on open shelves.
DIY Closet Remodel: Step-by-Step Installation
A DIY closet remodel using a melamine modular system or custom plywood build can be completed in a weekend. Start by removing the existing rod, shelf, and any hardware. Patch screw holes with spackle and paint the closet walls white or a light neutral — this brightens the interior and creates a clean backdrop for the new system. Mark stud locations and transfer your layout design to the walls with a level and pencil.
Install vertical divider panels first — these are the structural backbone of the system and must be anchored to studs or secured to the wall with toggle bolts in drywall. Level each panel carefully because all shelves and rods reference these verticals. Next, install horizontal shelves using shelf pins, cleats, or bracket supports. Hang closet rods on rod sockets attached to vertical panels or side walls. Finally, add accessories: hooks on the back of the door, pull-out tie and belt racks, and valet rods for outfit planning.
Closet Lighting: From Dark Cave to Bright Boutique
Lighting is the most overlooked upgrade in a closet remodel. Most builder-grade closets have a single overhead fixture or no light at all — making it impossible to distinguish navy from black or match outfit colors accurately. LED strip lighting along shelf edges or under each shelf tier provides even illumination throughout the closet. Battery-powered or rechargeable LED puck lights are a no-wiring solution that installs with adhesive backing in minutes.
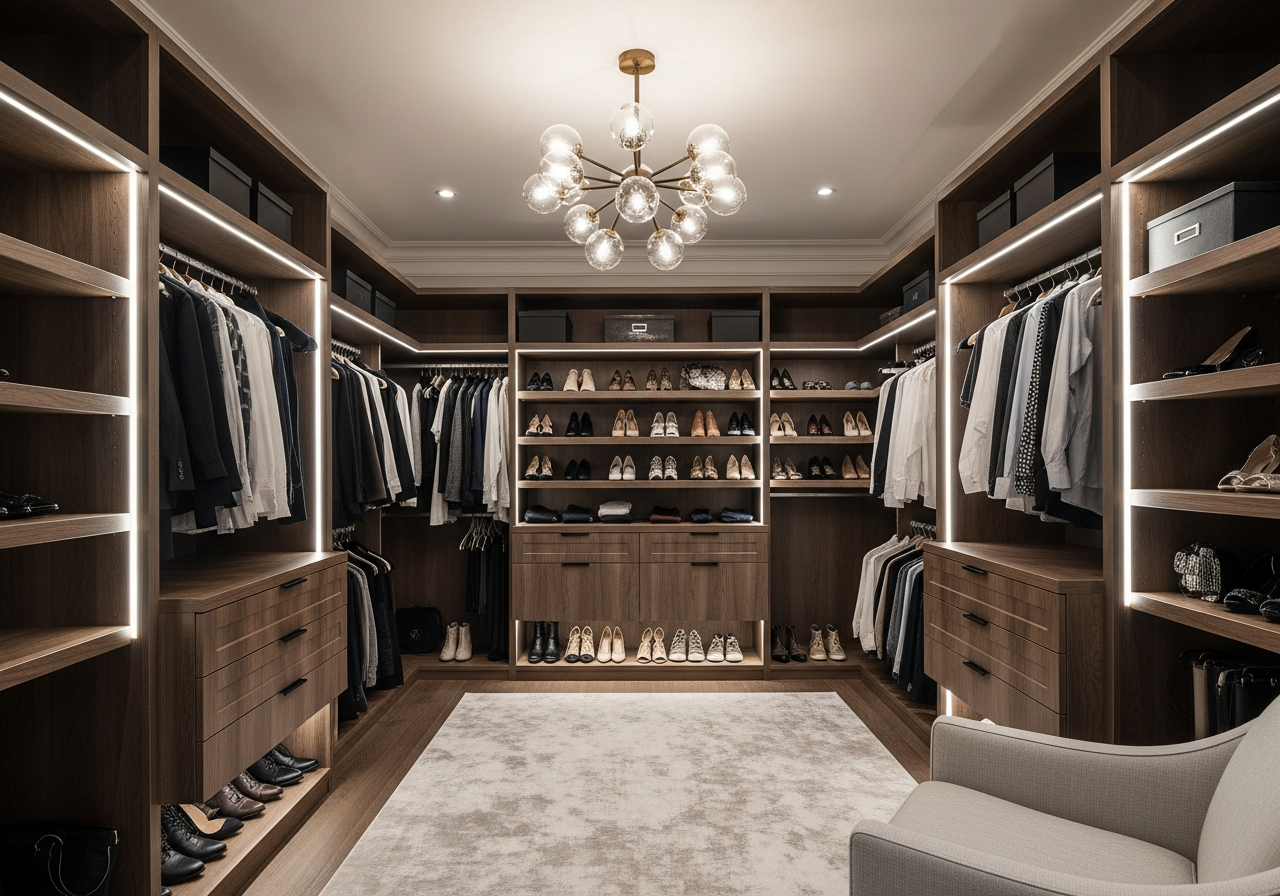
For walk-in closets, consider a central flush-mount LED fixture (at least 1,500 lumens for a 50-square-foot space) supplemented by under-shelf strip lighting. Motion-sensor switches that activate lights when you open the door or enter the closet add convenience and prevent the lights from being left on. A color rendering index (CRI) of 90 or above ensures that garment colors appear accurate under the closet lighting — essential for matching outfits before you step into natural daylight. Our recessed lighting guide covers additional fixture options for adjacent rooms.
Reach-In vs. Walk-In Closet Remodel Strategies
Reach-in closets (typically 2 to 6 feet wide and 24 inches deep) require maximizing the back wall and sometimes the two short side walls. Use the full height from 12 inches off the floor to 12 inches below the ceiling. Bi-fold or sliding doors provide access to the full width without requiring swing clearance. For reach-in closets under 4 feet wide, a single vertical divider with double-hung rods on one side and shelves on the other creates the most balanced layout.
Walk-in closets offer more flexibility with two or three usable walls plus the possibility of a center island in larger spaces. The most efficient walk-in layout uses an L-shape or U-shape configuration with 36-inch-wide walkways between opposing storage walls. Walk-ins over 7 feet wide can accommodate a center island with drawers for jewelry, accessories, and folded items, plus a countertop for packing or outfit assembly. For bedroom-adjacent closet transformations, see our bedroom remodel guide.
Closet Accessories That Add Custom-Level Functionality
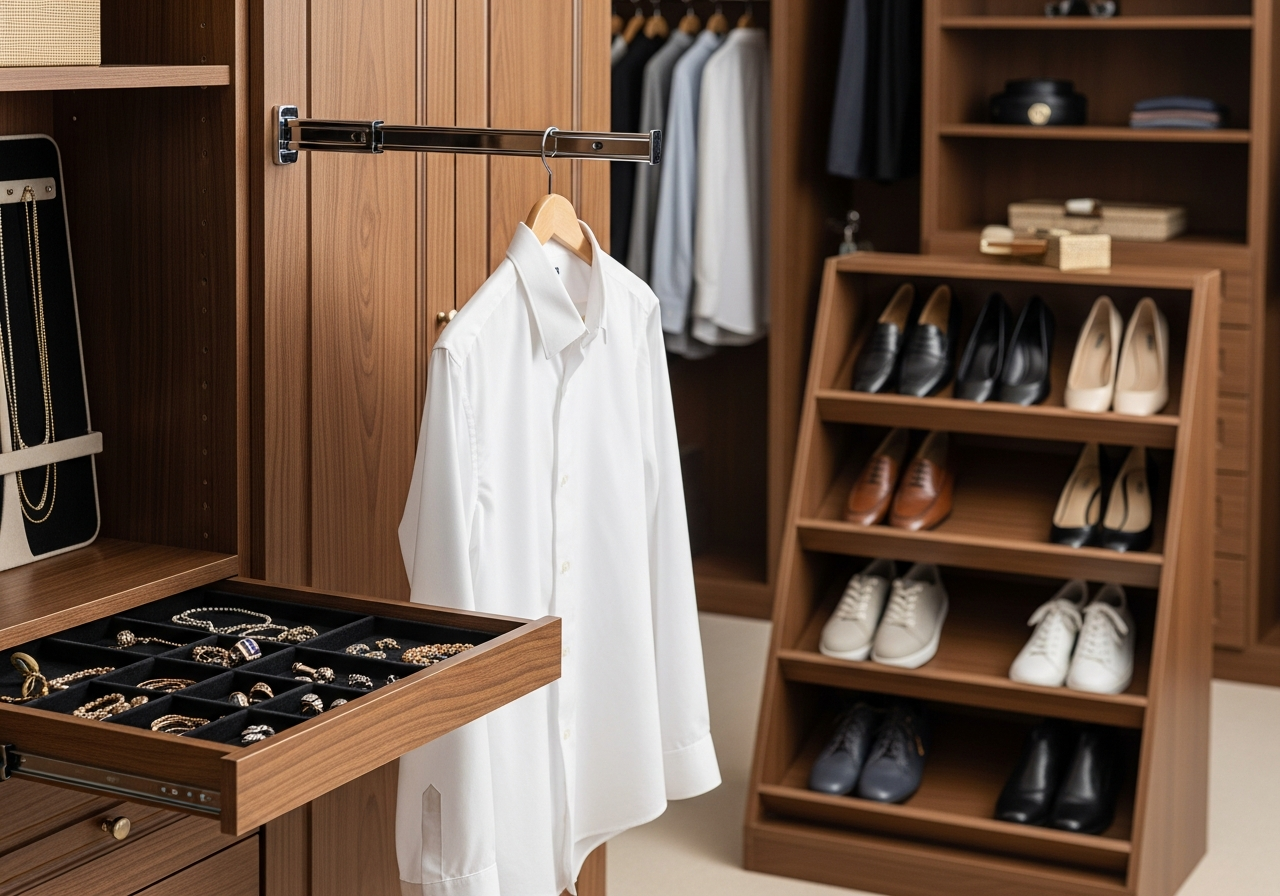
The right accessories elevate a basic shelving system into a truly functional wardrobe management tool. Pull-out valet rods ($8 to $15 each) extend from vertical panels to provide a temporary hanging spot for outfit planning. Velvet-lined jewelry drawers with dividers ($40 to $100) protect accessories while keeping them visible and accessible. Tilt-out hamper baskets ($25 to $60) hide dirty laundry behind a clean cabinet front.
Shoe storage deserves special attention because footwear is the most common source of closet floor clutter. Angled shoe shelves display shoes visibly and fit 30 to 50 percent more pairs than flat shelves. Over-the-door shoe organizers work for reach-in closets with limited floor space. Clear drop-front shoe boxes ($2 to $4 each) stack neatly on shelves while keeping shoes dust-free and visible. For a coordinated bedroom and closet renovation, explore our closet redesign guide.
Closet Remodel Cost Comparison
A DIY closet remodel using modular components costs $200 to $1,500 depending on closet size and material quality. A semi-custom system from a home improvement store with professional installation runs $1,500 to $4,000. A fully custom closet from a specialty company like California Closets or Closets by Design ranges from $3,000 to $10,000 or more for a walk-in primary closet. The DIY approach delivers 70 to 90 percent of the functionality and appearance of a custom system at 10 to 25 percent of the cost.
The most cost-effective approach is a hybrid: buy a modular melamine system from IKEA or a similar retailer, supplement with custom-cut plywood shelves for non-standard dimensions, and add premium hardware and accessories for a custom feel. Total cost for a 6-foot reach-in closet using this method: $400 to $800. Total cost for an 8-by-8-foot walk-in: $1,200 to $2,500. Both deliver organized, attractive storage that looks professionally installed. For broader budget strategies, see our remodel budgeting guide.
Frequently Asked Questions
How long does a closet remodel take?
A DIY closet remodel using a modular system can be completed in 1 to 2 days for a reach-in closet and 2 to 3 days for a walk-in. Professional custom closet installations typically take 1 to 2 days of on-site work, plus 2 to 4 weeks of lead time for design, measurement, and fabrication. Painting the closet interior adds one day of prep and drying time before installation begins.
Do I need a permit to remodel a closet?
Closet remodels that only involve shelving, rods, lighting, and cosmetic changes do not require building permits in most jurisdictions. However, if you are adding electrical outlets, relocating walls to expand the closet, or converting a closet into a different use (like a home office), you may need an electrical or building permit. Always check with your local building department for specific requirements in your area.
Can I turn a small bedroom into a walk-in closet?
Yes, converting a small adjacent bedroom into a walk-in closet or dressing room is a popular remodel for primary suites. This conversion typically costs $3,000 to $8,000 including removing or widening the connecting doorway, installing closet systems on three walls, adding appropriate lighting, and finishing walls and flooring. However, removing a bedroom reduces the official bedroom count of your home, which can affect resale value — weigh this trade-off carefully.
What is the best closet system for renters?
Freestanding closet systems that do not require wall mounting are ideal for renters. The IKEA PAX system, Elfa freestanding frames, and tension-rod-based systems can be installed without drilling into walls and removed when you move. Freestanding garment racks, stackable cube organizers, and over-the-door hooks provide additional storage without any permanent modifications to the rental unit.
How do I prevent musty odors in a remodeled closet?
Proper ventilation is key to preventing musty closet odors. Leave the closet door open when not in use, install a small louvered vent in the door if it remains closed, and ensure the closet is not located against a poorly insulated exterior wall that could create condensation. Wire shelving allows more air circulation than solid shelves. Cedar blocks or sachets provide natural odor absorption, and a small rechargeable dehumidifier works well in humid climates.
Related Articles
Continue your home organization journey: How to Remodel a Bedroom covers the full room renovation that often accompanies a closet upgrade. How to Redesign a Bedroom explores design principles for creating a cohesive suite. Small Bedroom Ideas addresses space-saving strategies when closet and bedroom square footage are both limited. And How to Remodel a Laundry Room covers another high-impact organizational renovation.
Design Your Dream Closet with HanoDecor
Ready to visualize your closet transformation? Upload a photo of your current closet to our AI Room Designer and see how different shelving configurations, finishes, and layouts would look in your actual space. Preview walk-in configurations, reach-in maximization layouts, and different material finishes — from bright white melamine to warm wood tones — before purchasing a single component.
How to Remodel a Closet FAQs
Written by
Lisa Wang
Sustainable Design Writer focused on eco-friendly materials, energy efficiency, and budget-conscious home improvement. LEED Green Associate with expertise in low-impact renovation strategies.