12 Exterior Painting Mistakes That Ruin Curb Appeal (and How to Avoid Them)
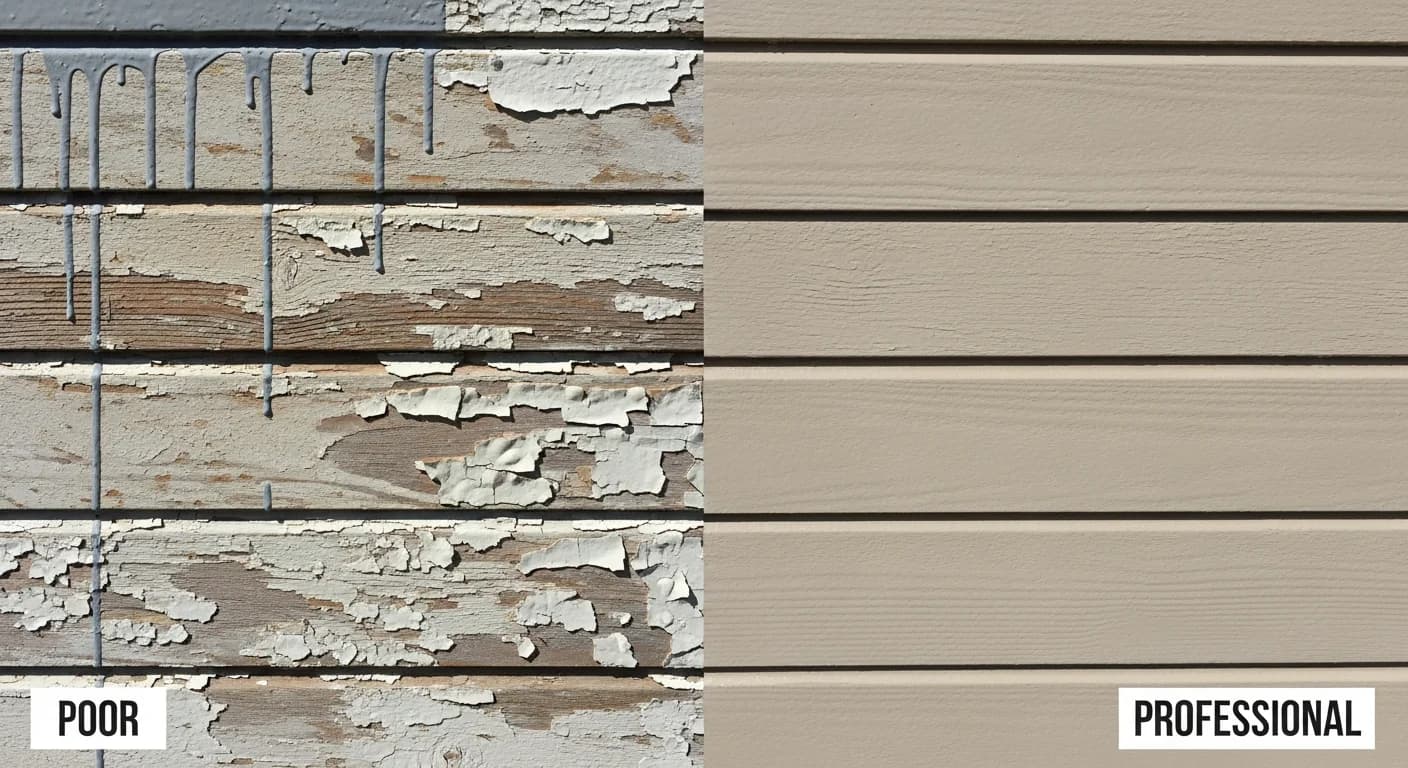
After painting hundreds of homes over a twenty-year career, I have seen every exterior painting mistake imaginable — and I have spent countless hours fixing the expensive consequences. The frustrating truth is that 80% of exterior paint failures are entirely preventable. They trace back to the same twelve mistakes that homeowners and even some inexperienced contractors make repeatedly. Each error costs anywhere from a few hundred dollars in touch-up work to $8,000 or more in complete stripping and repainting. This guide catalogs every major mistake, explains why it causes failure, and gives you the specific techniques to avoid each one. Whether you are planning a DIY project or hiring professionals, knowing these pitfalls will save you thousands and help you achieve a paint job that lasts.
Why Exterior Paint Jobs Fail (It Is Usually Preventable)
The exterior of your home faces constant assault from UV radiation, rain, wind, temperature extremes, humidity, mold, insects, and physical impact. A properly applied paint system is engineered to withstand all of these forces for 7 to 15 years depending on the substrate and paint quality. When paint fails prematurely — peeling after 2 years, fading after 1 year, or blistering within months — the cause is almost always a human error during preparation or application, not a defective product.
The average cost to fix a botched exterior paint job ranges from $3,000 to $8,000 — and that is on top of what was already spent on the failed job. Stripping poorly adhered paint, re-prepping damaged substrates, and reapplying a complete paint system essentially doubles the project cost. The math is clear: spending extra time and attention to avoid mistakes is dramatically cheaper than fixing them afterward.
Understanding these twelve mistakes transforms you from a vulnerable homeowner into an informed consumer who can evaluate contractor work quality, plan DIY projects effectively, and recognize problems before they become expensive failures. Every mistake listed here includes the cause, the consequence, and the professional solution. Review the full cost of painting a house to understand how these mistakes impact your budget.
Mistake 1 — Skipping or Rushing Surface Preparation
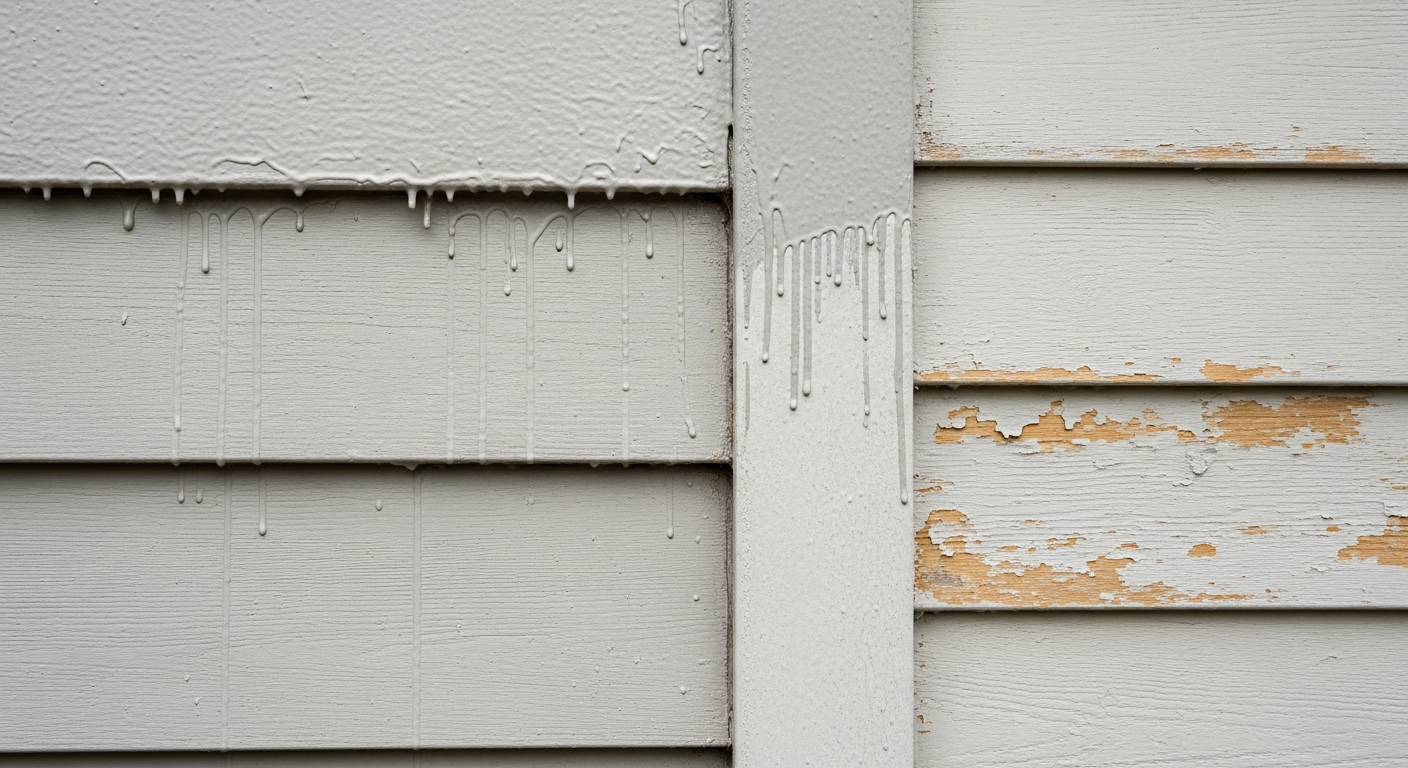
This is the number one cause of exterior paint failure. Surface preparation — cleaning, scraping, sanding, repairing, and priming — accounts for 60% of a professional painter's time on any exterior project. When homeowners or inexperienced painters rush through prep to get to the "fun part" of applying color, they create the conditions for peeling, flaking, and adhesion failure within months.
Paint does not bond to dirty, chalky, glossy, or loose surfaces. It needs a clean, dry, slightly textured substrate with sound adhesion to the underlying material. Skipping power washing leaves dirt, mildew, and chalky residue that prevents adhesion. Skipping scraping leaves loose paint that will peel and take the new coat with it. Skipping sanding on glossy surfaces prevents the mechanical bond that paint needs to grip.
The solution is straightforward: follow a systematic preparation process and do not cut corners. Our complete surface prep guide walks through all seven steps in detail. Professional painters estimate that proper prep adds $1 to $2 per square foot to the project cost — a fraction of what you will spend fixing failures caused by skipping it.
Mistake 2 — Painting in Wrong Weather Conditions
Painting outside the safe temperature and humidity range guarantees film formation problems. Latex paint requires 50°F to 85°F air and surface temperature with 40% to 70% relative humidity for proper coalescence. Painting in conditions outside these ranges — whether it is a scorching 95°F afternoon or a 40°F morning — prevents the paint from forming a continuous, durable film.
Hot weather causes surface skinning before lower layers dry, leading to blistering and lap marks. Cold weather prevents resin particles from fusing together, creating a weak, powdery film with poor adhesion. High humidity slows drying to the point where mold can grow in the curing paint. Morning dew on surfaces creates moisture pockets that cause blistering within weeks.
The fix is planning and patience. Check the complete weather conditions guide before every painting session. Monitor not just air temperature but surface temperature using an infrared thermometer. Target the 60°F to 77°F sweet spot when possible, and always check that surfaces are at least 5°F above the dew point before starting.
Mistake 3 — Using the Wrong Paint for Your Siding Type
Different siding materials require different paint formulations, and using the wrong one causes predictable failure. Vinyl siding requires vinyl-safe paint that will not cause heat distortion — painting vinyl a dark color with standard paint can cause the siding to warp permanently. Stucco needs elastomeric coatings that can flex with the substrate's movement and bridge hairline cracks. Bare wood needs oil-based or specialized bonding primer before topcoating.
Each substrate has unique porosity, adhesion characteristics, and expansion rates. Using a paint designed for wood on brick, or a brick-specific product on vinyl, creates a mismatch between the coating's flexibility and the substrate's movement pattern. Review our guide to painting different siding types to match the right products to your home's materials.
When in doubt, consult the paint manufacturer's technical data sheet (TDS), which lists approved substrates for each product. Premium brands like Sherwin-Williams, Benjamin Moore, and Behr provide detailed substrate compatibility information on their websites and on the can labels. Never assume that a "universal" paint works equally well on all surfaces — it rarely does.
Mistake 4 — Skipping Primer When It Is Required
Primer is not optional when painting bare wood, changing from dark to light colors, or painting over stains and tannin-rich substrates. Primer provides three critical functions that topcoat paint alone cannot deliver: it seals porous substrates to prevent uneven absorption, it creates a bonding layer between incompatible surfaces, and it blocks stains and tannin from bleeding through the topcoat.
Self-priming paints like Sherwin-Williams Duration and Behr Marquee are excellent products, but even these have limitations. They work well for repainting over sound, previously painted surfaces with similar colors. They do not replace dedicated primer on bare wood, raw stucco, new fiber cement, or when making drastic color changes. A dedicated primer like Zinsser Cover Stain or Sherwin-Williams Extreme Bond costs $25 to $45 per gallon and prevents problems that would cost ten times more to fix.
The most common primer-related mistake is painting bare wood without priming the same day. Bare wood begins absorbing moisture and UV radiation immediately after being exposed, and after just a few days, the surface degrades enough to compromise adhesion. If you scrape down to bare wood during prep, prime it the same day — never leave bare wood exposed overnight.
Mistake 5 — Applying Too Thick or Too Thin
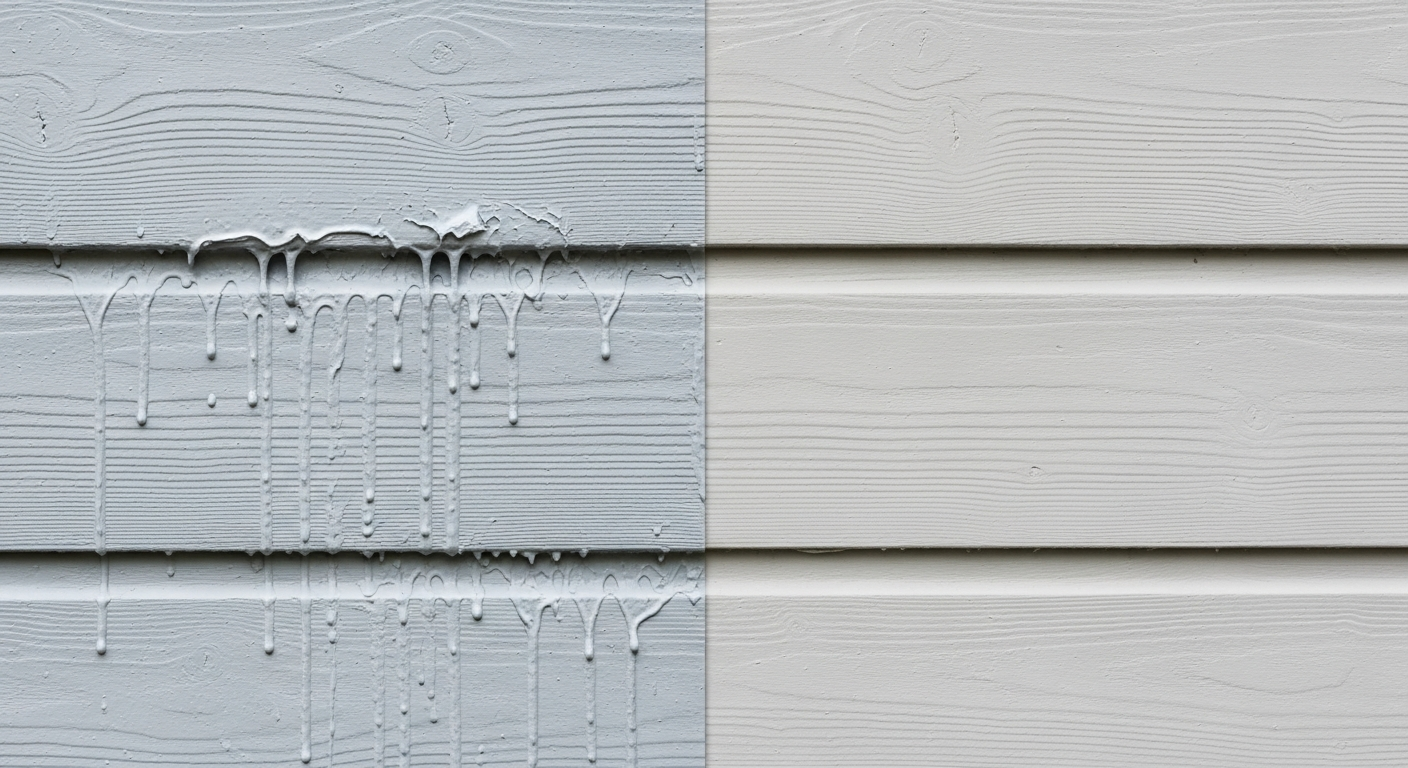
"Two thin coats, not one thick coat" is the single most important application rule in painting. A thick coat might seem like a time-saver, but it dries unevenly, traps solvents, creates drips and sag marks, and takes two to three times longer to cure. The surface skins over while the interior stays wet, leading to wrinkling, cracking, and eventual peeling.
Conversely, applying too thin a coat provides inadequate protection and color coverage. Thin coats allow UV radiation to penetrate to the substrate, accelerating deterioration. They also provide insufficient film thickness to bridge surface imperfections and resist moisture infiltration.
The target wet film thickness for most exterior paints is 4 to 6 mils (thousandths of an inch), which dries to approximately 1.5 to 2.5 mils per coat. Two coats at this thickness provide the manufacturer's intended 3 to 5 mil dry film that delivers rated durability and coverage. Use a wet film thickness gauge if you want to verify — they cost under $10 and ensure you are applying the right amount on every stroke.
Mistake 6 — Using Low-Quality Paint and Tools
Cheap paint is the most expensive paint you can buy. Budget exterior paints at $25 to $35 per gallon use lower concentrations of titanium dioxide (for opacity), less acrylic resin (for adhesion and flexibility), and fewer UV-blocking additives (for fade resistance). The result is paint that fades within 2 to 3 years, chalks prematurely, and needs replacement in half the time of a quality product.
Tool quality matters almost as much as paint quality. Cheap roller covers shed fibers into your finish, creating a textured, unprofessional appearance. Bargain brushes lose bristles, leave streaks, and make cutting in nearly impossible. Professional-grade tools — Purdy or Wooster brushes, high-density roller covers, quality sprayer tips — cost 2 to 3 times more than economy options but produce visibly better results and last for multiple projects.
The economic calculation is simple. On a 2,500 square foot home requiring 15 gallons of paint, upgrading from $30/gallon budget paint to $65/gallon premium paint costs about $525 extra. That premium paint will last 10 to 15 years instead of 4 to 6 years, saving you an entire repainting cycle worth $4,000 to $7,000. The return on investing in quality materials is enormous.
Mistake 7 — Ignoring Moisture and Drainage Issues
Painting over moisture problems is like putting a bandage on a broken pipe. If your home has clogged gutters, poor grading, leaking flashing, or missing kick-out diverters, water is reaching your siding from behind the paint film. No paint — regardless of quality — can withstand sustained moisture pressure from the substrate side. The water pushes the paint off from behind, causing blistering and peeling that no amount of repainting will fix.
Before any exterior painting project, inspect and repair all moisture management systems. Clean and repair gutters. Verify that grading slopes away from the foundation. Check flashing around windows, doors, and roof transitions. Repair or replace any damaged moisture barriers. These repairs might cost $200 to $1,000 but they protect your $5,000+ paint investment from premature failure.
Moisture-related paint failure is especially common on lower siding near foundation plantings, below window sills, and at roof-to-wall transitions. If you see paint peeling in these areas specifically, investigate the moisture source before repainting. Simply repainting over the problem area will produce the same failure within a year.
Mistake 8 — Wrong Color Testing Method
Testing a single paint swatch on one wall at one time of day is a recipe for painter's remorse. Colors look dramatically different based on sunlight direction, time of day, surrounding landscape colors, and the texture and material of your siding. A color that looks perfect on a north-facing wall at noon might look completely wrong on a south-facing wall at sunset.
The professional approach is to paint large samples (at least 2 feet by 2 feet) on multiple walls — north, south, east, and west faces — and observe them at different times of day over 2 to 3 days. Light Reflective Value (LRV) is particularly important for exterior colors because high-LRV colors appear brighter and more intense in direct sunlight than they do on a paint chip under store lighting.
Even better, use HanoDecor's AI House Painter to preview colors on your actual home digitally before committing to physical samples. This saves time, eliminates waste, and helps you narrow your choices from dozens to two or three before investing in sample quarts. Explore our exterior paint ideas for proven color combinations that work across different styles and lighting conditions.
Mistake 9 — Poor Tape and Masking Technique
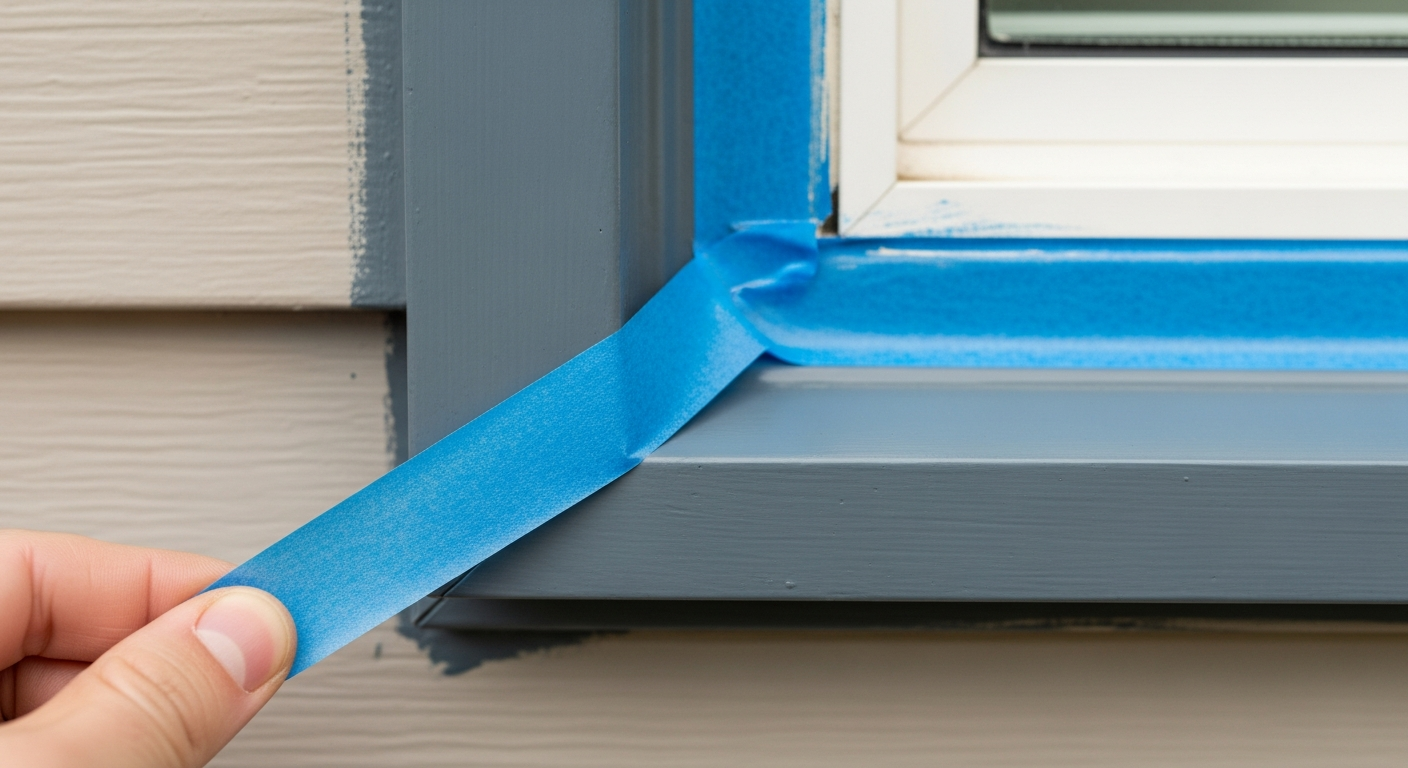
Painter's tape is both the most used and most misused tool in exterior painting. The two most common tape mistakes are not pressing edges firmly enough (allowing paint to bleed underneath) and removing tape too late (pulling cured paint off with it). Both create ragged, unprofessional paint lines that require tedious touch-up work.
For clean lines, press tape edges firmly using a putty knife or tape tool — especially the edge where paint will contact the tape. Use quality tape like FrogTape or 3M ScotchBlue, which create better seals than cheap masking tape. Remove tape while the paint is still slightly tacky — typically 1 to 2 hours after the final coat. Pull at a 45-degree angle away from the paint line for the cleanest release.
Many professional painters actually skip tape on exterior work and instead rely on freehand cutting in — using a quality angled brush to create clean lines by hand. This technique is faster and avoids tape-related problems entirely, but it requires practice and a steady hand. If you are a DIY painter, taping is generally the safer approach until you develop cutting-in skills.
Mistake 10 — Neglecting Back-Brushing When Spraying
Spraying exterior paint without back-brushing is a shortcut that produces inferior results. Spray application deposits paint on the surface in a thin, even mist, but it does not work the paint into the texture and pores of the substrate. Back-brushing — following behind the sprayer with a brush or roller to work the sprayed paint into the surface — ensures full contact, eliminates thin spots, and provides the mechanical adhesion that spray-only application lacks.
The difference is measurable. Spray-and-back-brush application typically provides 15% to 25% better adhesion than spray-only application on textured surfaces like wood siding, stucco, and cedar shingles. On smooth surfaces like fiber cement or aluminum, the improvement is less dramatic but still meaningful.
Professional painting crews typically use a two-person team: one sprayer operator and one back-brush person working in tandem. The sprayer applies paint quickly and evenly while the back-brush person follows immediately behind, working the wet paint into the surface before it begins to set. This combination delivers the speed advantage of spraying with the adhesion quality of brush application.
Mistake 11 — Painting Over Mold or Mildew
Paint does not kill mold — it feeds it. Mold and mildew growing on exterior surfaces will continue growing under and through fresh paint, causing dark spots, discoloration, and paint lifting. The organic components in paint actually provide additional food for mold colonies, accelerating their growth once sealed beneath a paint film.
All mold and mildew must be killed and removed before painting. Use a solution of one part bleach to three parts water, apply with a pump sprayer, let it sit for 15 to 20 minutes, then scrub with a stiff bristle brush and rinse thoroughly. For severe mold, commercial mold removers like Jomax or Mold Armor provide stronger treatment. Allow surfaces to dry completely — 24 to 48 hours minimum — before priming and painting.
After treatment, consider using mildew-resistant paint in areas prone to mold growth — north-facing walls, shaded areas near trees, and surfaces near sprinkler systems. Products like Sherwin-Williams Duration, Benjamin Moore Aura, and Behr Marquee all include mildewcide additives that help prevent regrowth for years after application. Adding supplemental mildewcide to standard paint is also an option for high-risk areas.
Mistake 12 — Not Maintaining the Paint Job After Completion
A finished paint job requires ongoing maintenance to reach its full lifespan. Annual power washing removes dirt, pollutants, and organic growth that degrade the paint film over time. Inspecting caulk seals around windows, doors, and trim every spring catches failures before moisture infiltrates. Touching up chips, scratches, and worn areas immediately prevents small problems from becoming large ones.
The most critical maintenance areas are south- and west-facing walls (highest UV exposure), horizontal surfaces like windowsills and porch railings (standing water), and areas near landscaping (soil splash and biological growth). These surfaces degrade 2 to 3 times faster than protected areas and may need touch-up painting every 2 to 3 years even when the rest of the house looks fine.
Keep your leftover paint properly stored — sealed tightly, stored at room temperature between 50°F and 80°F, and labeled with the exact color name, code, brand, sheen, and date applied. Having matching paint available for touch-ups means you can address small problems in minutes rather than waiting until the entire house needs repainting. Maintaining your curb appeal is an ongoing commitment, not a one-time project.
Cost of Mistakes: What Each Error Can Cost You
Understanding the financial impact of each mistake helps prioritize prevention. Skipping surface prep leads to peeling within 1 to 3 years and costs $3,000 to $8,000 to strip and redo. Wrong weather conditions cause blistering and film failure, costing $1,500 to $4,000 in recoating. Wrong paint for siding type causes adhesion failure, running $2,000 to $6,000 depending on the extent.
Skipping primer results in tannin bleed, stain bleed-through, and poor adhesion — $800 to $2,500 to correct. Too-thick application causes drips, sags, and wrinkling — $500 to $2,000 in sanding and recoating. Cheap paint requires full repainting in 3 to 5 years instead of 10 to 15 — effectively doubling or tripling your total paint spend over 20 years.
Moisture issues destroy paint from behind — $1,000 to $5,000 including structural repairs. Wrong color choice requires a complete repaint at $3,000 to $7,000. Painting over mold costs $800 to $3,000 when mold pushes through and surfaces must be stripped and retreated. Prevention is always dramatically cheaper than correction.
Frequently Asked Questions
Can you paint over peeling exterior paint? Never paint over peeling paint. All loose, flaking, and peeling paint must be scraped back to a sound edge and sanded smooth before recoating. Painting over peeling paint traps the loose material beneath the new coat, and the new paint will peel along with the old. Sound, firmly adhered paint that is not peeling can be painted over after cleaning and light sanding for adhesion.
How many coats of exterior paint do I need? Two coats of quality exterior paint is the professional standard. Two coats provide the manufacturer-specified film thickness for rated durability, complete color coverage, and optimal weather resistance. A single coat may look acceptable initially but will show wear, fading, and thin spots much sooner. Some premium paints like Behr Marquee claim one-coat coverage, but even these perform better with two coats on exterior surfaces exposed to harsh weather.
What is the best tool for cutting in exterior trim? A high-quality 2.5-inch or 3-inch angled sash brush is the professional choice for cutting in around trim, windows, and doors. Purdy XL and Wooster Shortcut are excellent options. The angled design allows precise control along edges and into corners. Load the brush about one-third of the way up the bristles and make steady, even strokes. Practice on a less visible area before moving to prominent surfaces.
Should I back-brush when spraying exterior paint? Yes, always back-brush or back-roll when spraying exterior paint. Spraying alone deposits paint on the surface without working it into the texture and pores, resulting in weaker adhesion and potentially thin coverage in textured areas. Back-brushing immediately after spraying ensures full contact between paint and substrate and produces a more uniform finish. The only exception is smooth, non-porous surfaces like aluminum or vinyl where the spray pattern provides adequate coverage.
How do I know if a painter did a bad job? Warning signs of poor quality include: visible brush or roller marks, drips and sag marks, paint on windows and fixtures, uneven coverage (see-through spots), rough or gritty texture, paint peeling within the first year, overspray on landscaping or neighboring surfaces, and visible caulk gaps or unfilled holes. A professional job should look smooth, even, and clean with crisp lines around trim and no evidence of sloppy workmanship. If you see issues, address them with your contractor while the warranty is still active.
Get It Right the First Time — Visualize Before You Paint
The most expensive painting mistake of all is choosing the wrong color and having to repaint the entire house. Before committing to any color, use digital visualization tools to see exactly how your choices will look on your actual home in real-world conditions.
HanoDecor's AI House Painter lets you test unlimited colors on a photo of your home — body, trim, doors, and accents — so you can be 100% confident in your palette before the first can opens. No more guessing from tiny paint chips under fluorescent store lighting.
For a complete exterior vision including siding materials, landscaping, and architectural details, try HanoDecor's Exterior Visualizer. See your entire transformation planned out visually, then execute with confidence. Check our pricing page to find the right plan for your project, and browse the transformation gallery to see the dramatic results other homeowners have achieved.
12 Exterior Painting Mistakes That Ruin Curb Appeal (and How to Avoid Them) FAQs
Written by
Sarah Chen
Senior Color Consultant with 12 years of residential exterior design experience. Specializes in architectural color theory, paint technology, and curb appeal optimization.