Bathroom Remodel Before and After: 15 Stunning Transformations by Budget
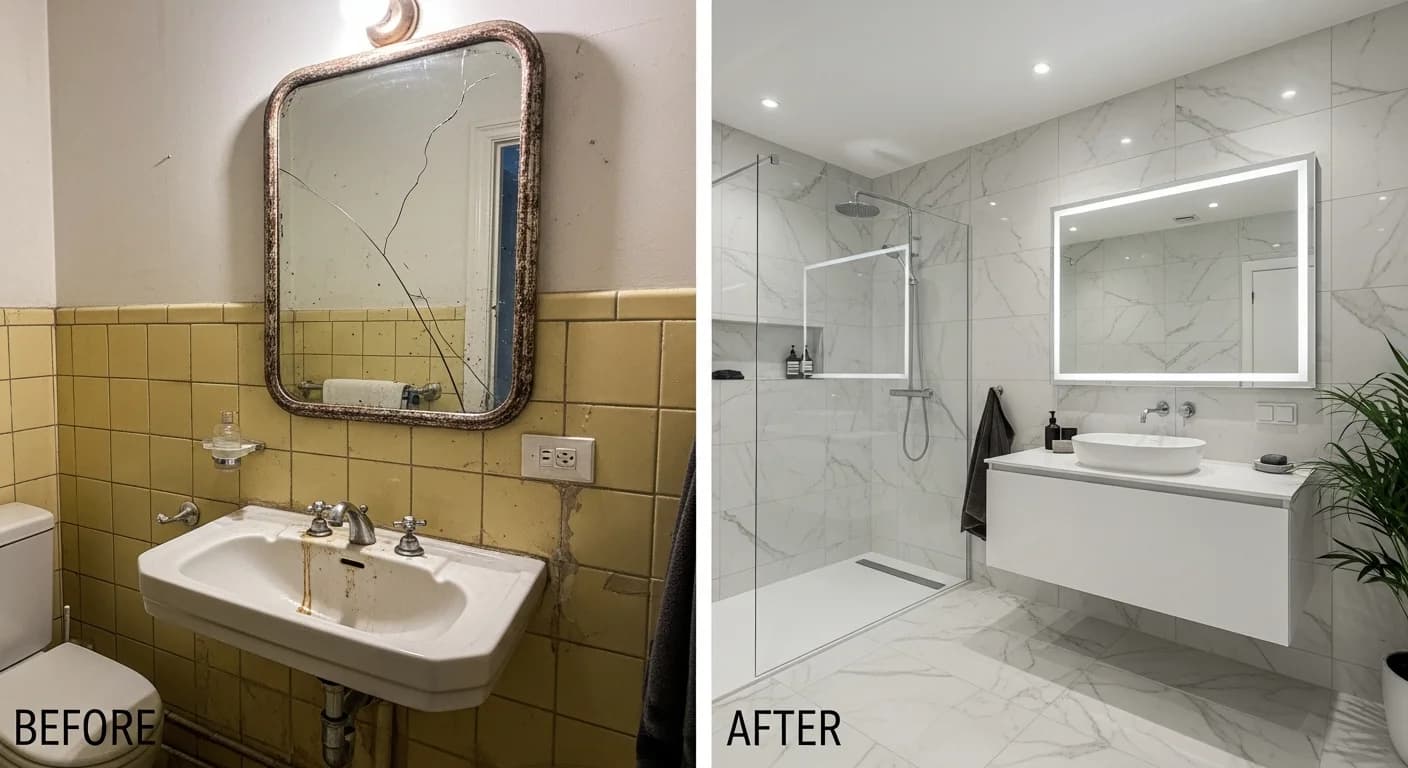
Nothing inspires a bathroom remodel quite like seeing real transformations. These 15 bathroom remodel before and after projects show what is achievable at every budget level, from a $300 weekend refresh to a $90,000 luxury master bath overhaul. Each transformation includes the scope of work, key changes, materials used, total cost, and timeline so you can find the project that matches your goals and budget.
Quick Summary
- Under $5K: Paint, hardware, accessories, and cosmetic updates deliver surprising impact
- $5K to $15K: New vanity, flooring, fixtures, and surface updates for a visible transformation
- $15K to $50K: Full renovations with new tile, walk-in showers, and layout improvements
- $50K+: Luxury master bath overhauls with premium materials, spa features, and custom everything
- Biggest visual impact: Lighting, tile, and removing visual clutter consistently produce the most dramatic before-and-after difference
Tier 1: Under $5,000 — Cosmetic Transformations
These projects prove that budget constraints do not prevent dramatic results. Strategic cosmetic changes transform dated bathrooms without touching plumbing or structural elements.
1. The $300 Weekend Warrior
Before: 1990s builder-grade guest bath with almond-colored fixtures, brass towel bars, and a cloudy mirror.
Scope: Accessory-only update. No painting, no plumbing.
Key changes: Replaced brass hardware with brushed nickel towel bars, toilet paper holder, and robe hooks. New shower curtain, bath mat, and coordinated accessories. Framed the existing mirror with adhesive trim kit. Added floating shelf for decorative storage.
Materials: Brushed nickel hardware set, mirror frame kit, shower curtain and rings, bath accessories.
Cost: $310 total. Timeline: 3 hours.
Lesson: Coordinated accessories create cohesion. Matching all metal finishes is the single fastest way to make a bathroom look intentional rather than assembled over decades.
2. The $800 Paint-and-Hardware Refresh
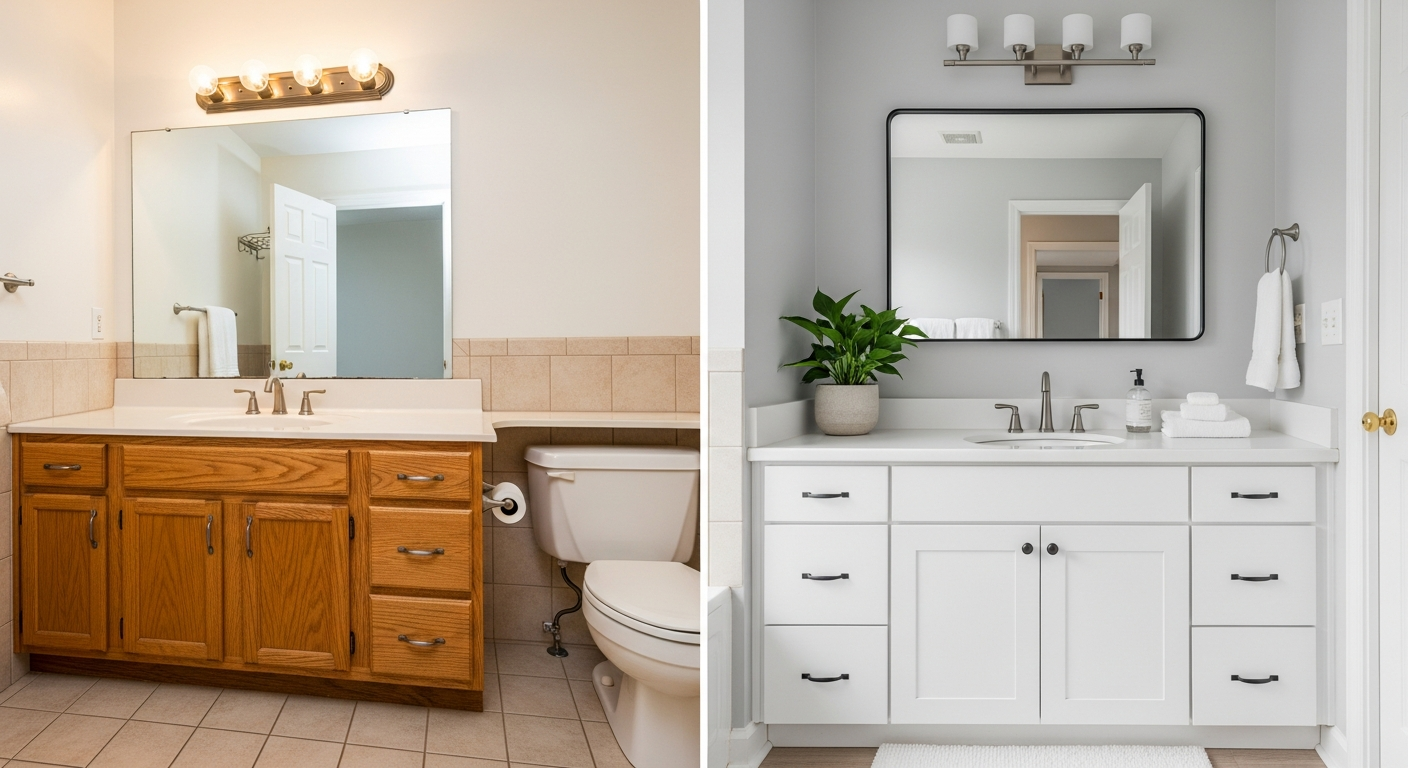
Before: Dated bathroom with honey oak vanity, brass fixtures, and beige walls. Structurally sound but visually exhausting.
Scope: Cabinet painting, hardware swap, wall paint, and new light fixture.
Key changes: Painted oak vanity cabinets in crisp white (two coats primer, two coats cabinet paint). Replaced brass cabinet pulls with matte black bar pulls. Painted walls in soft gray. Swapped the Hollywood-style vanity light for a modern two-sconce setup.
Materials: Cabinet paint and primer, wall paint (semi-gloss), matte black hardware, two wall sconces.
Cost: $820 total. Timeline: One weekend (painting needs overnight dry time between coats).
Lesson: Painting oak cabinets is the single highest-impact budget move. The color change from honey oak to white modernizes the entire room instantly. For more DIY bathroom projects at this skill level, see our beginner guide.
3. The $2,500 Surface Refresh
Before: 2000s bathroom with basic white tile, outdated vanity mirror, poor lighting, and worn grout.
Scope: New mirror, light fixture, faucet, grout refresh, and peel-and-stick floor tile over existing vinyl.
Key changes: Installed statement mirror with shelf. Replaced single-bulb fixture with three-light vanity bar. Swapped old chrome faucet for modern brushed gold single-handle. Deep-cleaned and re-grouted tile. Laid peel-and-stick luxury vinyl tile over existing floor.
Materials: Statement mirror, vanity light fixture, brushed gold faucet, grout refresh pen, peel-and-stick LVT flooring.
Cost: $2,480 total. Timeline: Two weekends.
Lesson: Upgrading the faucet finish (chrome to brushed gold) creates a luxury look at modest cost. The faucet is the most-touched fixture in the bathroom and draws the eye constantly. See our fixture finishes guide for choosing the right metal tone.
4. The $4,800 Full Cosmetic Makeover
Before: Cramped-feeling hall bathroom with dark walls, dated pedestal sink (no storage), and worn vinyl floor.
Scope: New vanity with countertop, toilet, mirror, lighting, paint, and flooring. No tile or plumbing relocation.
Key changes: Replaced pedestal sink with 30-inch vanity with drawers and doors (finally, storage). New comfort-height elongated toilet. Large frameless mirror to visually expand the space. Painted walls bright white. New ceramic-look LVT flooring. Coordinated matte black accessories throughout.
Materials: 30-inch vanity with quartz top ($650), toilet ($280), frameless mirror ($120), vanity light ($95), LVT flooring ($320), paint and accessories ($200).
Cost: $4,800 total including basic plumbing hookup. Timeline: Three weekends (DIY) or 2 days (professional).
Lesson: Adding storage where there was none transforms daily function as much as aesthetics. If your bathroom lacks storage, prioritize a vanity with drawers over a vessel sink or pedestal. Our small bathroom guide covers more space-maximizing strategies.
Tier 2: $5,000 to $15,000 — Significant Upgrades
At this budget, you can replace major fixtures and surfaces without a full gut renovation. These projects create noticeably transformed spaces.
5. The $6,500 Guest Bath Overhaul
Before: 1980s guest bathroom with pink tile, matching pink toilet, and floral wallpaper. Fully functional but deeply dated.
Scope: New toilet, vanity, mirror, lighting, wallpaper removal, and paint. Existing tile left in place.
Key changes: Removed wallpaper and skim-coated walls. Painted in warm white. New white elongated toilet. New 36-inch gray vanity with white quartz top. Modern rectangular mirror. Two-bulb vanity sconces. The existing pink floor tile was left and actually works with the new warm gray and white palette (a pleasant surprise).
Materials: 36-inch vanity with quartz ($1,100), toilet ($300), mirror ($150), sconces ($180), wallpaper removal supplies and paint ($250), plumbing labor ($600).
Cost: $6,500 total. Timeline: 4 days professional work.
Lesson: You do not always need to replace tile. Existing tile in good condition can work with a new color palette. Test paint samples against the tile before committing.
6. The $9,000 Hall Bath Renovation
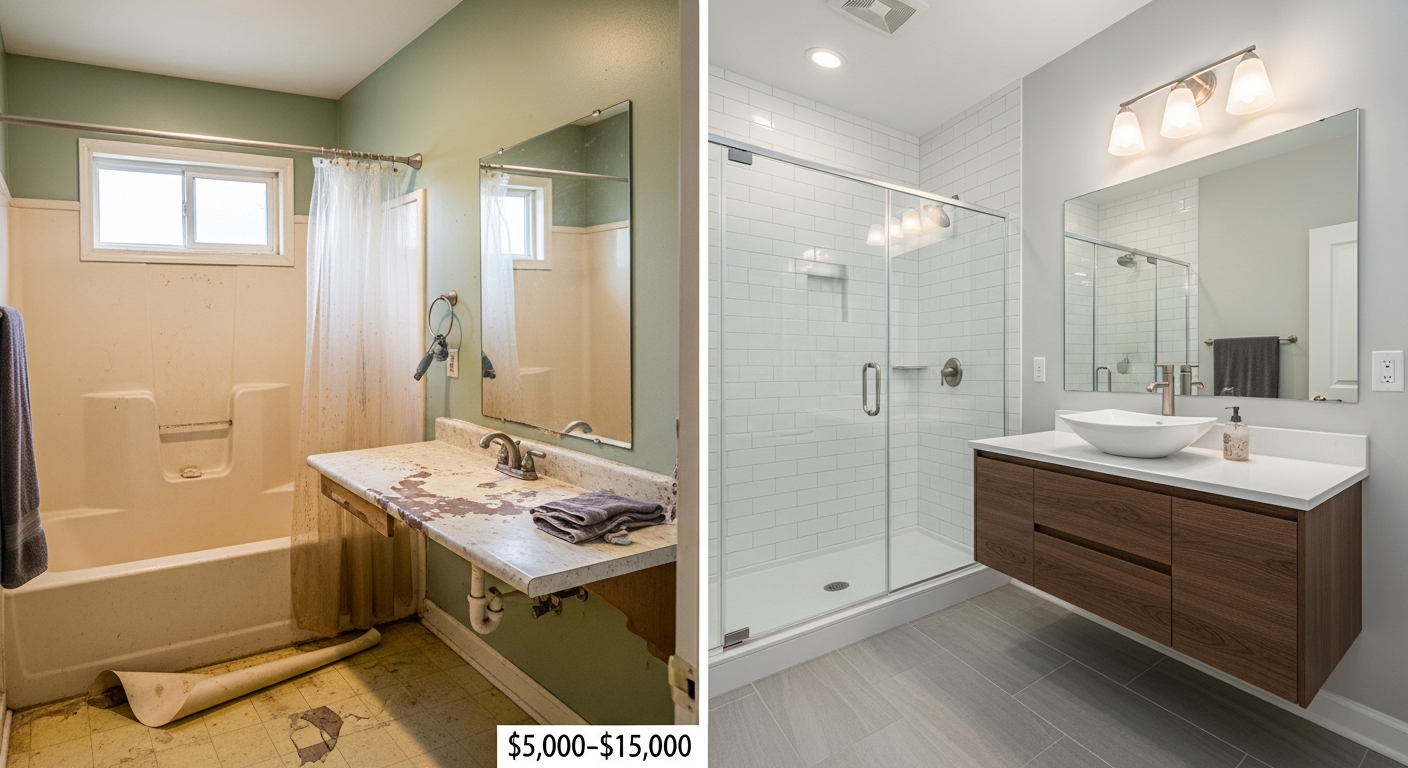
Before: Small 5x7 hall bathroom with tub-shower combo, basic builder vanity, and linoleum floor showing wear.
Scope: New tub surround, vanity, toilet, flooring, lighting, and accessories. Same layout, no plumbing moves.
Key changes: Replaced fiberglass tub surround with white subway tile and dark grout. New 30-inch floating vanity. Porcelain wood-look floor tile. New toilet. Recessed medicine cabinet with mirror. Proper exhaust fan (the old one barely worked). Fresh paint and all new accessories.
Materials: Subway tile and installation ($2,200), floating vanity ($800), floor tile and installation ($1,600), toilet ($300), medicine cabinet ($250), exhaust fan ($180), paint and accessories ($350), labor ($3,200).
Cost: $9,100 total. Timeline: 8 days.
Lesson: Subway tile with contrasting grout is one of the most cost-effective ways to create visual drama. The material cost is low ($2-$4/sq ft) but the visual impact is enormous. See our shower tile patterns guide for layout ideas.
7. The $12,000 Primary Bath Refresh
Before: 1990s primary bathroom with garden tub nobody used, separate shower stall with glass block, and double vanity with cultured marble top.
Scope: Remove garden tub, expand shower, replace vanity top and sinks, new fixtures, new flooring. Keep existing vanity cabinet base and shower footprint.
Key changes: Removed underused garden tub and converted the space to a linen closet and bench area. Re-tiled shower with 12x24 porcelain in herringbone pattern, replaced glass block wall with frameless glass panel. New quartz countertop on existing vanity cabinets. New undermount sinks and brushed gold faucets. Porcelain floor tile replacing vinyl.
Materials: Shower tile and installation ($3,500), frameless glass ($1,200), quartz countertop ($1,800), faucets and sinks ($600), floor tile ($2,000), linen closet build-out ($800), fixtures and accessories ($500), labor included in tile/plumbing costs.
Cost: $12,400 total. Timeline: 2 weeks.
Lesson: Removing a tub nobody uses and replacing it with functional storage or a larger shower dramatically improves daily life. Survey your household: if nobody has taken a bath in 6 months, that tub is wasting valuable square footage. Learn more in our layout ideas guide.
8. The $14,500 Accessibility Upgrade
Before: Standard bathroom needing aging-in-place modifications. Step-over tub, small vanity at standard height, no grab bars.
Scope: Convert tub to curbless shower, install comfort-height fixtures, add grab bars, widen doorway.
Key changes: Zero-threshold curbless shower with built-in fold-down bench and linear drain. Decorative grab bars in matte black that match fixtures (not institutional chrome). Comfort-height toilet. 36-inch vanity at accessible height with lever-handle faucet. Non-slip large-format floor tile throughout. Doorway widened from 28 to 34 inches.
Materials: Curbless shower build and tile ($5,500), grab bars ($350), toilet ($380), vanity ($900), floor tile ($1,800), door widening ($1,200), faucet and fixtures ($450), labor ($3,800).
Cost: $14,500 total. Timeline: 10 days.
Lesson: Modern accessible design looks beautiful, not institutional. Decorative grab bars, curbless showers, and comfort-height fixtures appeal to all ages and increase resale value. For more on upgrades that add value, see our ROI guide.
Tier 3: $15,000 to $50,000 — Full Renovations
At this budget, you can gut the bathroom to the studs and rebuild. Layout changes, new plumbing positions, and premium materials become options.
9. The $18,000 Tub-to-Shower Conversion
Before: Standard 5x8 bathroom with tub-shower combo that felt cramped and dated.
Scope: Remove tub, build walk-in shower, replace all surfaces, new vanity and toilet.
Key changes: Walk-in shower with 12x24 porcelain walls, niche with accent tile, frameless glass door. New 36-inch vanity with quartz top. New toilet. Large-format floor tile. Proper ventilation fan. Fresh paint. All fixtures in polished nickel.
Materials: Walk-in shower construction and tile ($7,500), frameless glass door ($1,400), vanity with quartz ($1,600), toilet ($350), floor tile ($1,500), ventilation fan ($250), fixtures, paint, accessories ($1,200), plumbing and electrical labor ($4,200).
Cost: $18,200 total. Timeline: 3 weeks.
Lesson: A walk-in shower makes a standard 5x8 bathroom feel dramatically larger than a tub-shower combo in the same footprint. The visual openness of frameless glass is transformative. For more walk-in shower designs, see our style guide.
10. The $28,000 Primary Bath Gut Renovation
Before: 8x10 primary bathroom with laminate counters, fiberglass shower, linoleum, and zero natural light feel.
Scope: Complete gut to studs, new everything, same footprint but improved layout.
Key changes: Moved toilet to corner for better flow. 48-inch shower with bench, rain head, and hand shower. 48-inch double vanity with quartz countertop. Porcelain marble-look floor tile with radiant heat. Recessed LED lighting plus vanity sconces. New exhaust fan with humidity sensor.
Materials: Complete tile package ($5,500), shower glass ($1,800), double vanity with quartz ($3,200), two faucets ($500), toilet ($400), heated floor system ($1,200), lighting ($800), exhaust fan ($300), plumbing ($3,500), electrical ($1,500), general contractor labor ($6,800), permits and disposal ($1,800).
Cost: $28,500 total. Timeline: 5 weeks.
Lesson: Heated floors cost roughly $1,000-$1,500 to add during a gut renovation but deliver outsized daily satisfaction and buyer appeal. If you are already tearing up floors, add radiant heat. For detailed cost planning, reference our 2026 cost guide.
11. The $38,000 Bathroom Expansion
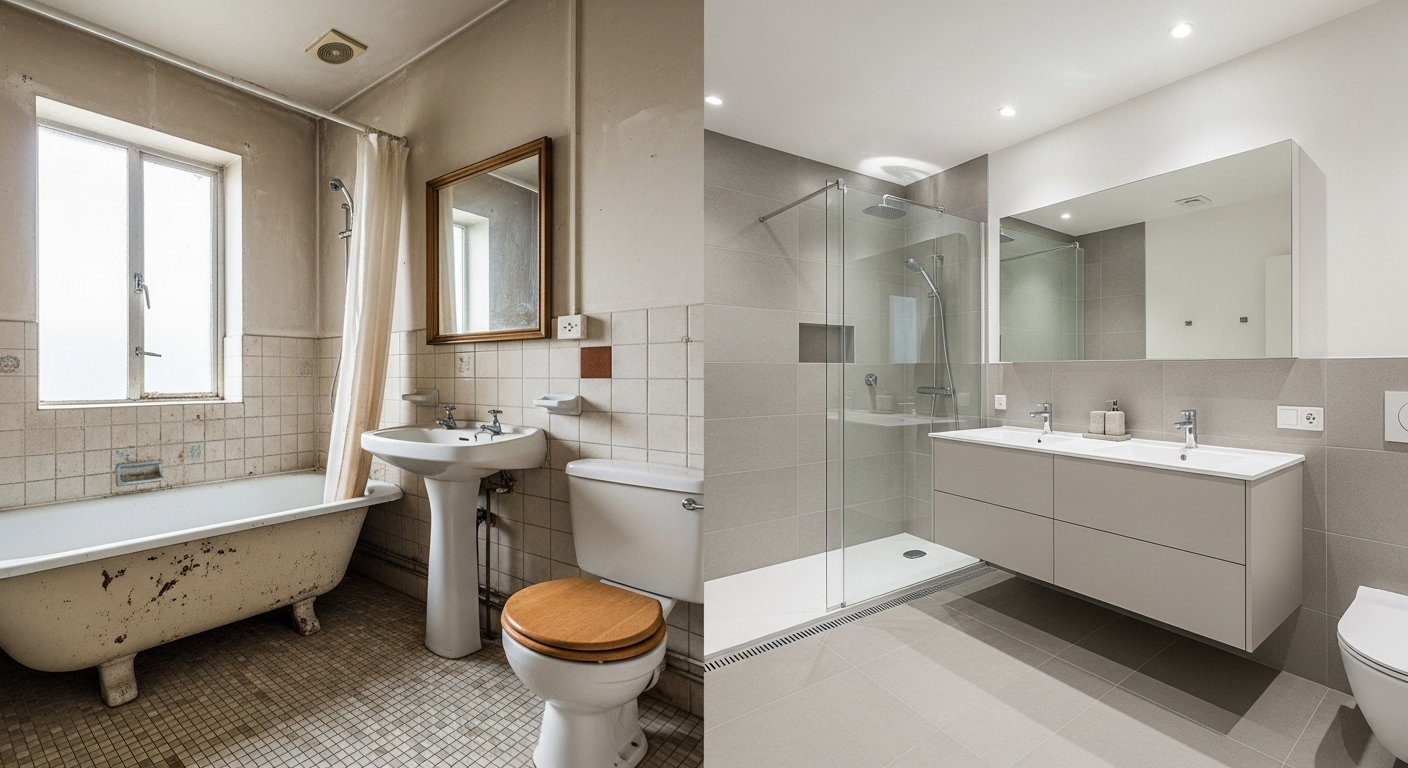
Before: Tiny 5x6 primary bathroom that was inadequate for the home's price point. Adjacent closet space available.
Scope: Borrow 20 sq ft from adjacent closet to expand bathroom to 50 sq ft. Full renovation with improved layout.
Key changes: Knocked out wall into closet, expanded bathroom to accommodate a 42-inch walk-in shower, 48-inch vanity, and separate toilet alcove. Built replacement closet in bedroom. All new plumbing runs, electrical, and finishes. Large-format tile walls and floor. Heated floors.
Cost: $38,000 total including structural, plumbing relocation, and closet rebuild. Timeline: 7 weeks.
Lesson: Borrowing space from an adjacent room or closet is often the best investment in a home with a cramped primary bath. The bedroom closet loss is easily offset by the improved bathroom. Check our remodel checklist for planning an expansion.
Tier 4: $50,000+ — Luxury Transformations
These projects create spa-caliber master bathrooms with premium materials, custom features, and significant layout changes.
12. The $55,000 Master Bath Spa Conversion
Before: Large but dated 1990s master bath with enclosed shower, platform jetted tub, double vanity with cultured marble, and tile countertops.
Scope: Complete gut renovation, open layout, spa features, premium materials.
Key changes: Removed platform tub and enclosed shower walls. Built open walk-in shower (48x60) with rain head, body sprays, and hand shower. Freestanding acrylic soaking tub by window with floor-mounted filler. 72-inch floating double vanity with quartz. Marble-look porcelain on all surfaces. Heated floors. Smart toilet. Built-in linen cabinet.
Cost: $55,000 total. Timeline: 8 weeks.
Lesson: Opening up a compartmentalized layout is the single most transformative change in large master baths. Removing walls between the tub, shower, and vanity areas creates a spacious, light-filled room. Explore luxury master bath features to prioritize your upgrades.
13. The $72,000 His-and-Hers Master Suite
Before: 12x14 master bath with single vanity, separate tub and shower, and cramped layout causing daily conflicts for two users.
Scope: Complete redesign with dual zones, premium materials, and smart technology.
Key changes: His-and-hers vanity walls on opposite sides (each 48-inch vanity with dedicated mirror and sconces). Central freestanding stone resin tub. Large walk-in shower with dual showerheads (one rain, one handheld per side). Enclosed water closet with smart toilet. Natural marble accent wall behind tub. Heated marble floors throughout. Smart mirror with defogging and integrated lighting.
Cost: $72,000 total. Timeline: 10 weeks.
Lesson: Designing for two users with separate zones eliminates the most common daily frustration in shared master baths. The extra vanity cost pays for itself in relationship harmony.
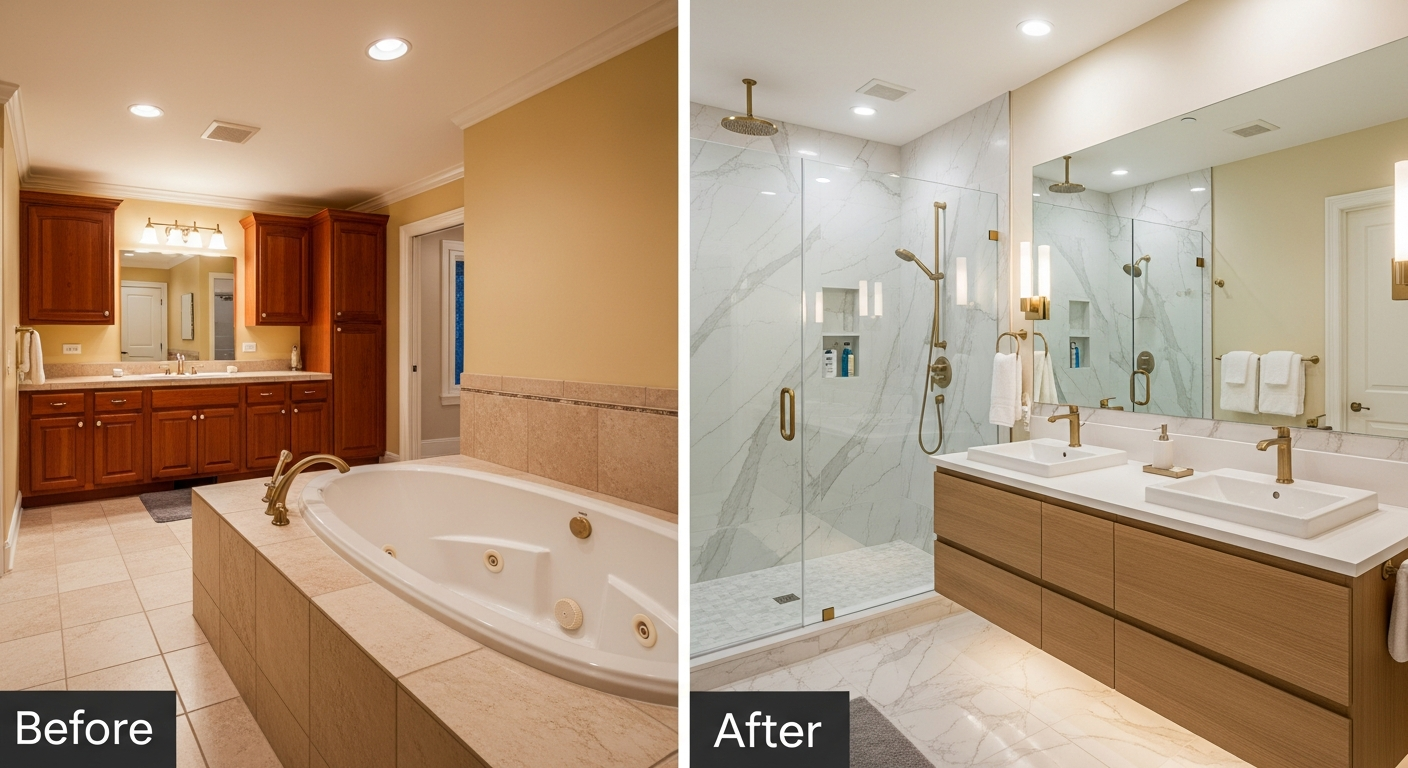
14. The $90,000 Wet Room Master Bath
Before: Large master bathroom with outdated everything. Homeowners wanted a hotel-inspired wet room design.
Scope: Complete tear-out and rebuild with wet room shower area, freestanding tub, and custom cabinetry.
Key changes: Open wet room area with curbless entry, linear drain, floor-to-ceiling Calacatta marble slab walls, rain shower and body sprays. Freestanding cast iron tub. Custom walnut vanity with integrated lighting. Heated Calacatta marble floors. Chromatherapy LED lighting in shower. Built-in sound system. Automated window shades.
Cost: $90,000 total. Timeline: 12 weeks.
Lesson: Slab marble (rather than tile) on shower walls creates an unmatched luxury look with virtually no grout lines to maintain. The material cost is high ($80-$150/sq ft) but the visual impact and reduced maintenance justify it at this budget level.
15. The $65,000 Spa Retreat with Steam
Before: Spacious but dated 1980s master bath with sunken tub, separate shower, and compartmentalized vanity area.
Scope: Full gut renovation with steam shower, soaking tub, and spa features.
Key changes: Sealed steam shower with eucalyptus aromatherapy injection, teak bench, and rain shower. Freestanding Japanese soaking tub with deep profile. 60-inch double vanity in matte white with brushed gold hardware. Large-format porcelain walls mimicking travertine. Heated floors with programmable thermostat. Dedicated makeup vanity area with Hollywood lighting. Towel warmer built into wall.
Cost: $65,000 total. Timeline: 9 weeks.
Lesson: Steam shower capability adds $3,500-$7,000 to a project but delivers daily spa-level experience. It is one of the most personally satisfying luxury upgrades, even though its resale ROI is modest. For spa-level inspiration, browse our spa bathroom ideas.
What Made the Biggest Visual Impact
Across all 15 transformations, certain changes consistently produced the most dramatic bathroom remodel before and after difference.
Lighting upgrades: Present in 14 of 15 projects. Better lighting makes every other change look better. A $200 lighting upgrade amplifies the perceived value of a $5,000 renovation. Dark bathrooms photograph poorly and feel smaller regardless of materials.
Removing visual clutter: Clearing countertops, updating mismatched hardware, and creating storage reduced visual noise in every project. Organized, minimal surfaces photograph dramatically better and feel more luxurious.
Tile choice and pattern: Tile covers the most surface area and dominates the visual field. The choice between subway and large-format, light and dark, patterned and plain sets the entire mood. Our tile ideas guide helps narrow options.
Frameless glass: Every project that replaced a shower curtain or framed glass with frameless produced a transformative before/after. The transparency makes spaces feel larger and showcases tile work.
Consistent fixture finish: Coordinating all metal finishes (faucets, hardware, towel bars, light fixtures) in a single tone creates cohesion that reads as professionally designed, even in budget projects.
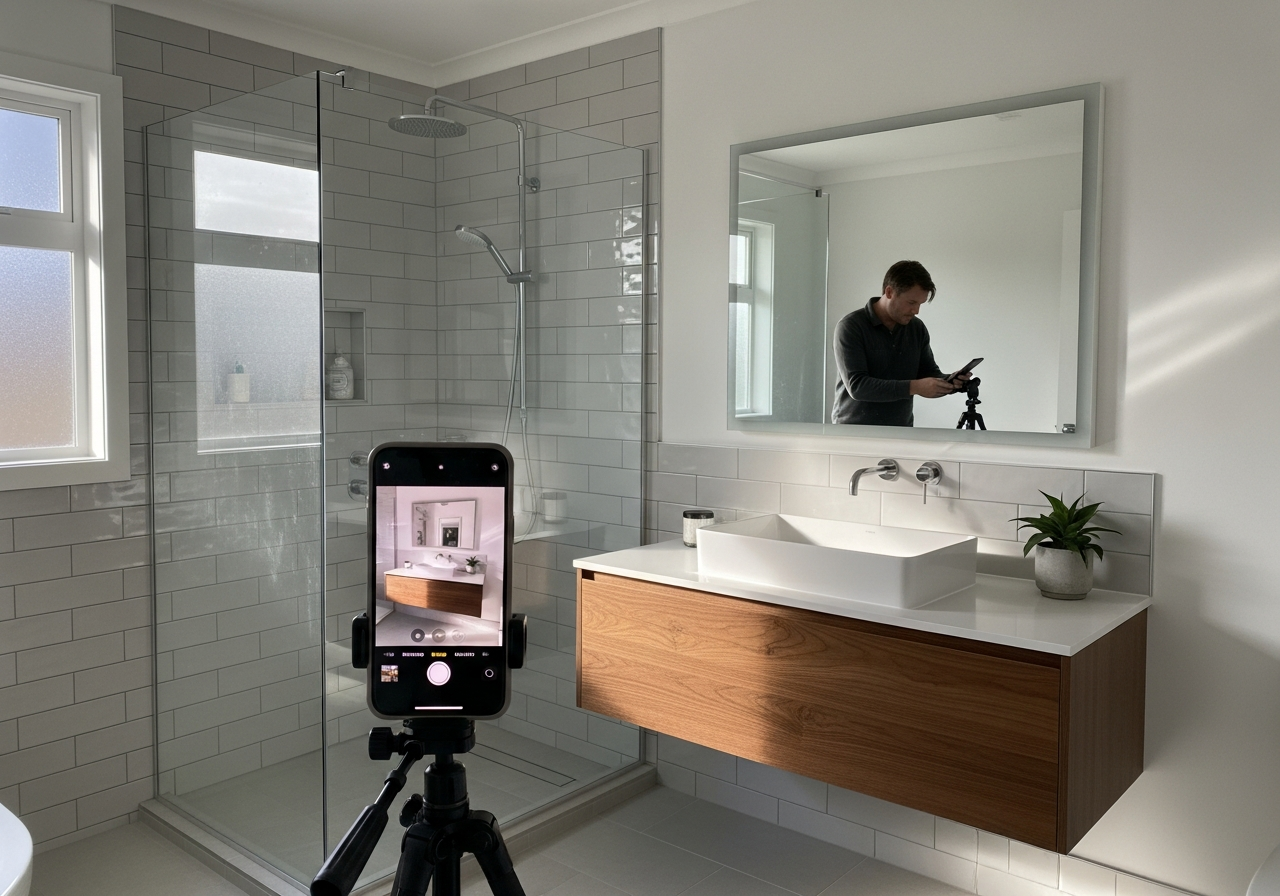
Tips for Photographing Your Own Before and After
Great bathroom remodel pictures document your transformation and help you share your success.
Capture the exact same angle: Stand in the same spot for before and after photos. Mark the floor with tape if needed. The most compelling comparisons show the identical viewpoint.
Use natural light: Open blinds and turn off overhead lights for the most flattering photos. Shoot during daytime. Harsh overhead lighting creates unflattering shadows in both conditions.
Shoot wide: Use your phone's wide-angle lens (0.5x on most smartphones). Small bathrooms are difficult to photograph, and wide angle captures more of the room from a close position.
Clear the counters: Remove all personal items, towels, and toiletries before shooting the after photo. A clean, styled surface photographs dramatically better.
Include detail shots: Beyond the wide room shot, capture close-ups of tile patterns, fixture finishes, hardware details, and niche styling. These details tell the material story.
Shoot the before honestly: Do not clean or style the before photo. The more dated and cluttered it looks, the more impressive the after. Raw honesty makes the transformation compelling.
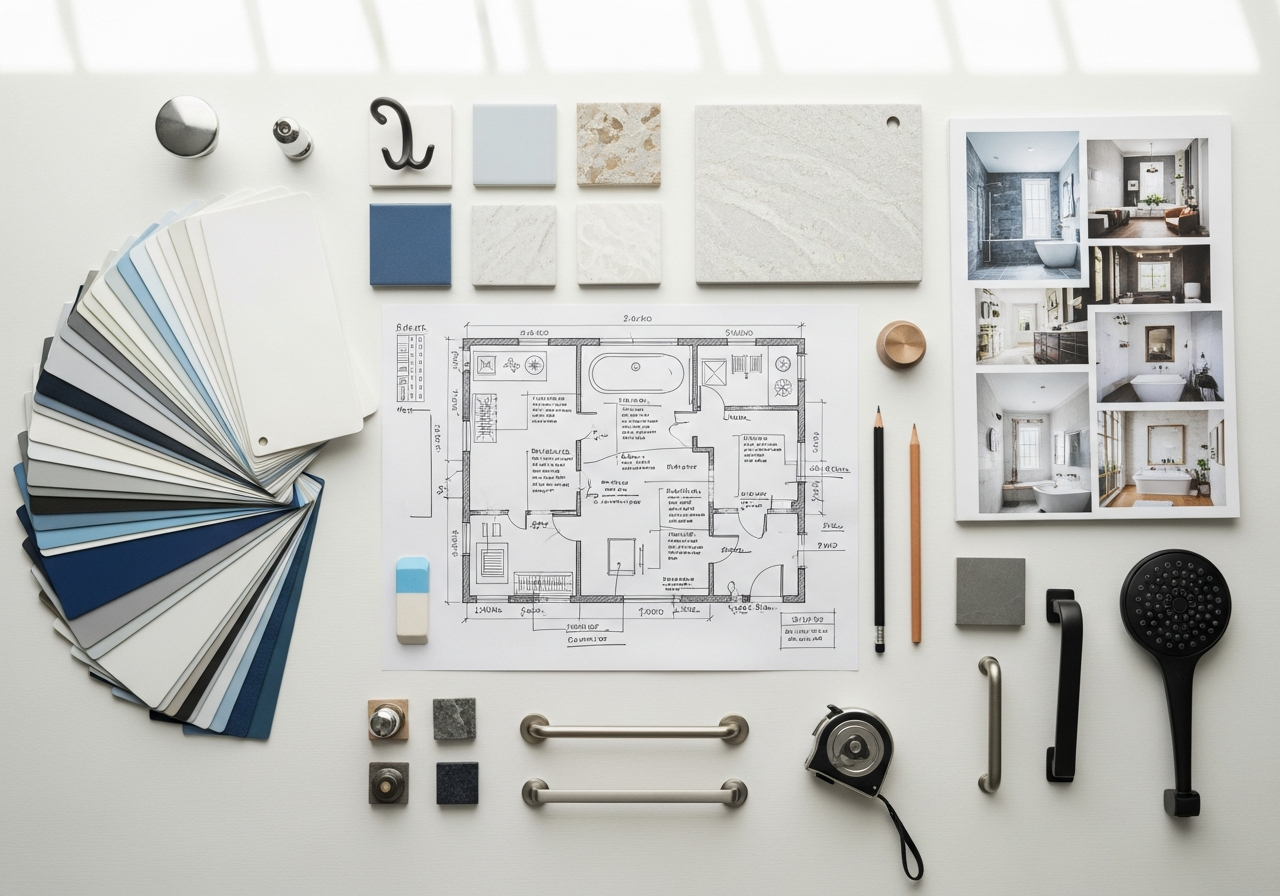
How to Plan Your Remodel Based on Transformations You Like
Use these before-and-after projects as planning tools, not just inspiration.
Identify your budget tier: Find the projects closest to your budget. Note what is and is not included at that price point. This sets realistic expectations.
List the specific changes you respond to: Is it the tile pattern? The fixture finish? The layout change? The frameless glass? Knowing what draws your eye helps prioritize spending.
Compare materials across tiers: Notice how porcelain marble-look tile appears in $15K renovations and actual marble appears at $50K+. The visual difference in photos is subtle; the cost difference is enormous. Review our materials comparison before choosing.
Note the timelines: If you have one bathroom and need it functional quickly, focus on projects with shorter timelines. Plan alternative arrangements for longer renovations. See our timeline guide for phase-by-phase planning.
Visualize on your own space: HanoDecor's Bathroom Visualizer lets you test the tile patterns, colors, and layouts you see in these transformations on a photo of your actual bathroom.
Lessons Learned Across All 15 Projects
- Paint is the highest-ROI cosmetic change. Every budget tier uses paint. At any budget, fresh paint transforms walls, cabinets, or both.
- Fixture finish coordination matters more than fixture cost. A $120 faucet in brushed gold looks more intentional than a $300 faucet that does not match the other hardware.
- Storage solves daily frustration. Clutter is the enemy of a beautiful bathroom. Prioritize storage solutions at every budget.
- Lighting is the most underinvested category. Homeowners spend on tile and fixtures but skimp on lighting. Proper lighting makes everything else look better.
- Layout changes are expensive but deliver the biggest daily improvement. Moving plumbing costs $3,000-$8,000 but can fundamentally change how the room functions.
- Heated floors are worth it at any budget above $15K. Adding $1,000-$1,500 during a tile installation delivers outsized comfort. Learn about flooring options that pair with radiant heat.
- Do not skip the ventilation upgrade. A beautiful bathroom with inadequate exhaust develops mold. Every full renovation should include a properly sized exhaust fan. See our ventilation guide.
- Avoid common mistakes that waste budget. Our renovation mistakes guide covers the most expensive errors across real projects.
Frequently Asked Questions
What is the cheapest way to dramatically transform a bathroom?
Paint the cabinets white, replace all hardware and accessories in a coordinated metal finish, and update the light fixture. This three-step combination costs $500-$1,000 and consistently delivers the most dramatic visual change per dollar. Add a new mirror and faucet for under $2,000 total and the transformation is remarkable.
How long does a typical bathroom remodel take?
Cosmetic updates take one to two weekends. A mid-range renovation replacing fixtures and surfaces takes one to three weeks. A full gut renovation takes four to eight weeks. Luxury master bath projects with custom materials take eight to twelve weeks. Lead time on custom cabinetry and specialty tile can extend timelines significantly, so order materials early.
Should I remove my bathtub during a remodel?
Keep at least one bathtub in the home for resale value, especially if you have children or plan to sell within ten years. If the bathroom being remodeled is the only one with a tub, consider keeping it or converting to a tub-shower combo. If you have a tub elsewhere in the home, converting to a walk-in shower is almost always the right choice for the primary bathroom.
What bathroom remodel changes add the most home value?
Walk-in showers with frameless glass (60-70% ROI), double vanities (55-65% ROI), updated tile (55-65% ROI), and modern lighting (50-60% ROI) consistently return the most value at resale. Avoid over-personalizing with bold colors or unusual layouts. Keep the style broadly appealing. Our ROI guide covers specific upgrades in detail.
How do I choose the right contractor for my bathroom remodel?
Get three to five quotes from licensed, insured contractors with bathroom-specific experience. Ask for recent before-and-after photos of completed projects. Check references and online reviews. Verify their license and insurance are current. Never pay more than 10-15% upfront as a deposit. A detailed written contract specifying materials, timeline, payment schedule, and change-order process protects both parties. See our planning checklist for a complete contractor vetting process.
Create Your Own Before and After
Every stunning bathroom remodel before and after started with a homeowner looking at a dated space and imagining something better. Your transformation is next.
HanoDecor's Bathroom Visualizer helps you preview changes on a photo of your actual bathroom. Test tile patterns, vanity styles, paint colors, and fixture finishes before spending a dollar. See your after before the remodel begins.
For more planning resources, explore our color scheme guide to choose your palette, our 2026 trends guide for current design direction, and our modern bathroom ideas for contemporary inspiration.
Bathroom Remodel Before and After FAQs
Written by
Michael Torres
Bathroom and Kitchen Design Specialist with 15 years of remodeling experience. NKBA-certified designer focused on functional layouts, fixture selection, and spa-inspired wellness spaces.